How to intercept and debug WebSocket from iOS simulators or devices
If your iOS app is using URLSessionWebSocketTask or iOS WebSocket libraries, e.g. Starscream, SocketRocket, etc. Proxyman might not be able to capture WS/WSS traffic out of the box.
Reason
It's an intention of Apple. URLSessionWebSocketTask doesn't respect the System HTTP Proxy. All WS/WSS traffic goes directly to the Internet. Thus, Proxyman or Charles Proxy can't capture it.
In this blog
- We will use Proxyman to capture the WebSocket message from iOS device (iOS 18 or later) during the development phase.
Solution
In this tutorial, we would like to show how to intercept and debug the WebSocket message from iOS device during the development phase by using Proxyman, which is a powerful tool for debugging HTTP/HTTPS and WebSocket.
Here are the tutorial steps we’re going to achieve:
- Get Proxyman ready
- Config Proxyman on my iOS devices (iPhone / iPad) or iOS Simulator
- Start Proxyman SOCKS Proxy Server
- Configure the app to use the Proxyman SOCKS Proxy Server
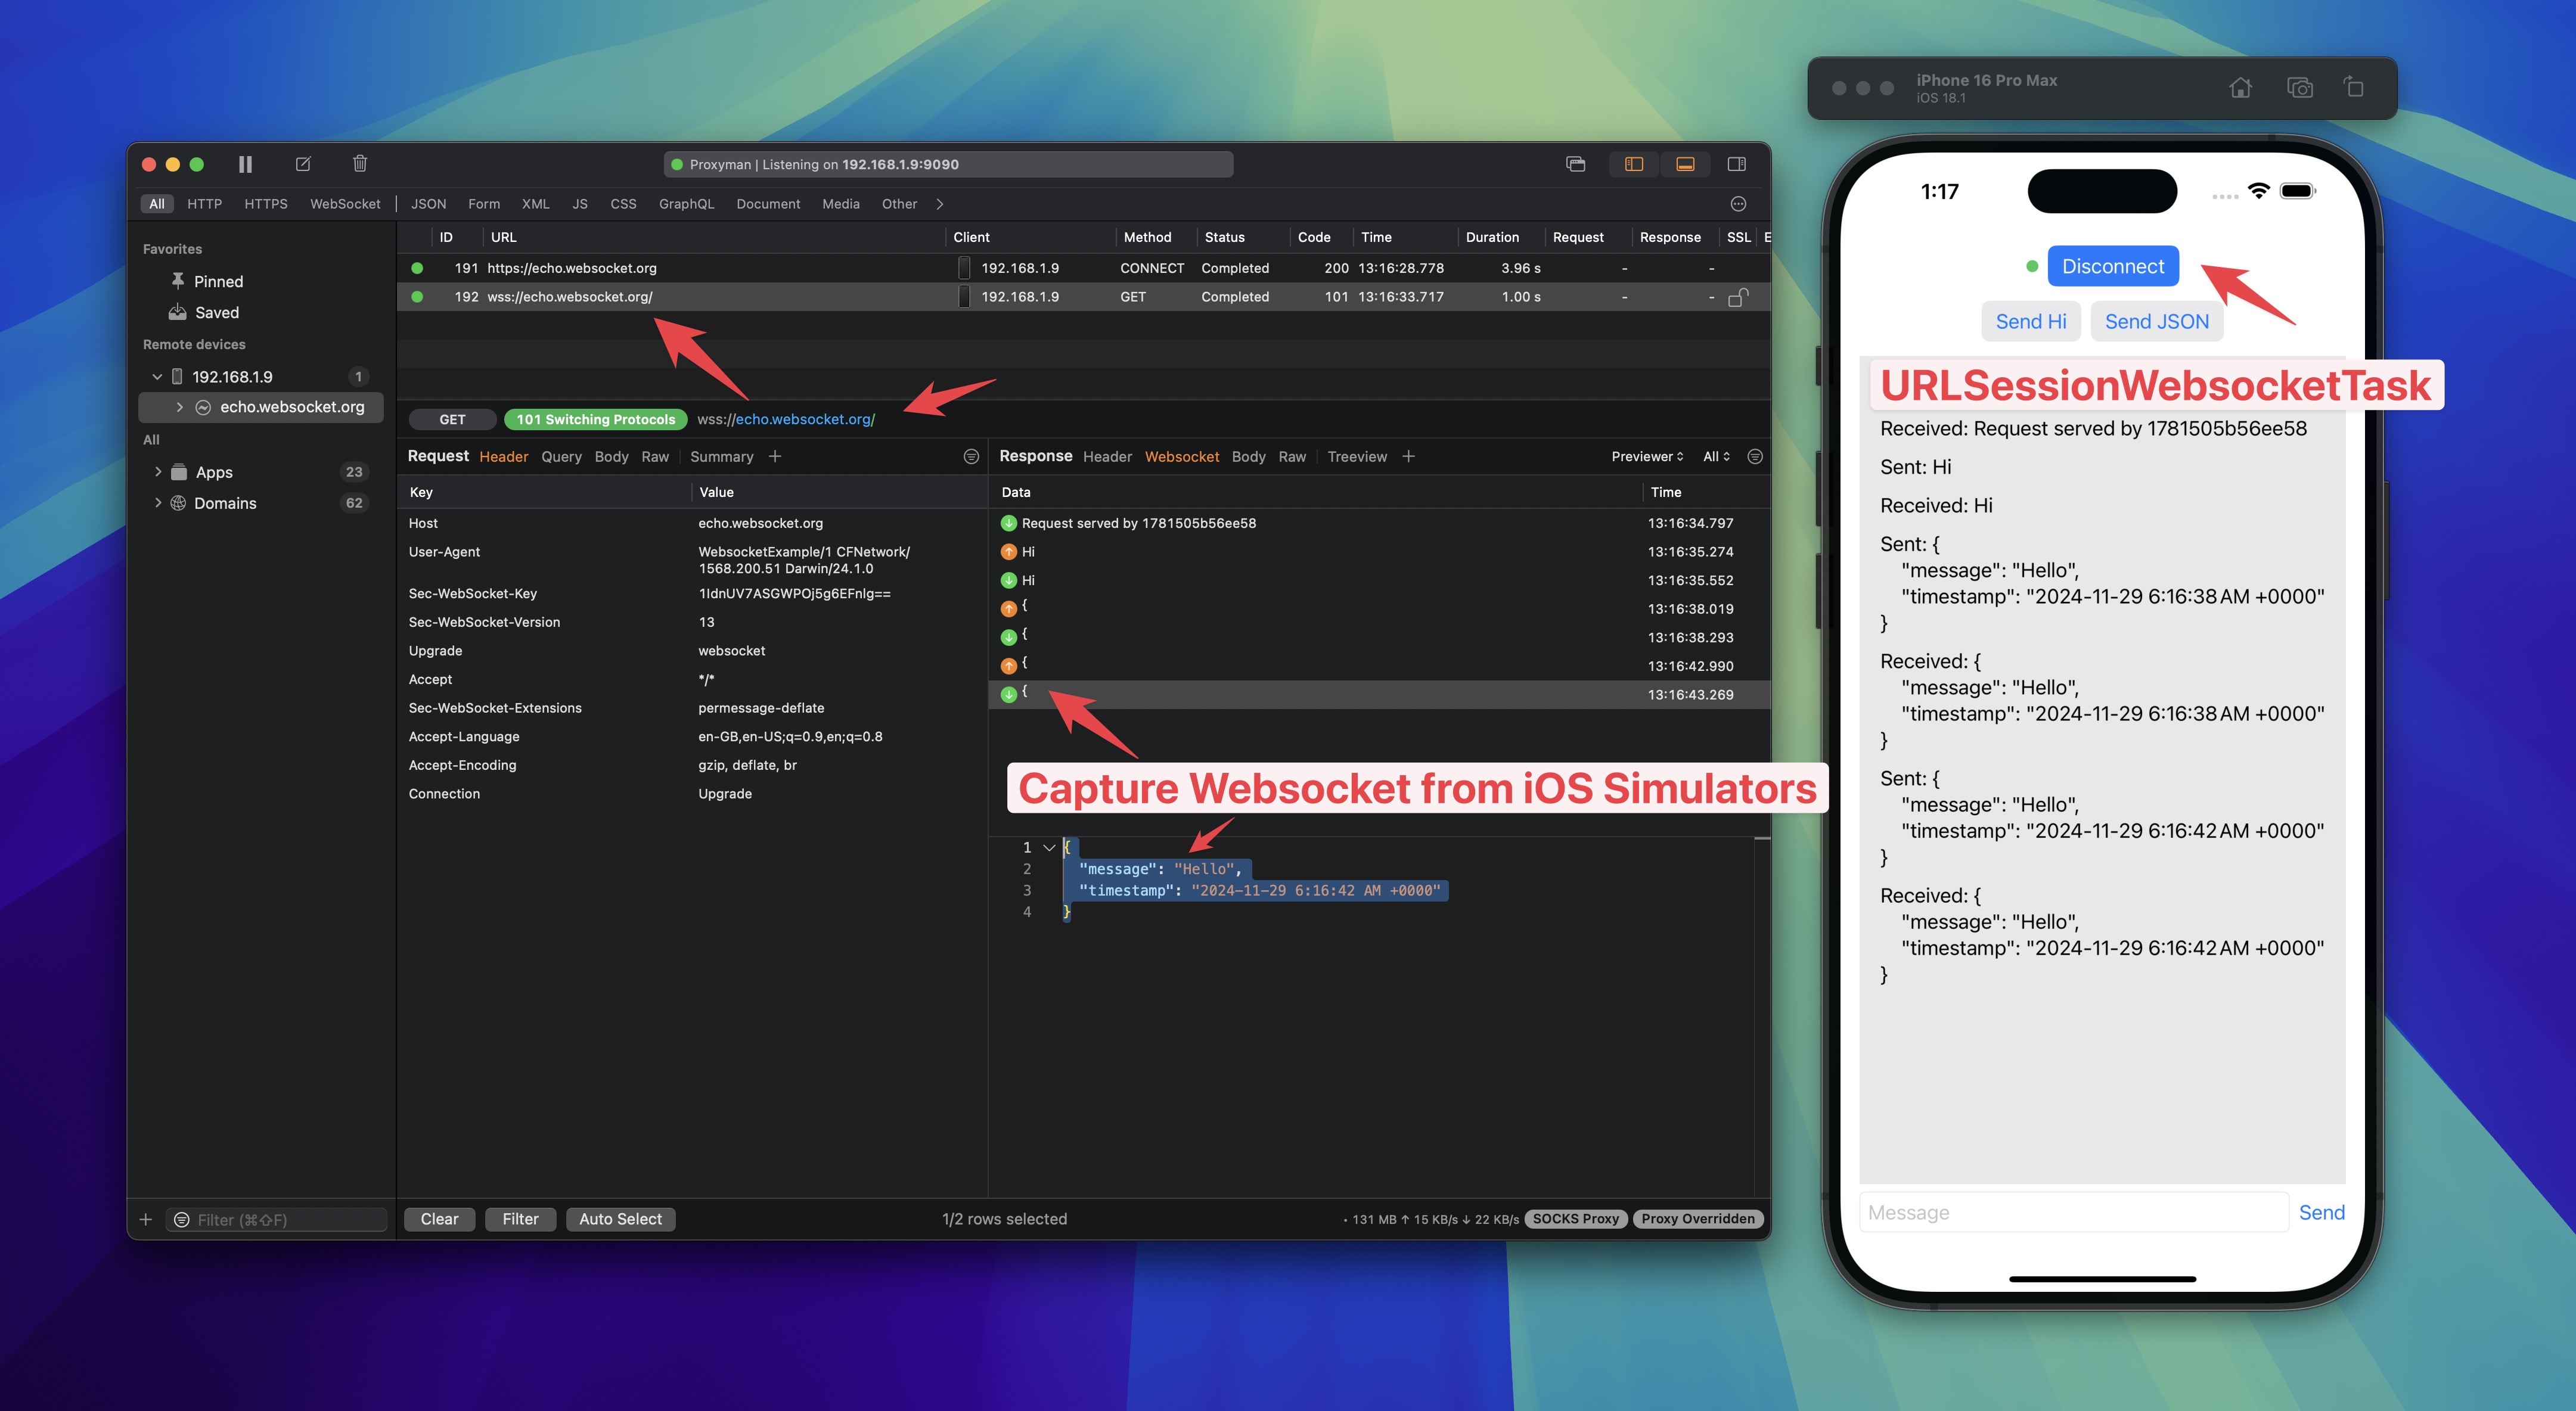
- Tada. Proxyman will capture the WebSocket message from your app. Works with URLSessionWebSocketTask.
If you need read the code, please visit GitHub.
1. Get Proxyman ready
First of all, the easy way to get Proxyman is that we download directly from Proxyman’s homepage or from Terminal.
$ brew cask install proxyman
2. Config your iOS Simulators or iOS devices with Proxyman
2.1 iOS Simulator
- Just simply navigate to the
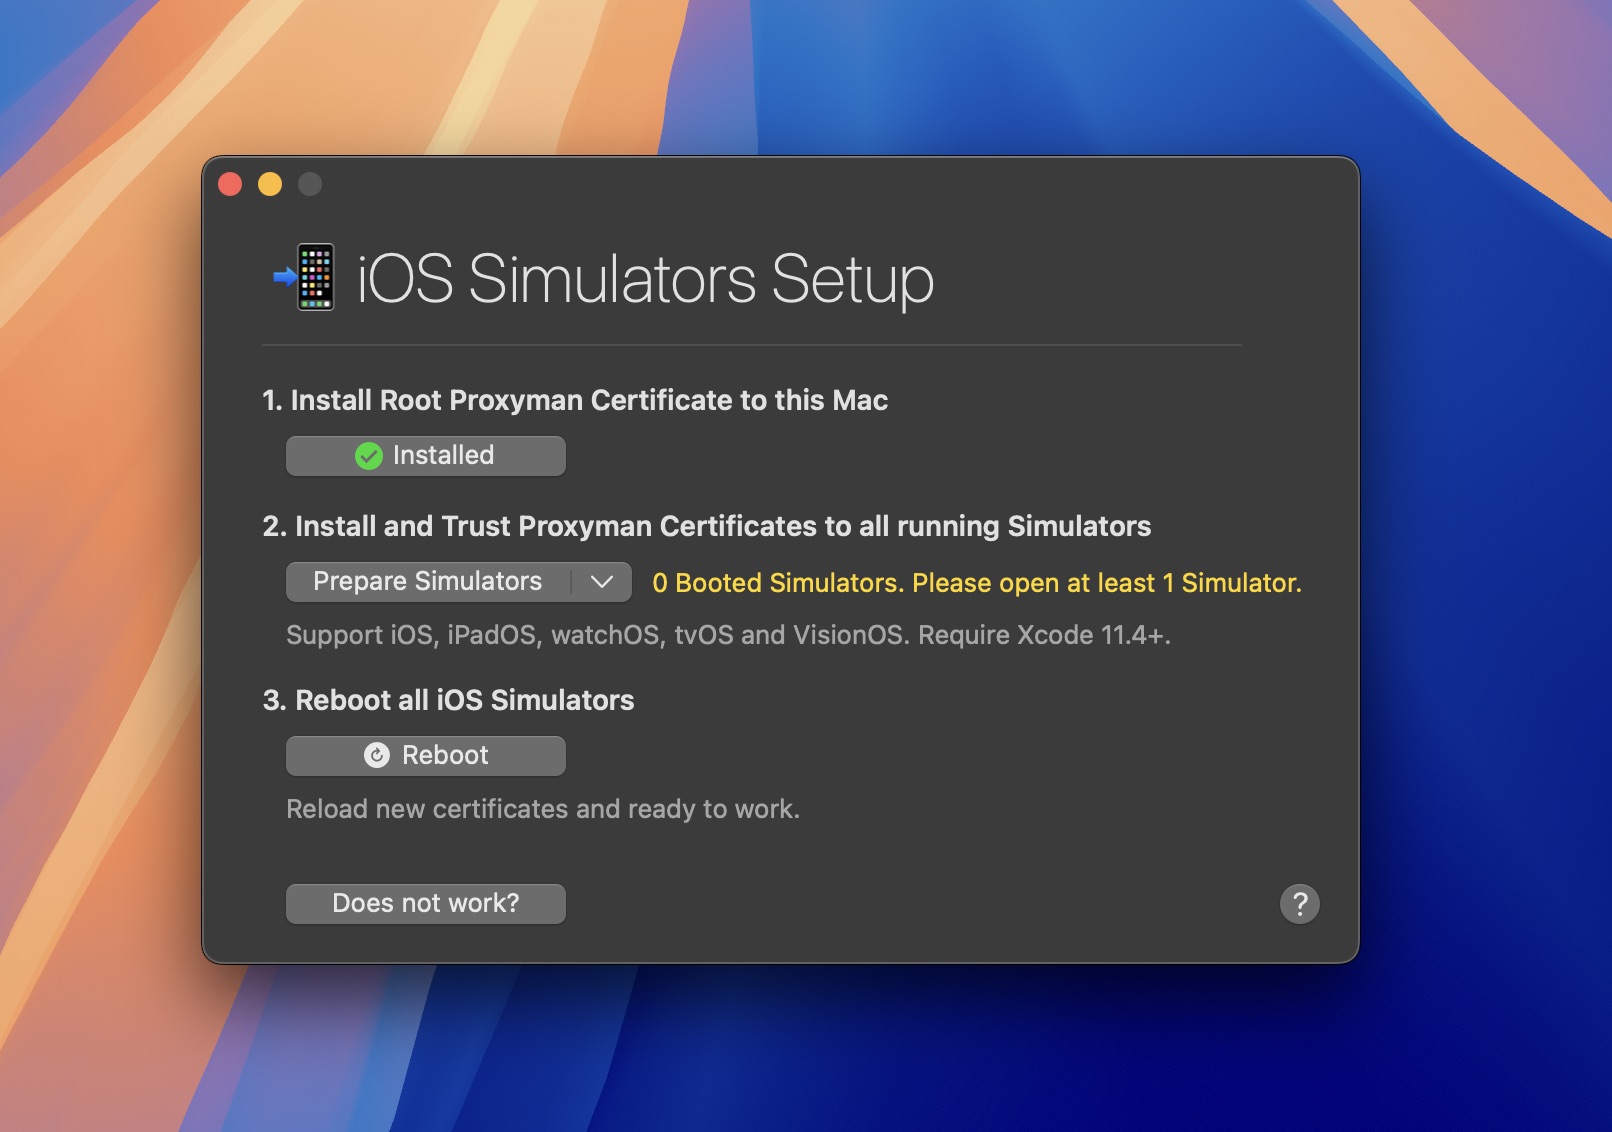
Certificate Menu->Install for iOS->iOS Simulators - Follow all steps to install the certificate to your iOS Simulator. (Make sure you have at least one iOS Simulator)
- Done.

2.2 iOS devices
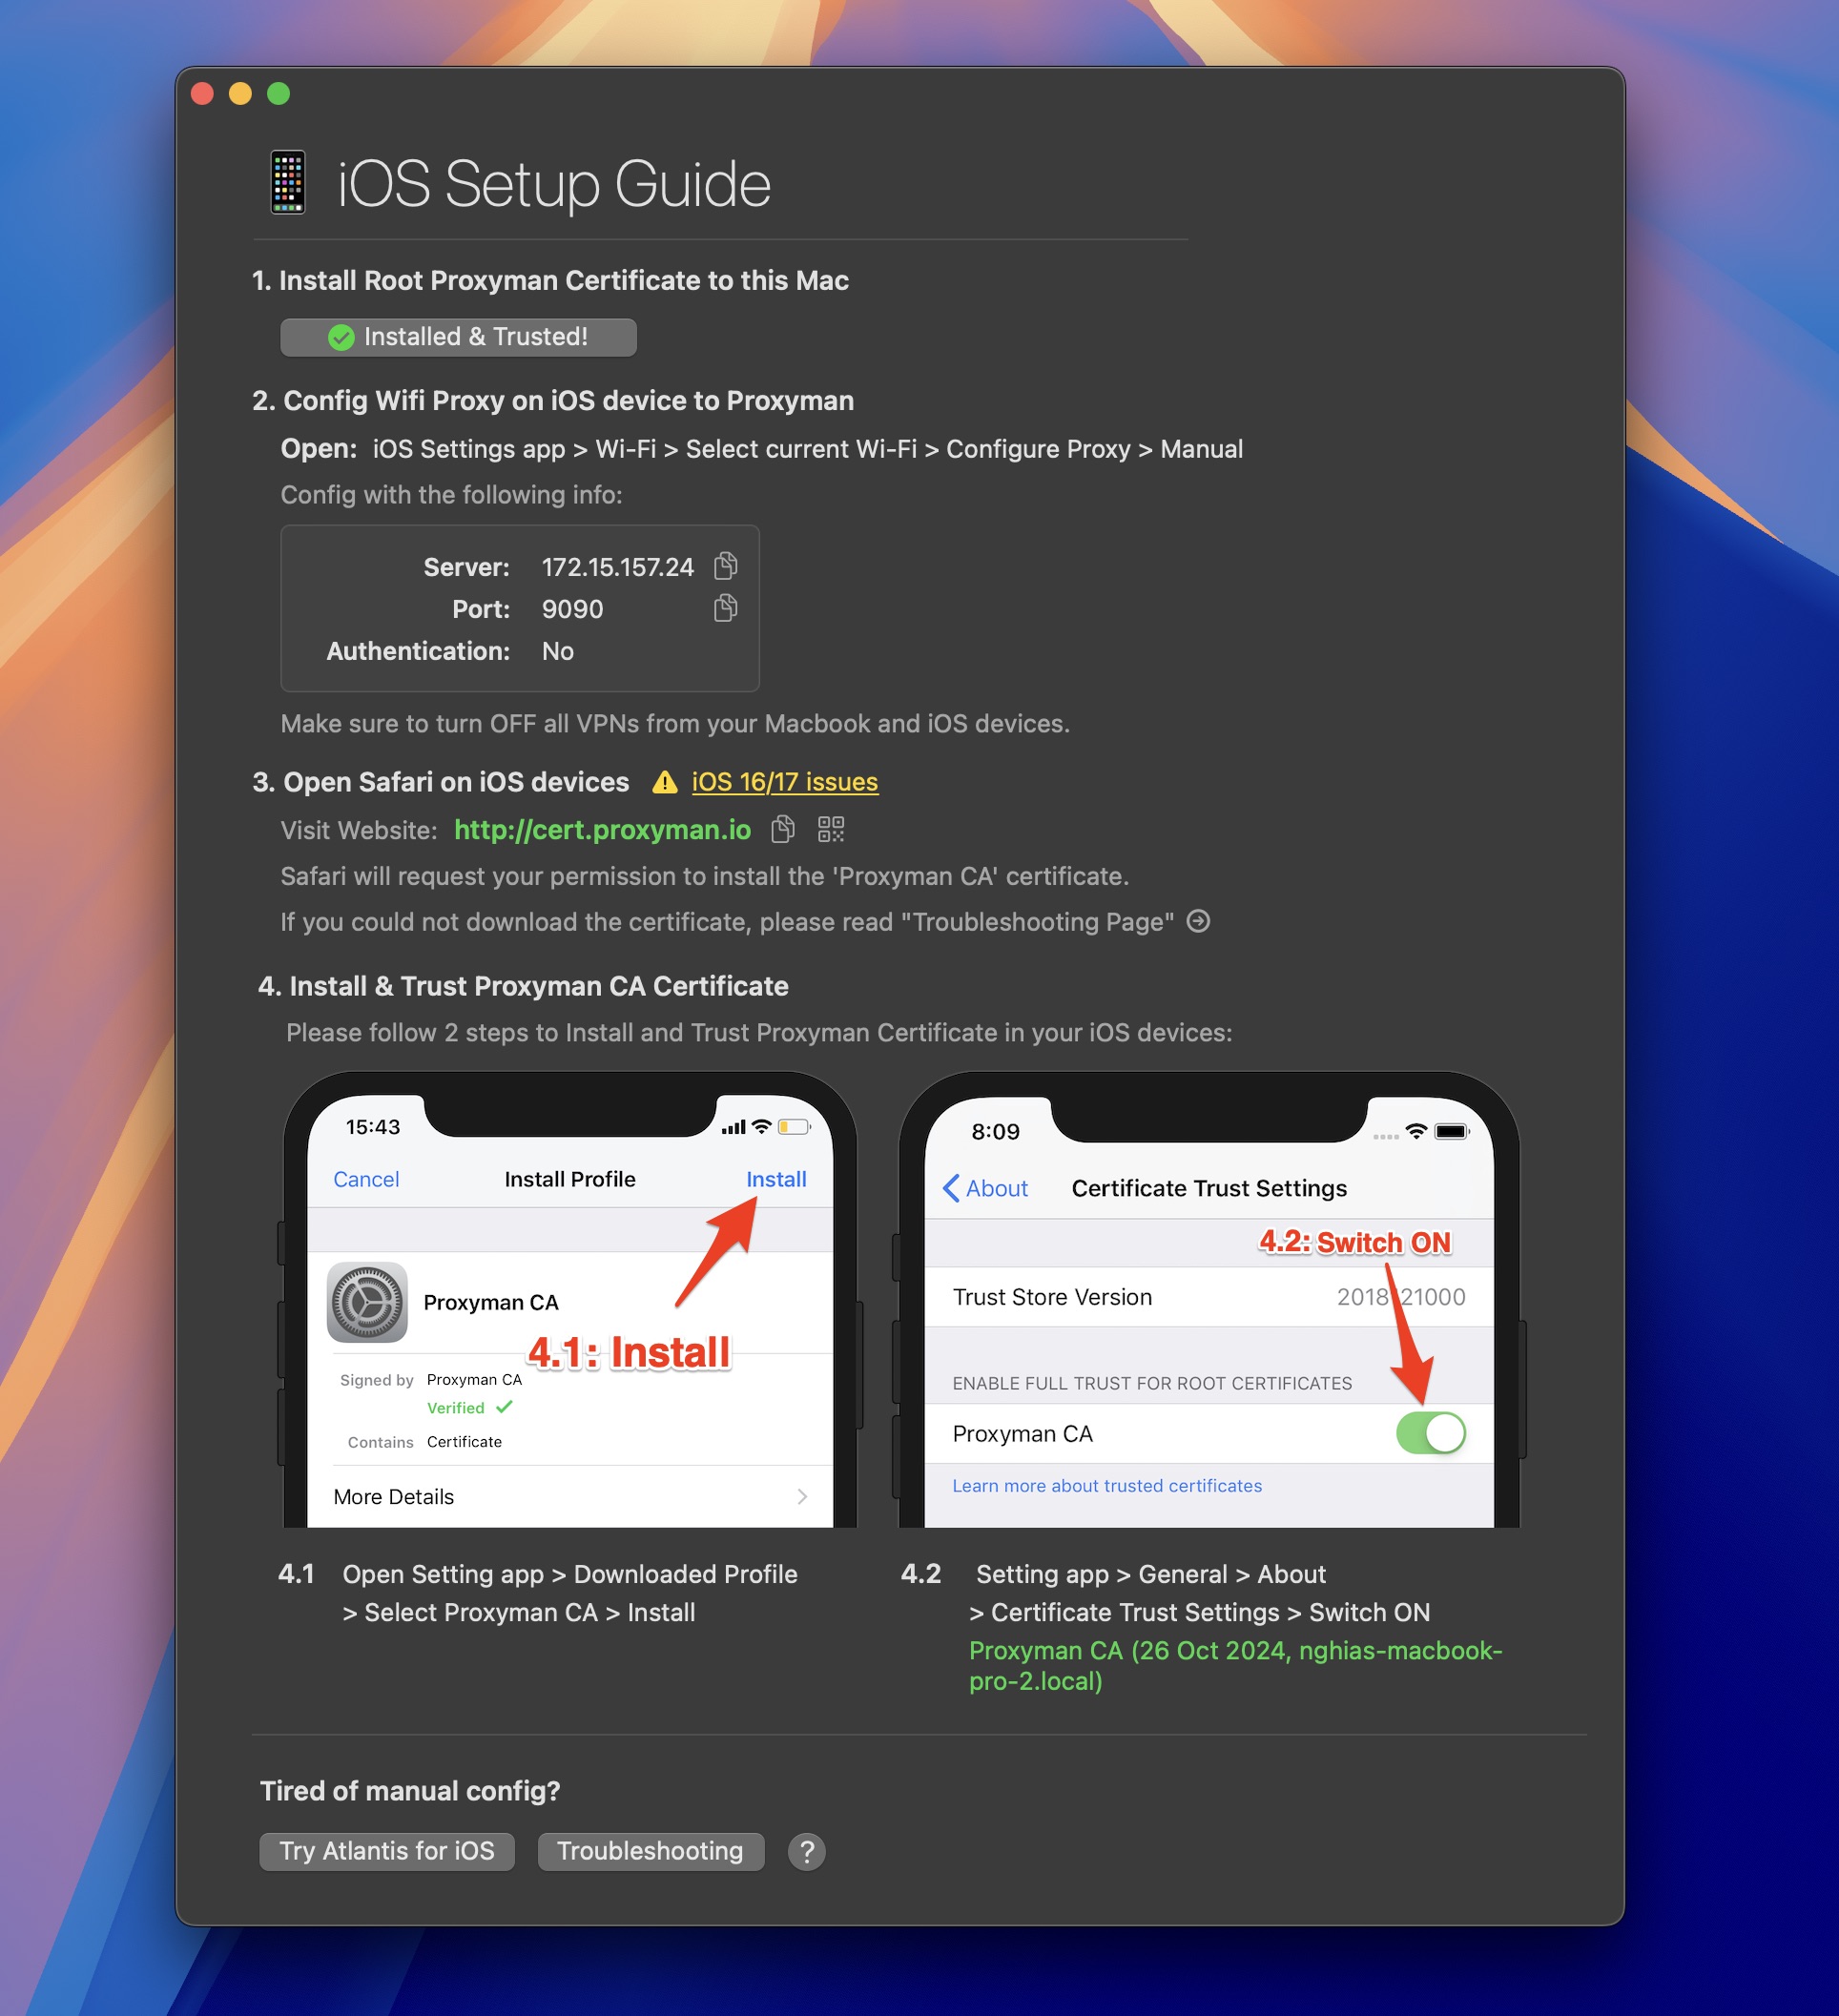
Certificate Menu->Install for iOS->iOS Devices- Follow all steps to install the certificate to your iOS device.
- Make sure to complete the last step that trust Proxyman Certificate in your iOS devices.
- Done.

3. Start Proxyman SOCKS Proxy Server
- Open Proxyman app ->
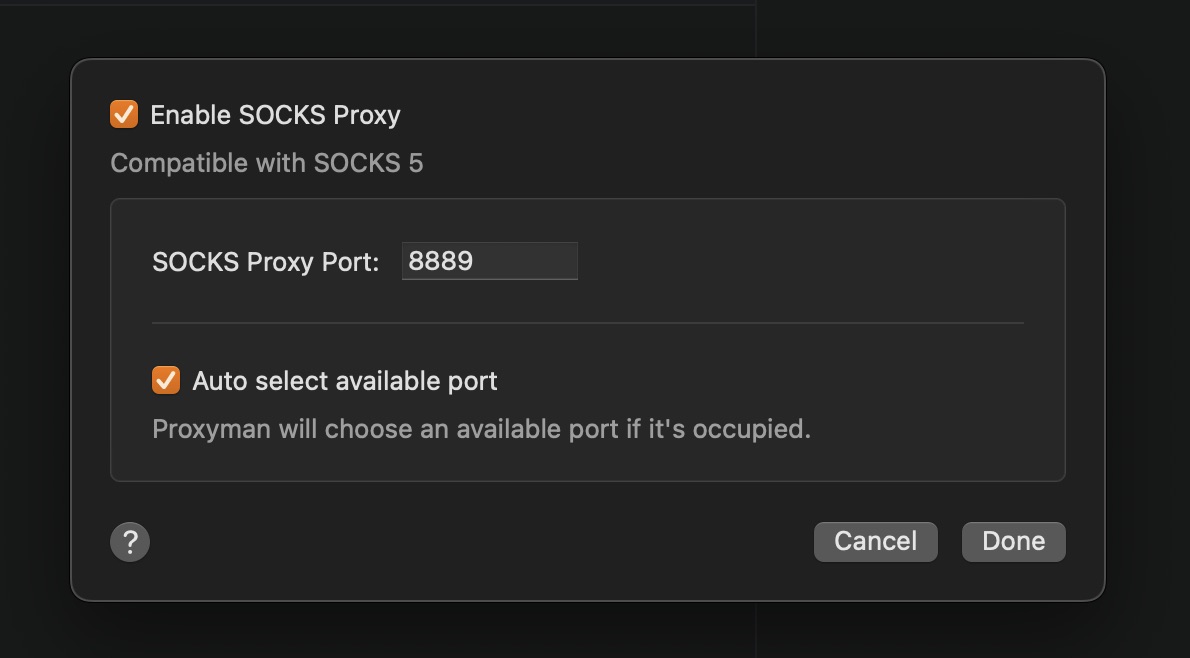
Tools->Proxy Settings->SOCKS Proxy settings->Enable - Note down the port number. At this moment, the default port is
8889. - Done.

4. Configure the app to use the Proxyman SOCKS Proxy Server
Depends on the WebSocket library you are using, please follow the instructions below:
4.1 For NWConnection
let parameters = webSocketURL.scheme == "wss" ? NWParameters.tls : NWParameters.tcp

let options = NWProtocolWebSocket.Options()
options.autoReplyPing = true

parameters.defaultProtocolStack.applicationProtocols.insert(options, at: 0)

if #available(iOS 17.0, *) {
  let socksv5Proxy = NWEndpoint.hostPort(host: "x.x.x.x", port: 8889) // Replace with your Proxyman SOCKS Proxy Server IP address
  let config = ProxyConfiguration.init(socksv5Proxy: socksv5Proxy)
  let context = NWParameters.PrivacyContext(description: "my socksv5Proxy")
  context.proxyConfigurations = [config]

  parameters.setPrivacyContext(context)
}

let connection = NWConnection(to: .url(webSocketURL), using: parameters)
connection.start(queue: .main)
4.2 For URLSession and URLSessionWebSocketTask
private lazy var urlSession: URLSession = {
let config = URLSessionConfiguration.default
if #available(iOS 17.0, *) {
    let socksv5Proxy = NWEndpoint.hostPort(host: "x.x.x.x", port: 8889) // Replace with your Proxyman SOCKS Proxy Server IP address
    let proxyConfig = ProxyConfiguration.init(socksv5Proxy: socksv5Proxy)

    config.proxyConfigurations = [proxyConfig]
}

return URLSession(configuration: config, delegate: nil, delegateQueue: nil)
}()
5. Done
Tada. Proxyman will capture the WebSocket message from your app 🎉

6. Alternative solution
If you prefer not modify the app code, you can use Atlantis framework to capture the WebSocket message.
What going next?
You can read more about Websocket from Proxyman's official documentation.
Proxyman is a high-performance macOS app, which enables developers to capture and inspect HTTP/HTTPS requests from apps and domains on iOS device, iOS Simulator and Android devices.
Get it at https://proxyman.com
