Debug Server-Sent Events from OpenAPI with Proxyman
Here is what we achieve in this tutorial:
- Download and Setup Proxyman macOS
- Start iOS Chat GPT Sample app and try to make some Chat with GPT-4o
- 1 click to set up iOS Simulator with Proxyman and ready to capture HTTPS
- Capture & Debug the Server-Sent Events from OpenAPI with Proxyman
In the end of this tutorial, you will be able to see the Server-Sent Events from OpenAPI with Proxyman.
With SSE and OpenAI Custom Tab -> It's easy to debug Server-Sent Events from OpenAPI
1. Get Started with Proxyman
Before we start, let's make sure you have Proxyman installed on your Mac.
- Head over to the Proxyman website and download the macOS version.
- Run the installer to set up Proxyman on your Mac.
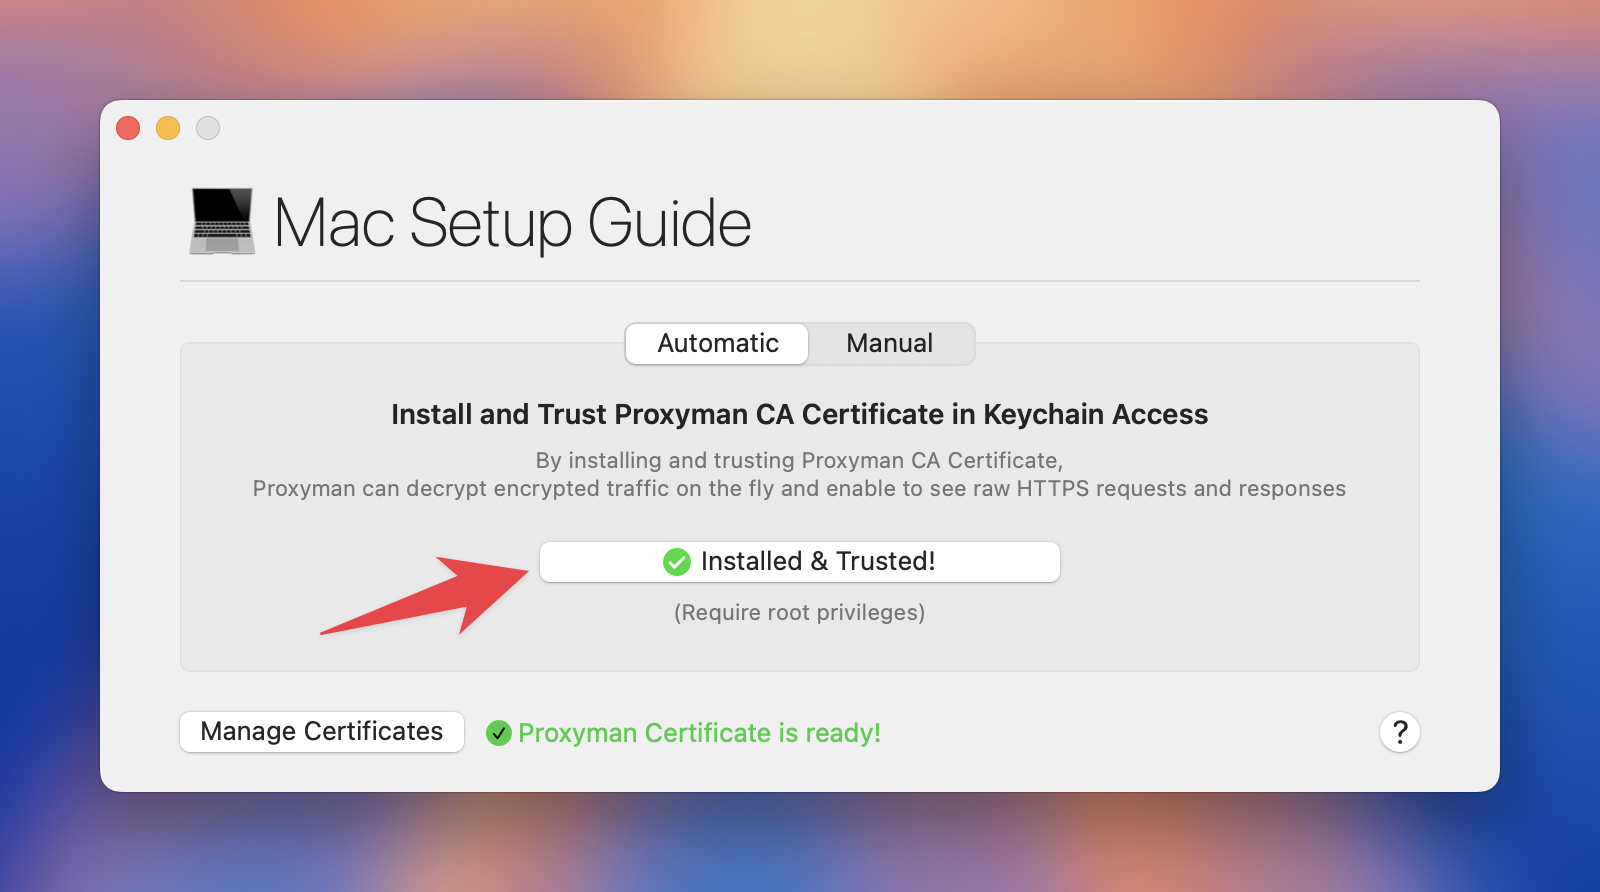
- Launch Proxyman, navigate to the Certificate menu, and select "Install Certificate for this Mac..."
- Complete the on-screen steps to finish the certificate installation.
- Make sure the Proxyman certificate displays a green checkmark to confirm successful installation.
By following the steps above:
- Proxyman CA Certificate is installed on your Mac and ready to capture HTTPS traffic from iOS Simulator.
2. Setup iOS Simulator with Proxyman
In order to capture HTTPS traffic from iOS Simulator, we need to setup Proxyman with iOS Simulator.
- Open Xcode, download this Sample App: GPTClientApp-iOS and start it with iOS 18 Simulators.
- Open Proxyman, navigate to certificate Menu -> Install Certificate for iOS -> Simulator
- Click on "Prepare Simulators" button
- Click on "Reboot" button and re-start your iOS app from Xcode.
- Done! It's ready to capture HTTPS traffic with Proxyman
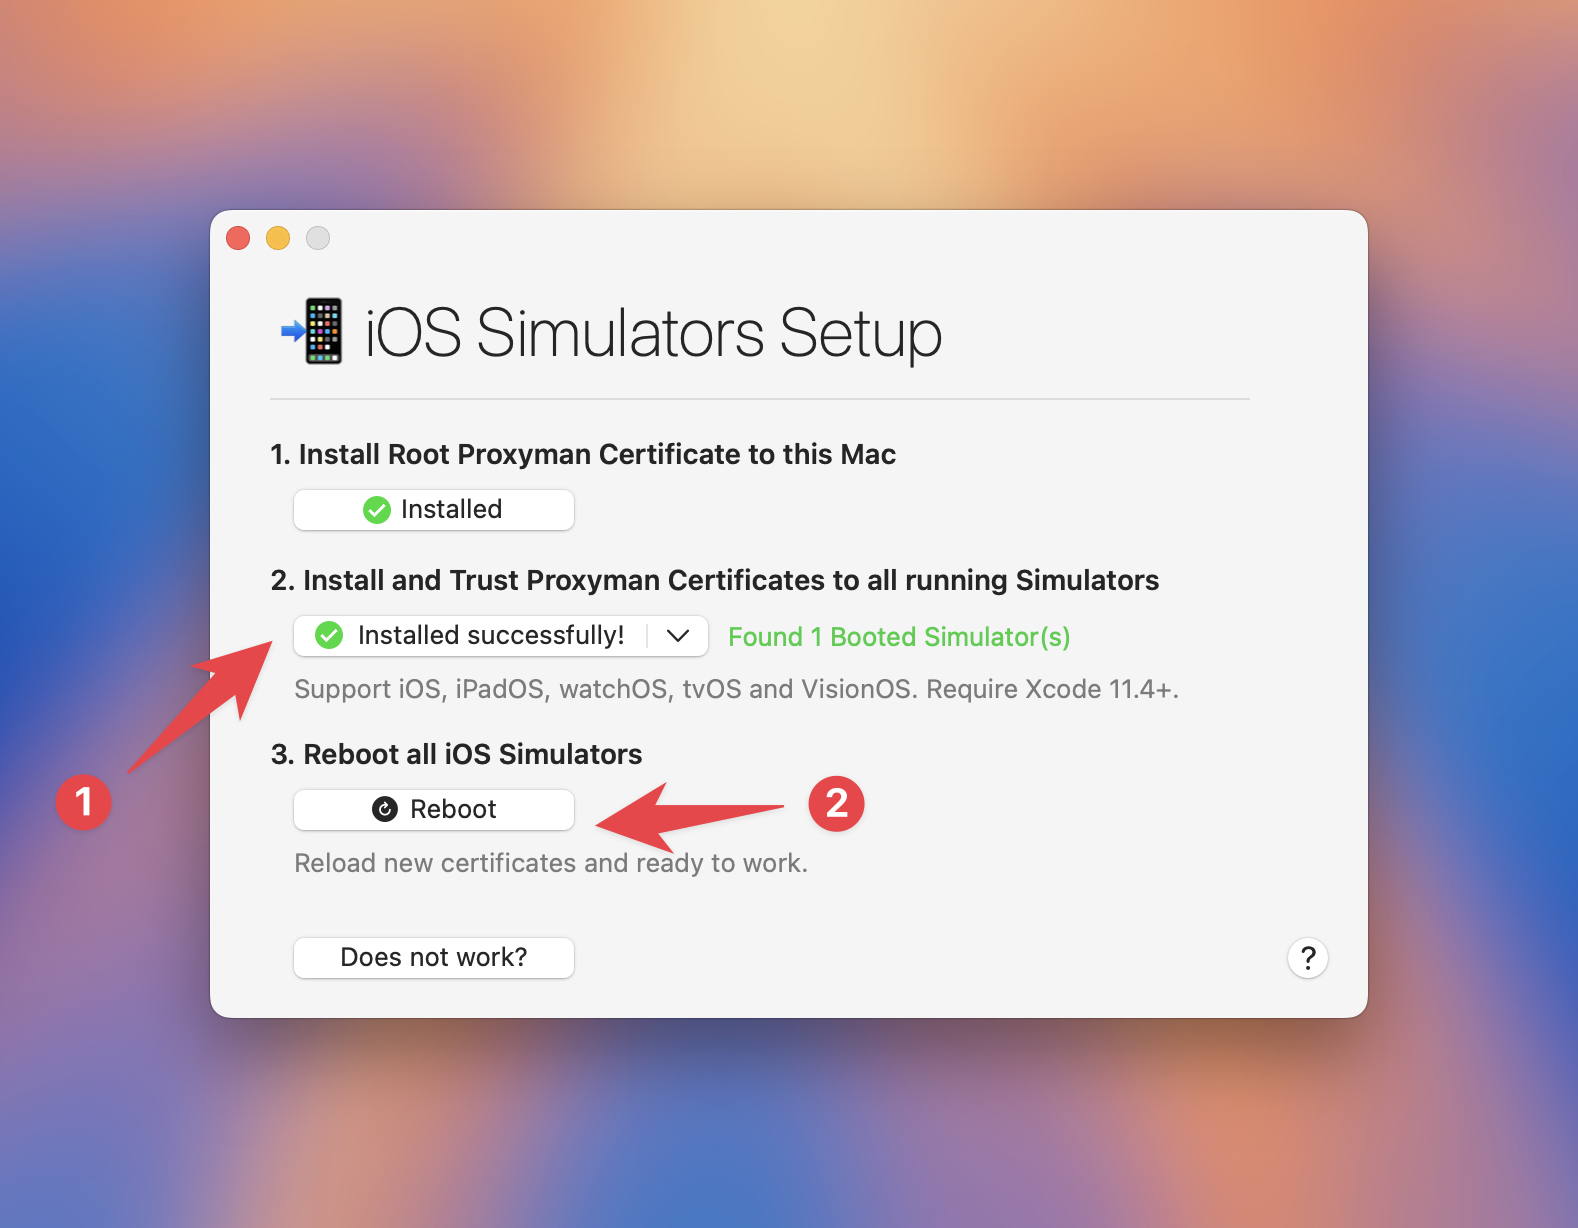
This is the most simple and recommended way to capture HTTPS traffic from iOS Simulator with Proxyman. No need to manually set up HTTP Proxy and Trust self-signed certificate like other web proxy tools, like Charles, Fiddler, etc.
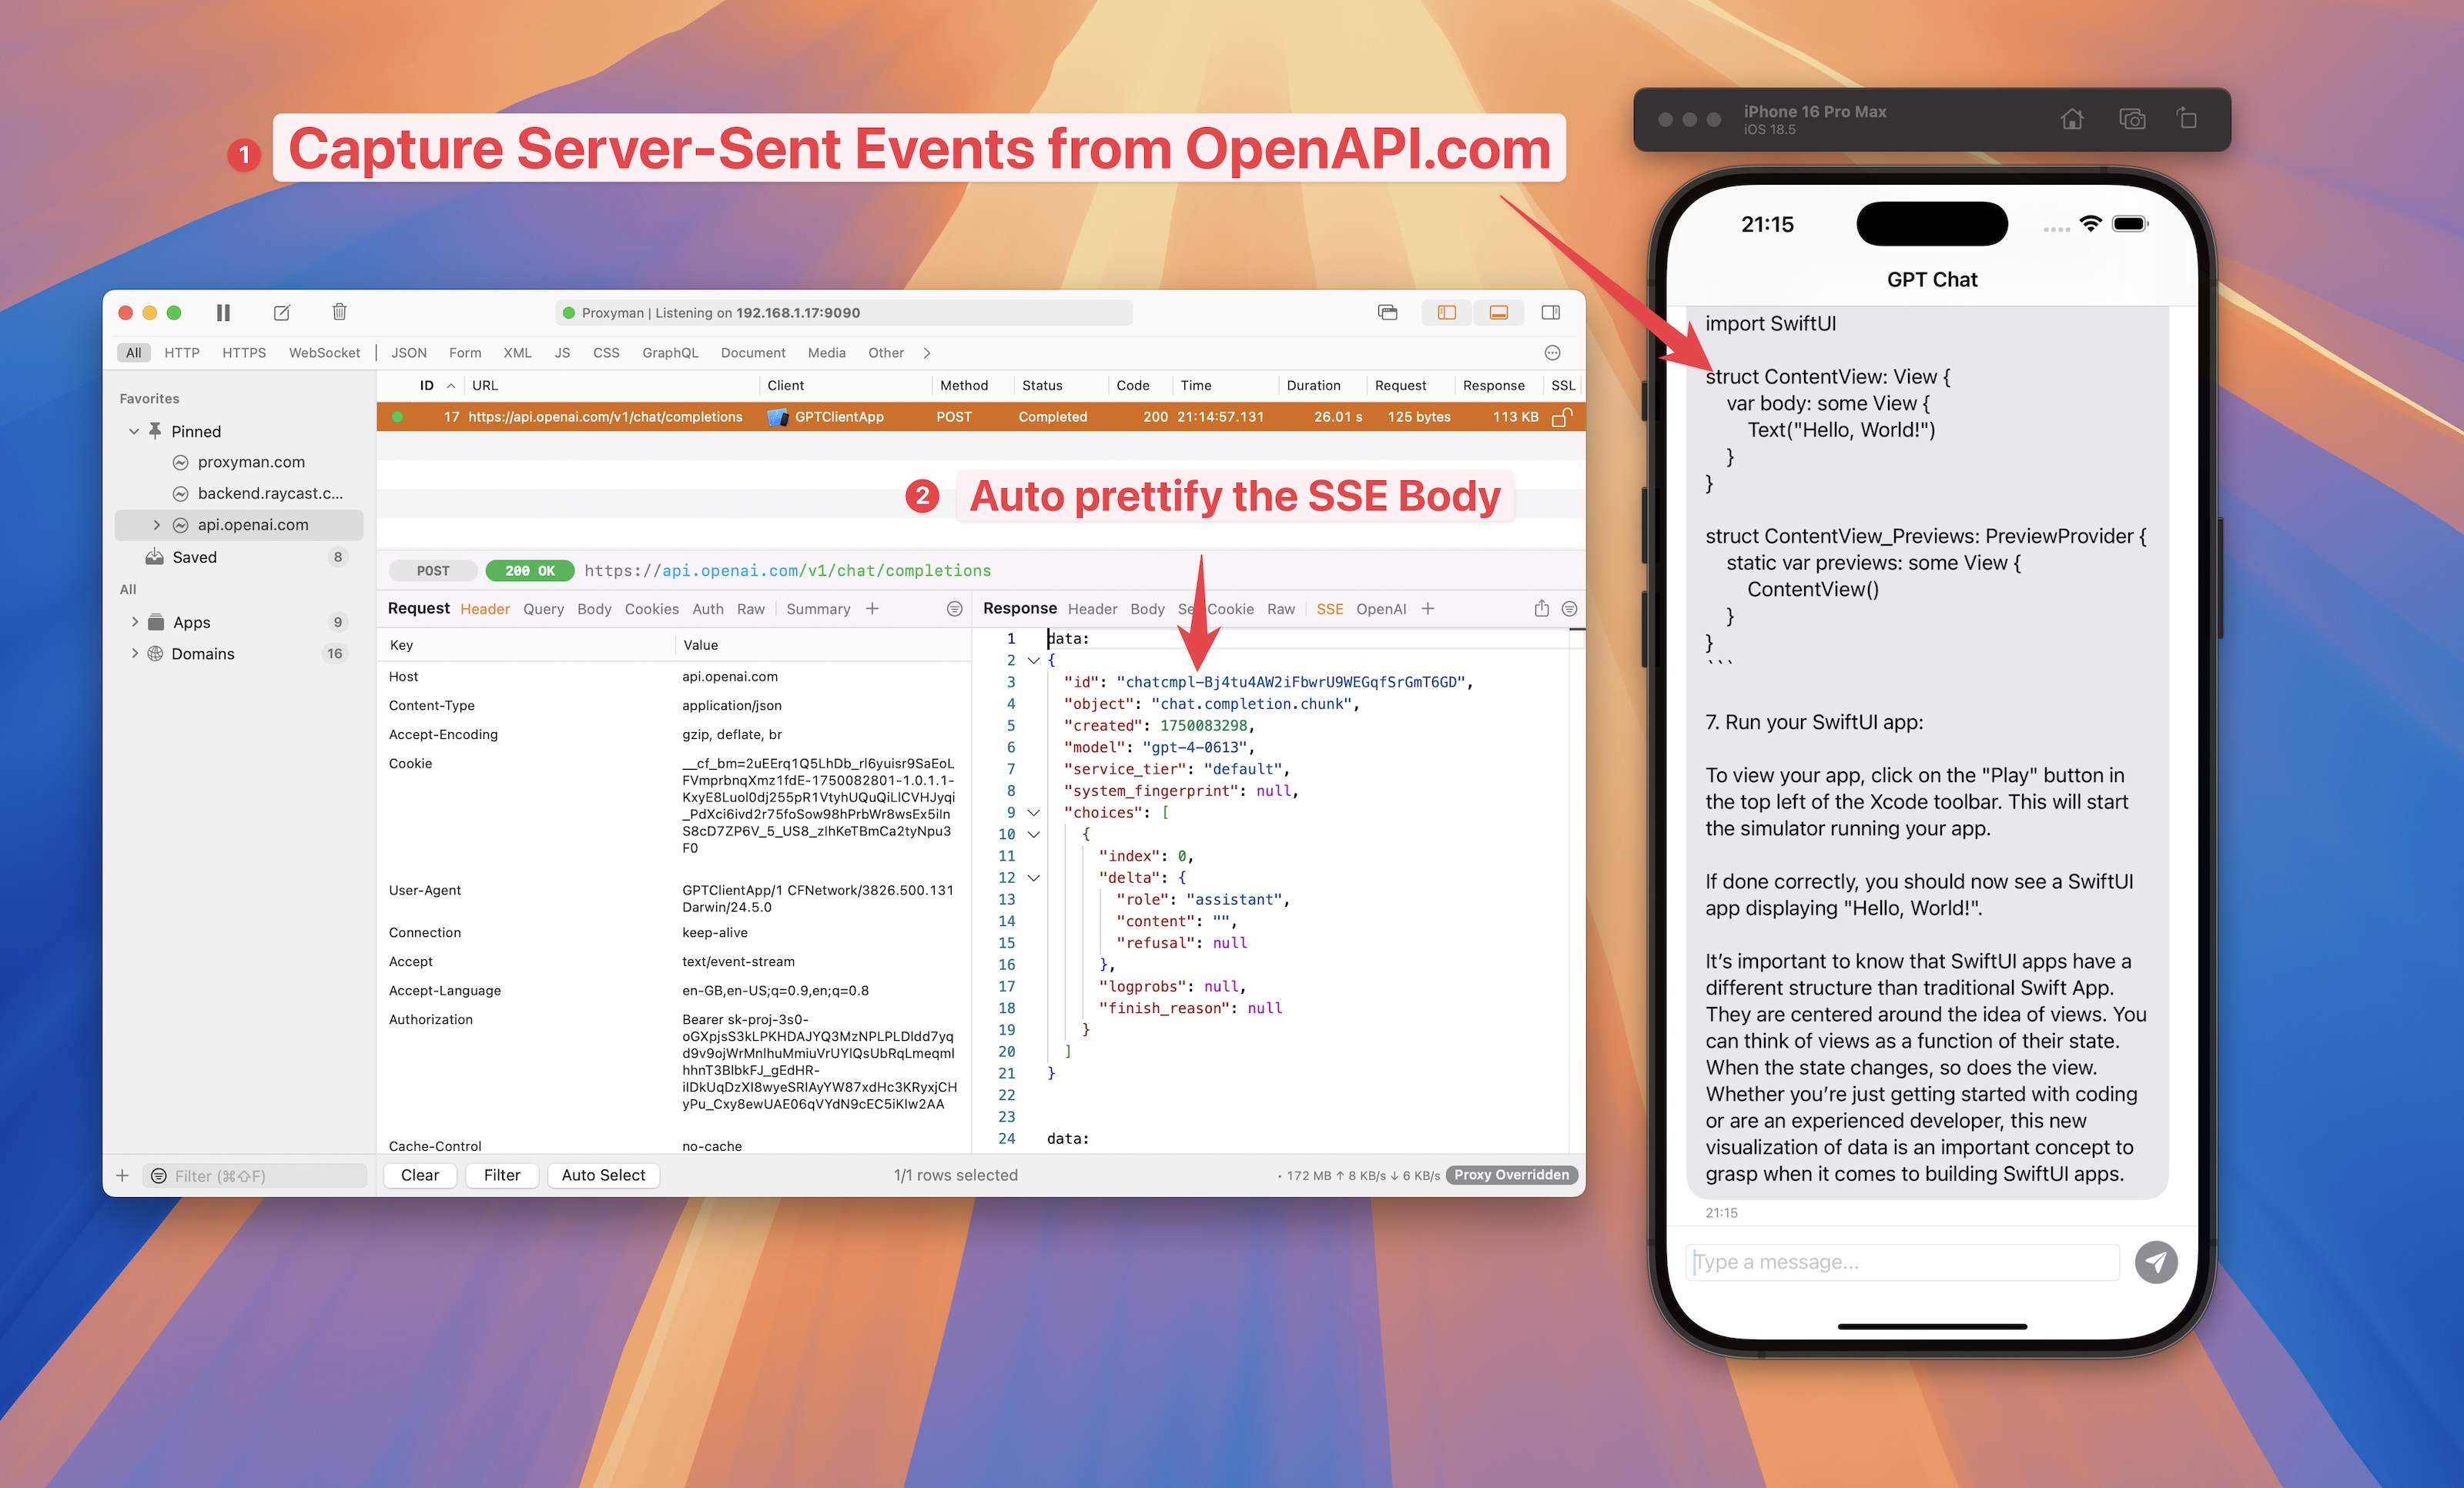
3. Debug Server-Sent Events from OpenAPI with Proxyman
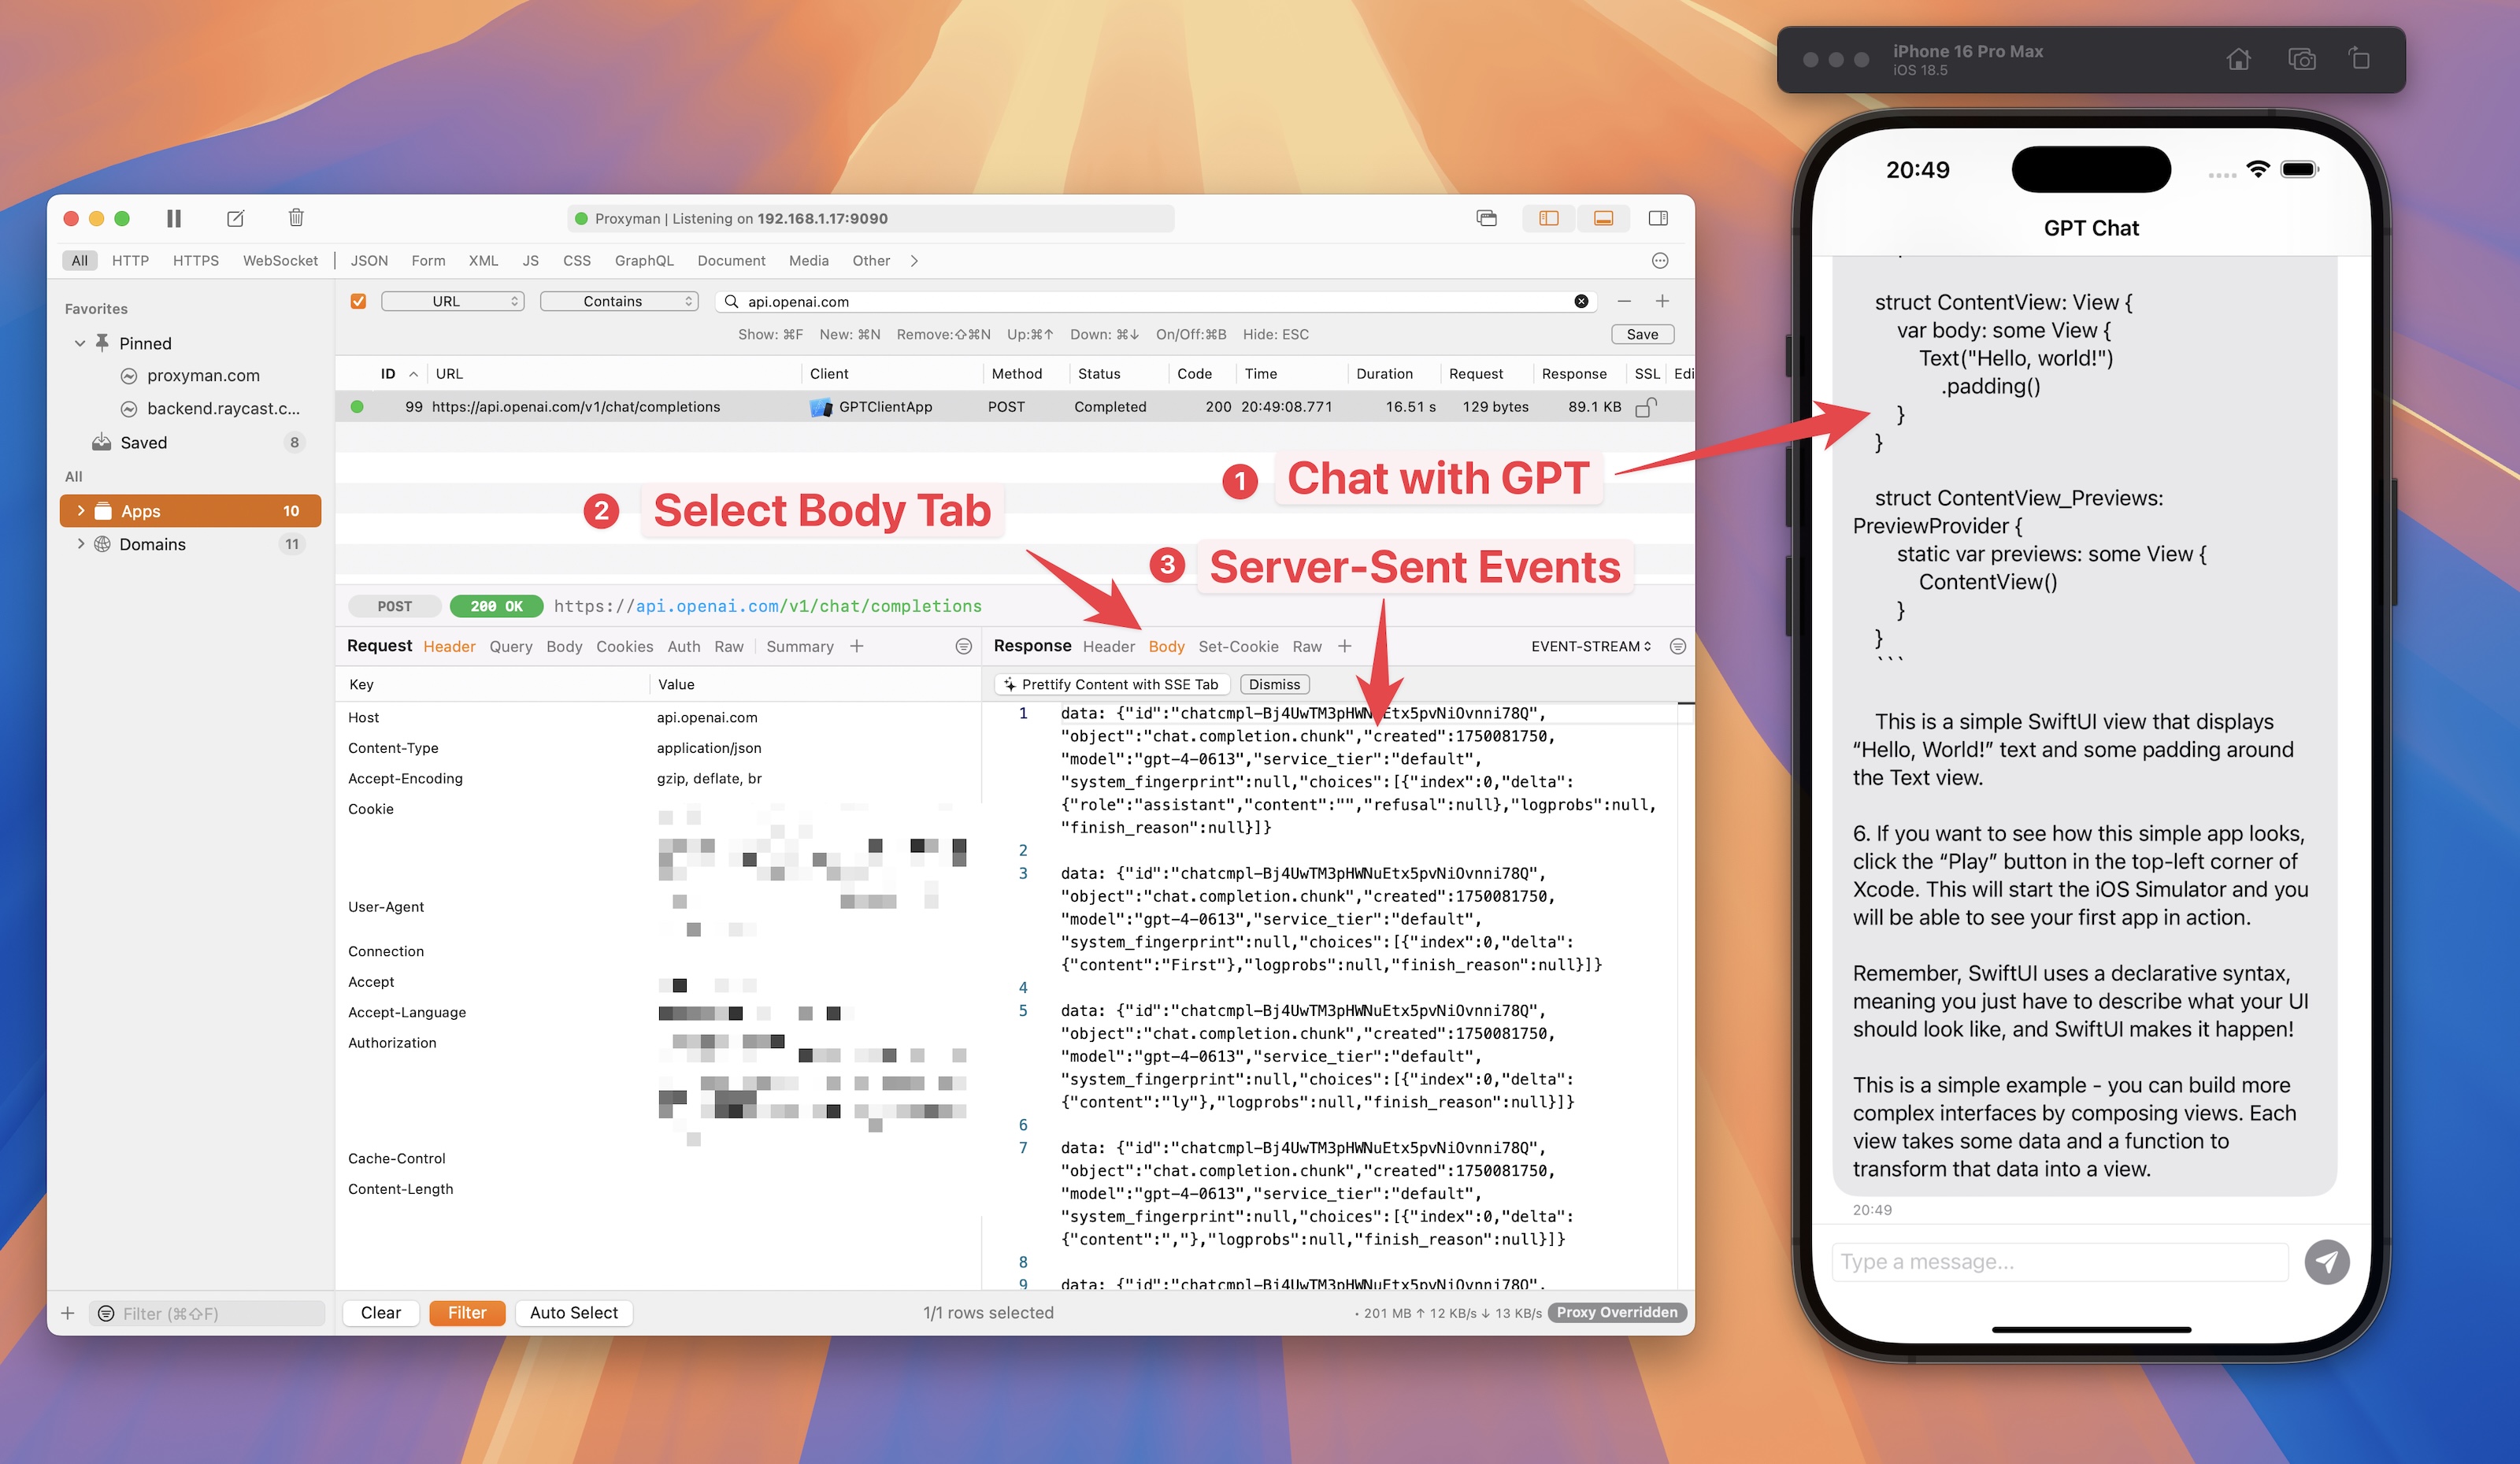
- In Xcode, start the iOS Chat GPT Sample app and try to Chat with GPT-4o. It's crucial because GPT Sample App will make a first request to OpenAI API, so Proxyman can capture it.
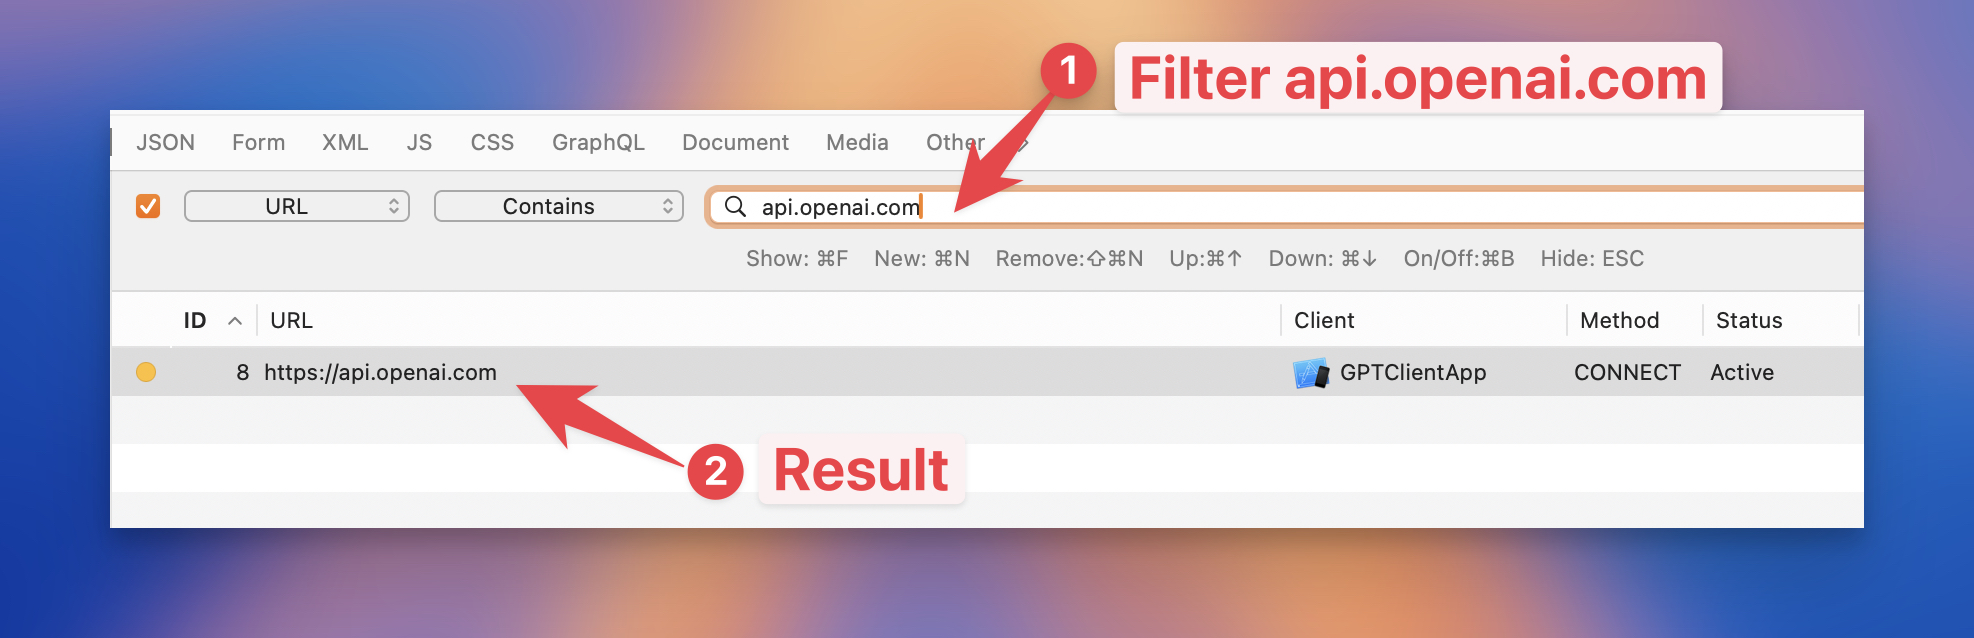
- Open Proxyman -> You can use Command + F to search for "api.openai.com" -> You will see the first request to OpenAI API.
- Look at the Response Panel -> Click on "Enable only this domain"
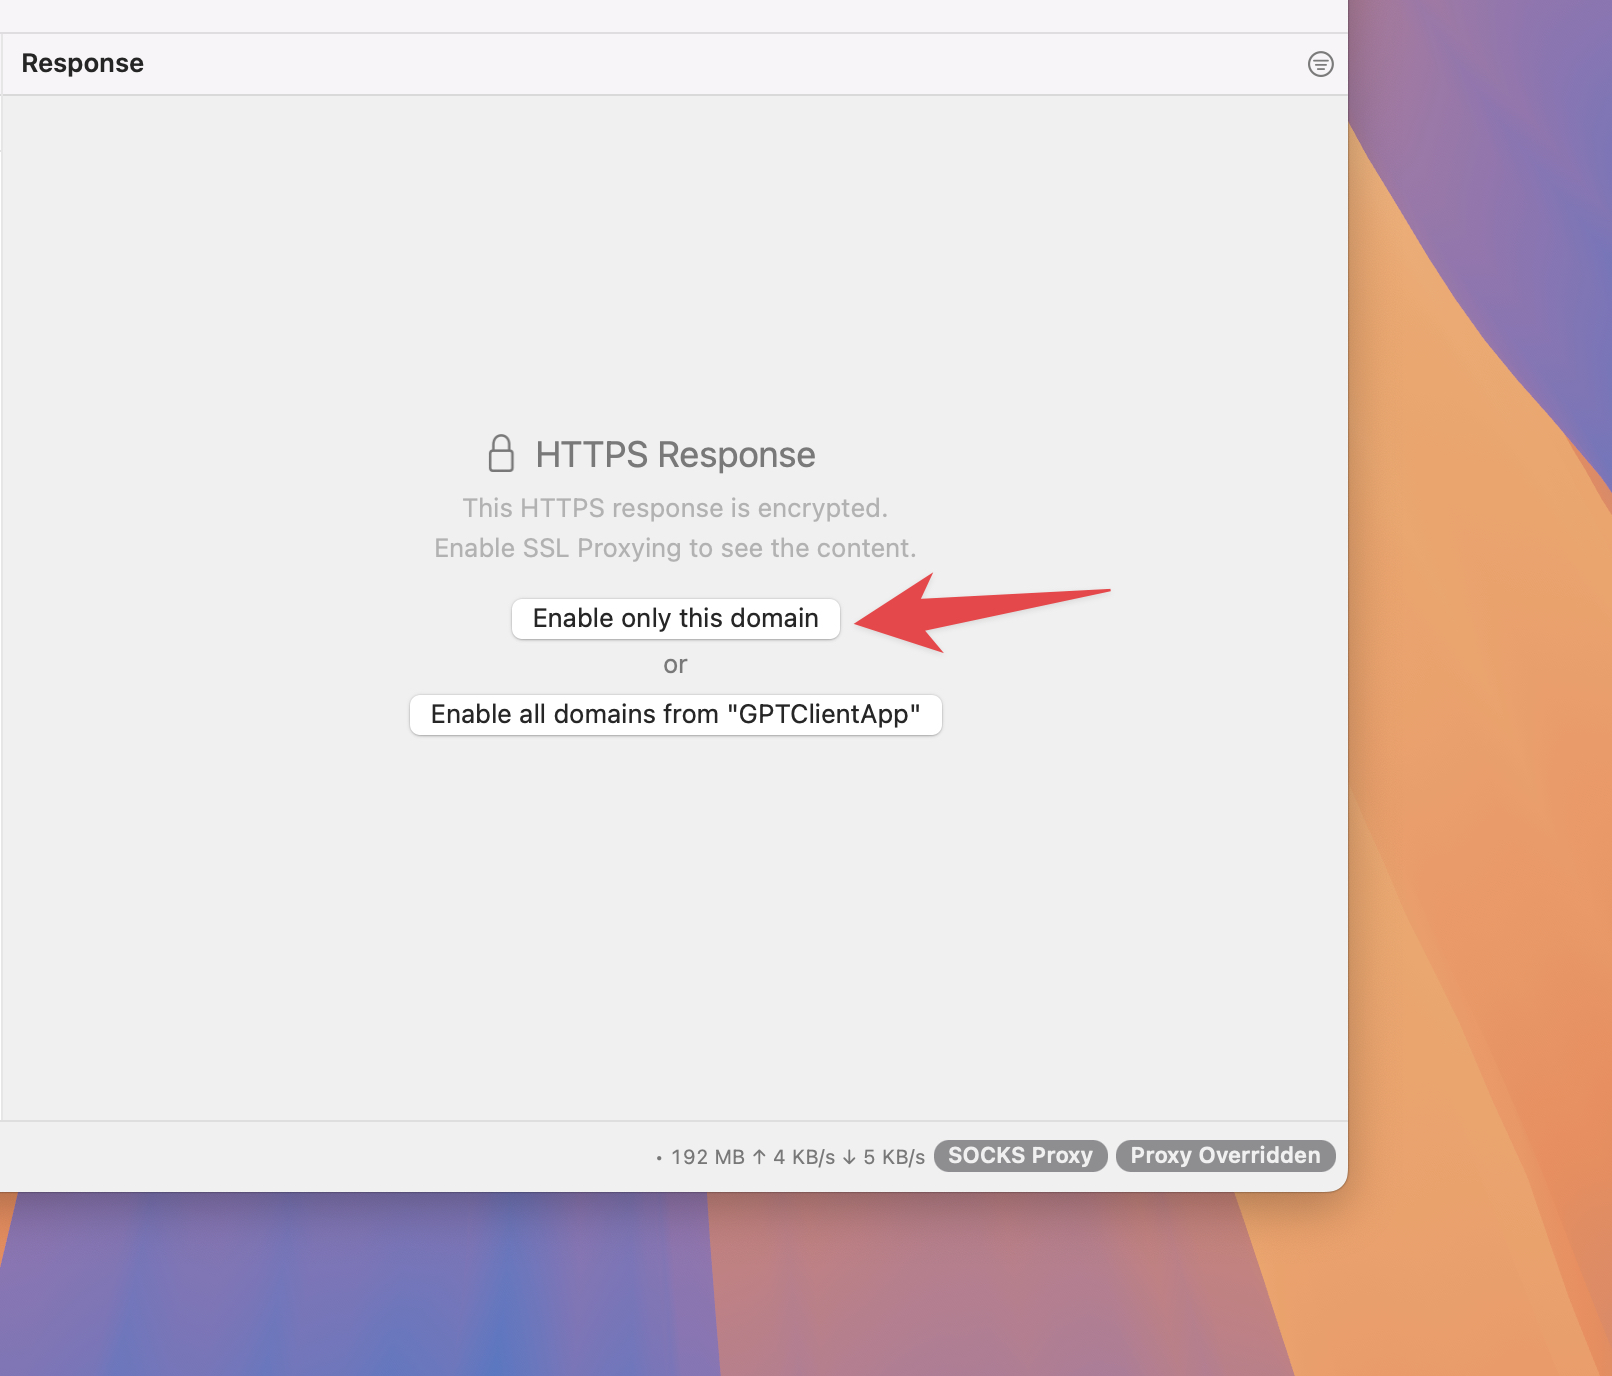
By doing it, it tells Proxyman to capture & decrypt HTTPS traffic from https://openai.com
-
Now, restart your iOS app, and start asking questions to GPT.
-
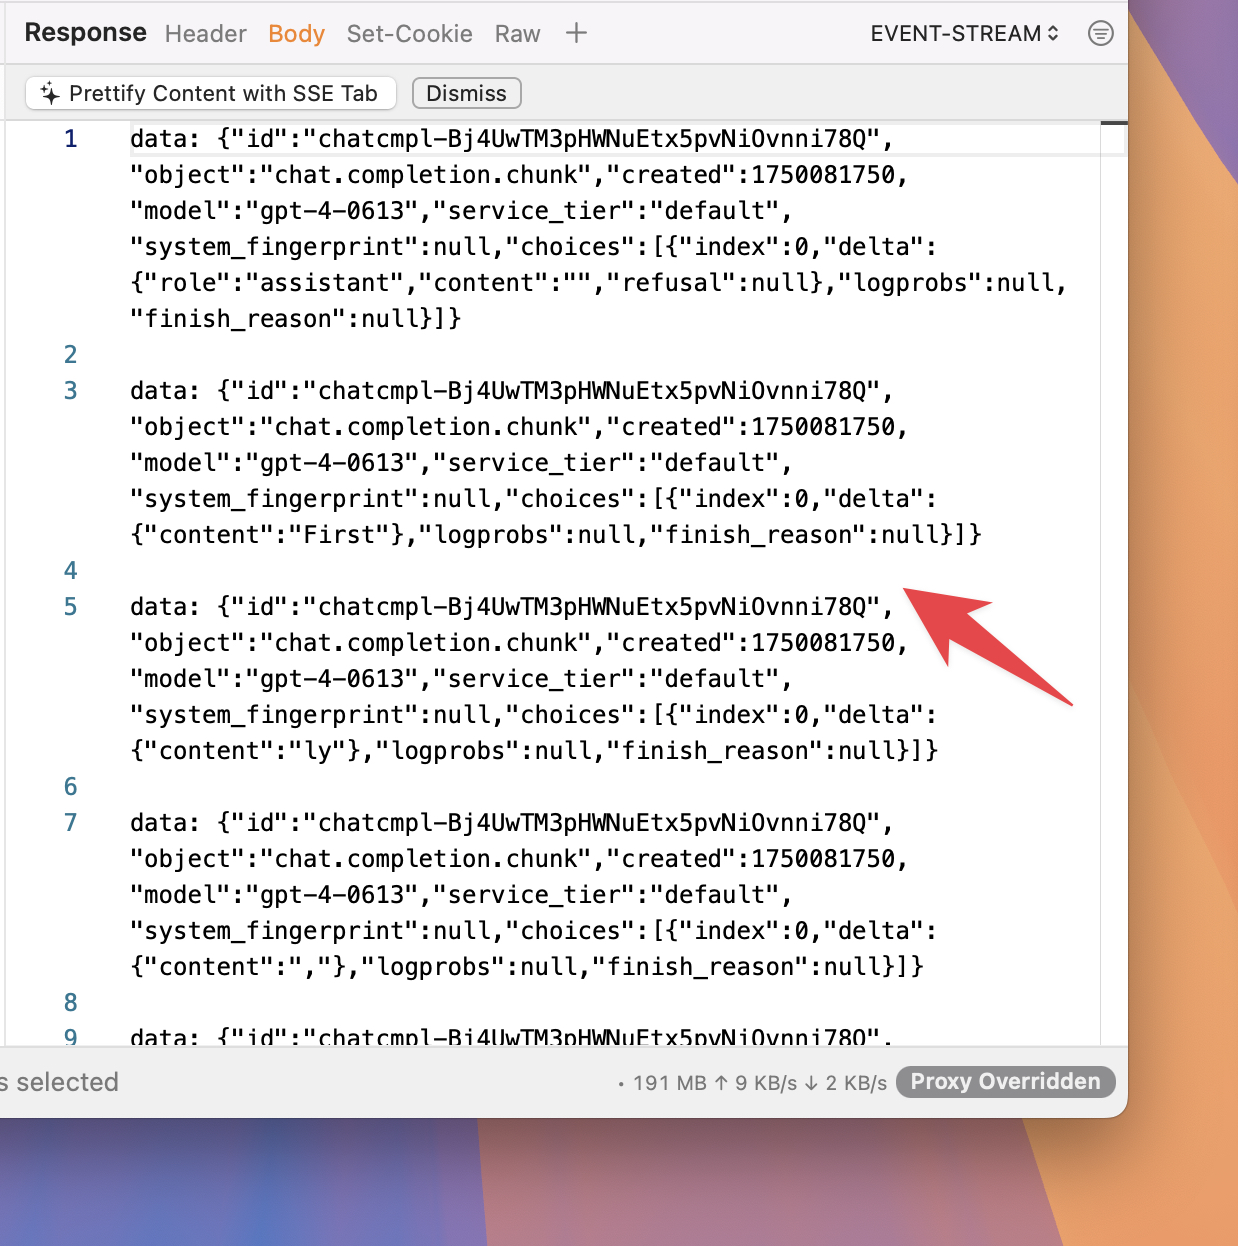
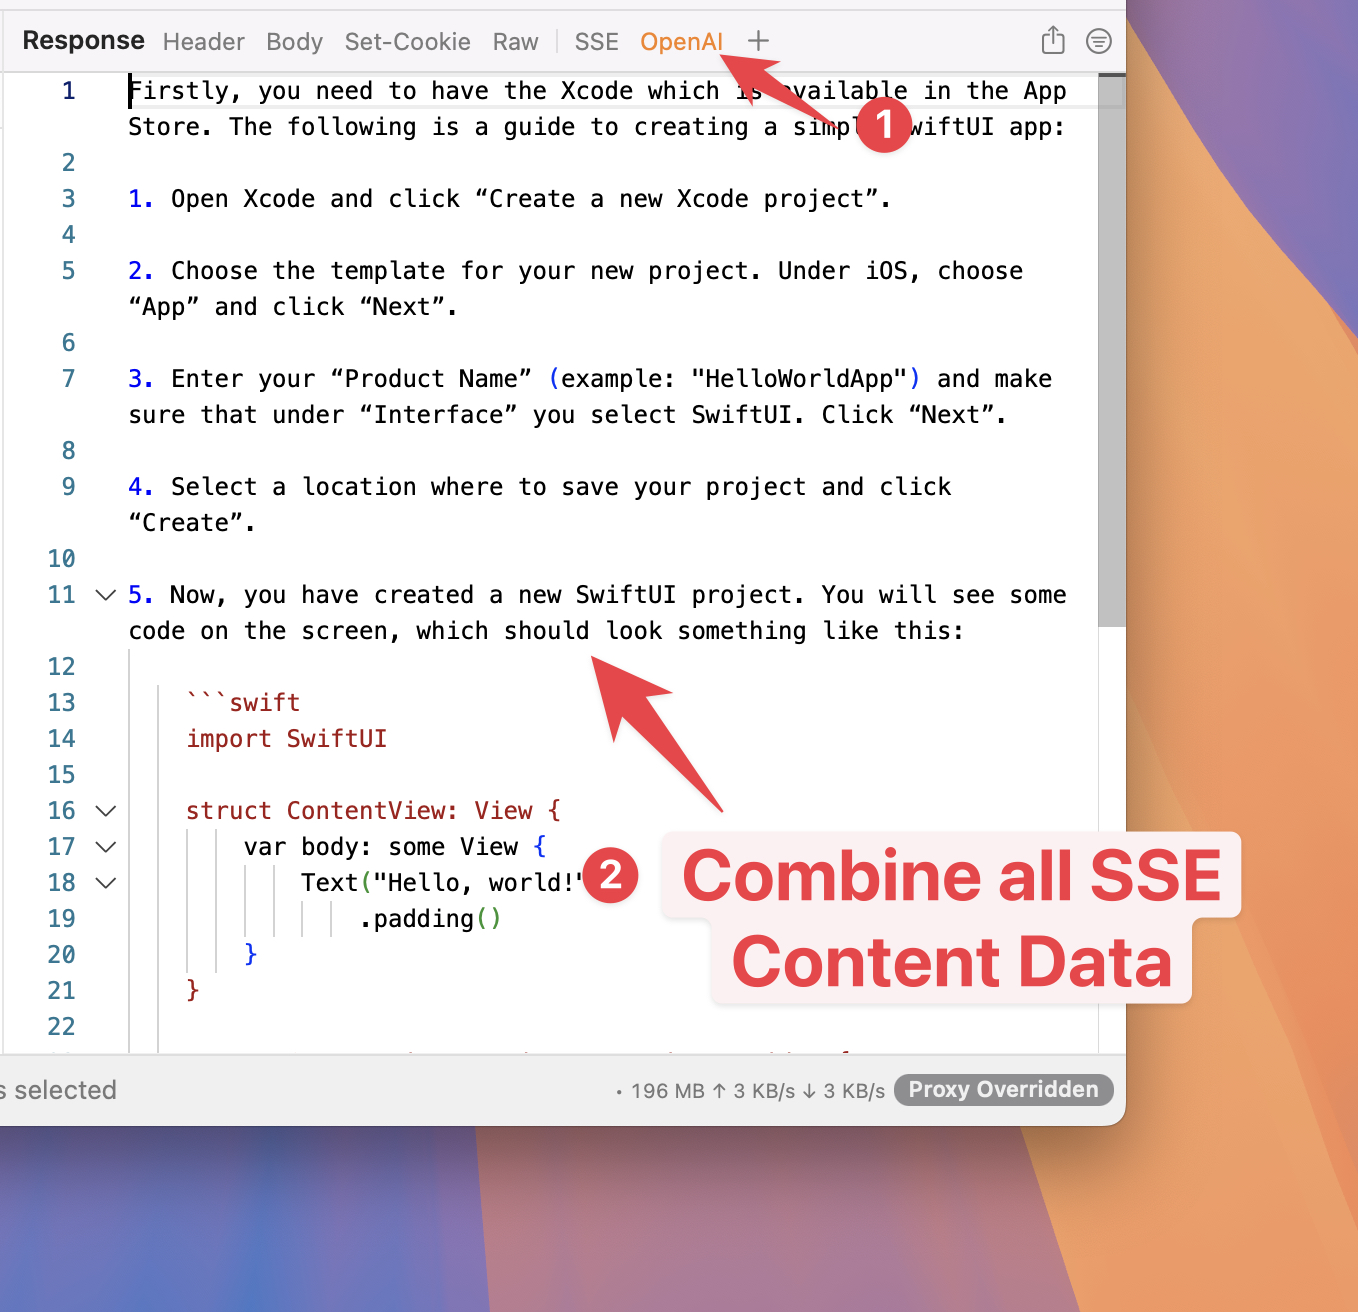
At this point, you can see the Server-Sent Events from OpenAPI with Proxyman in the Response Body
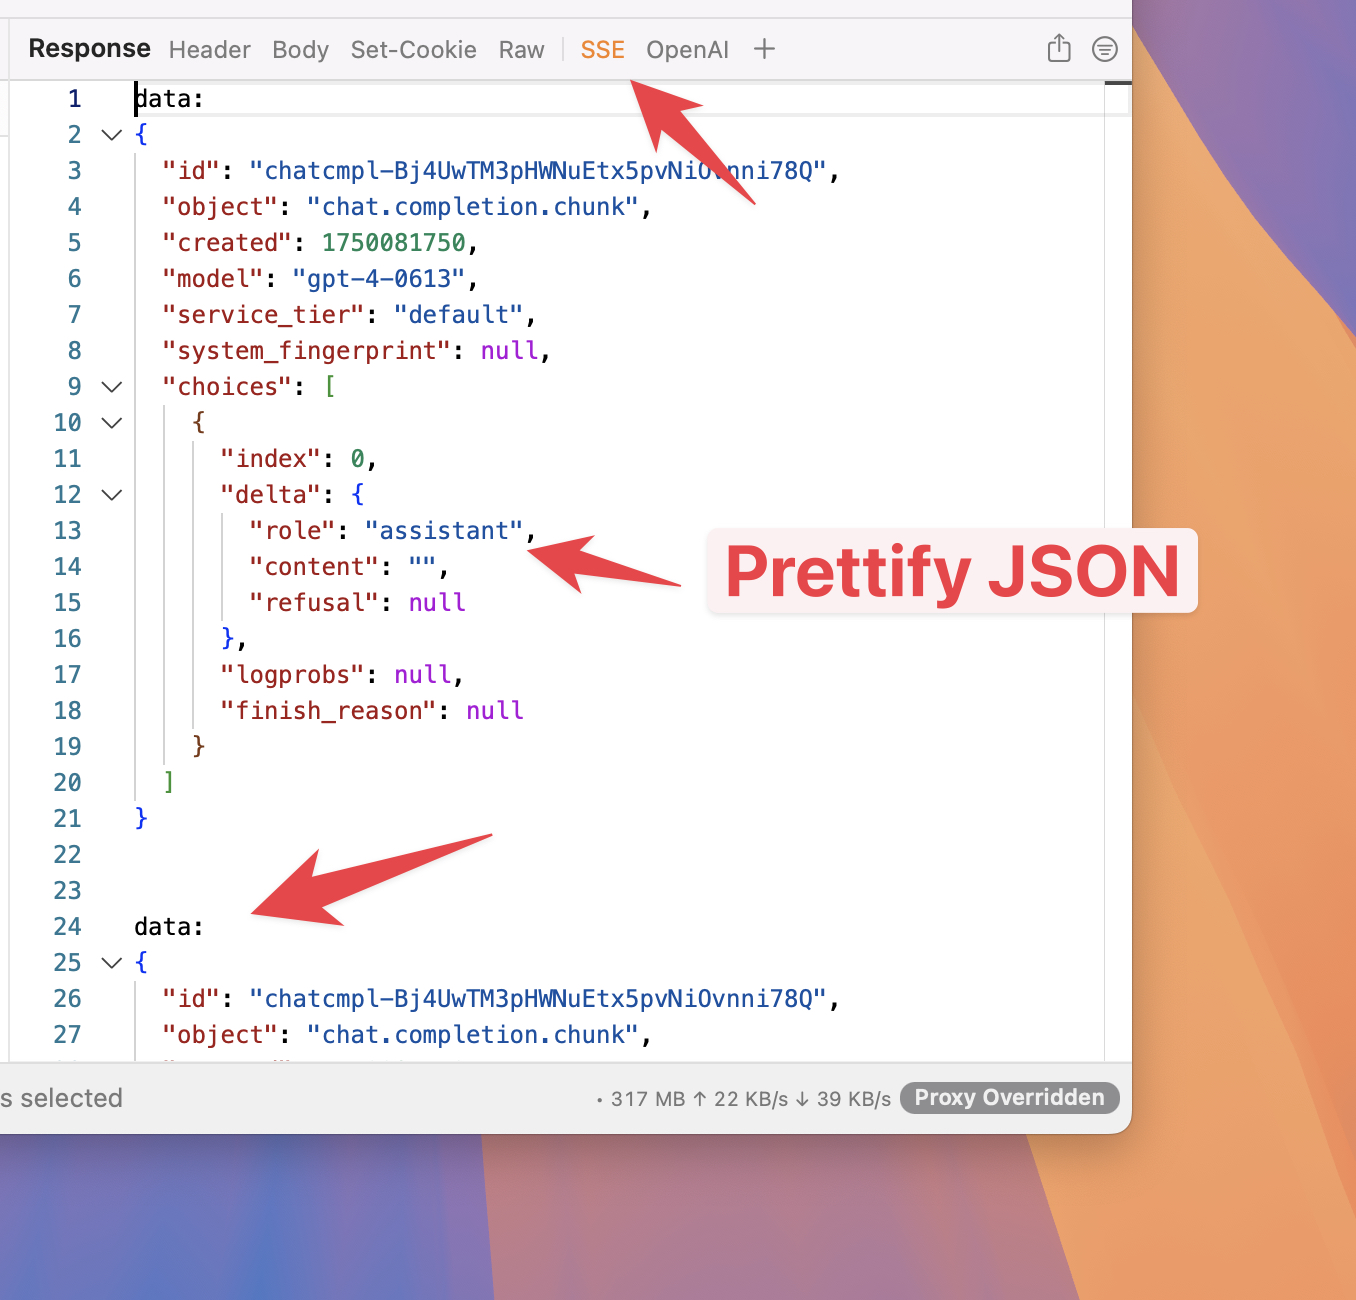
3.1 Use SSE and OpenAI custom tab for better debugging
If you can notice from the Response Body, Server-Sent Event sent a bunch of fragment data and it's hard to read
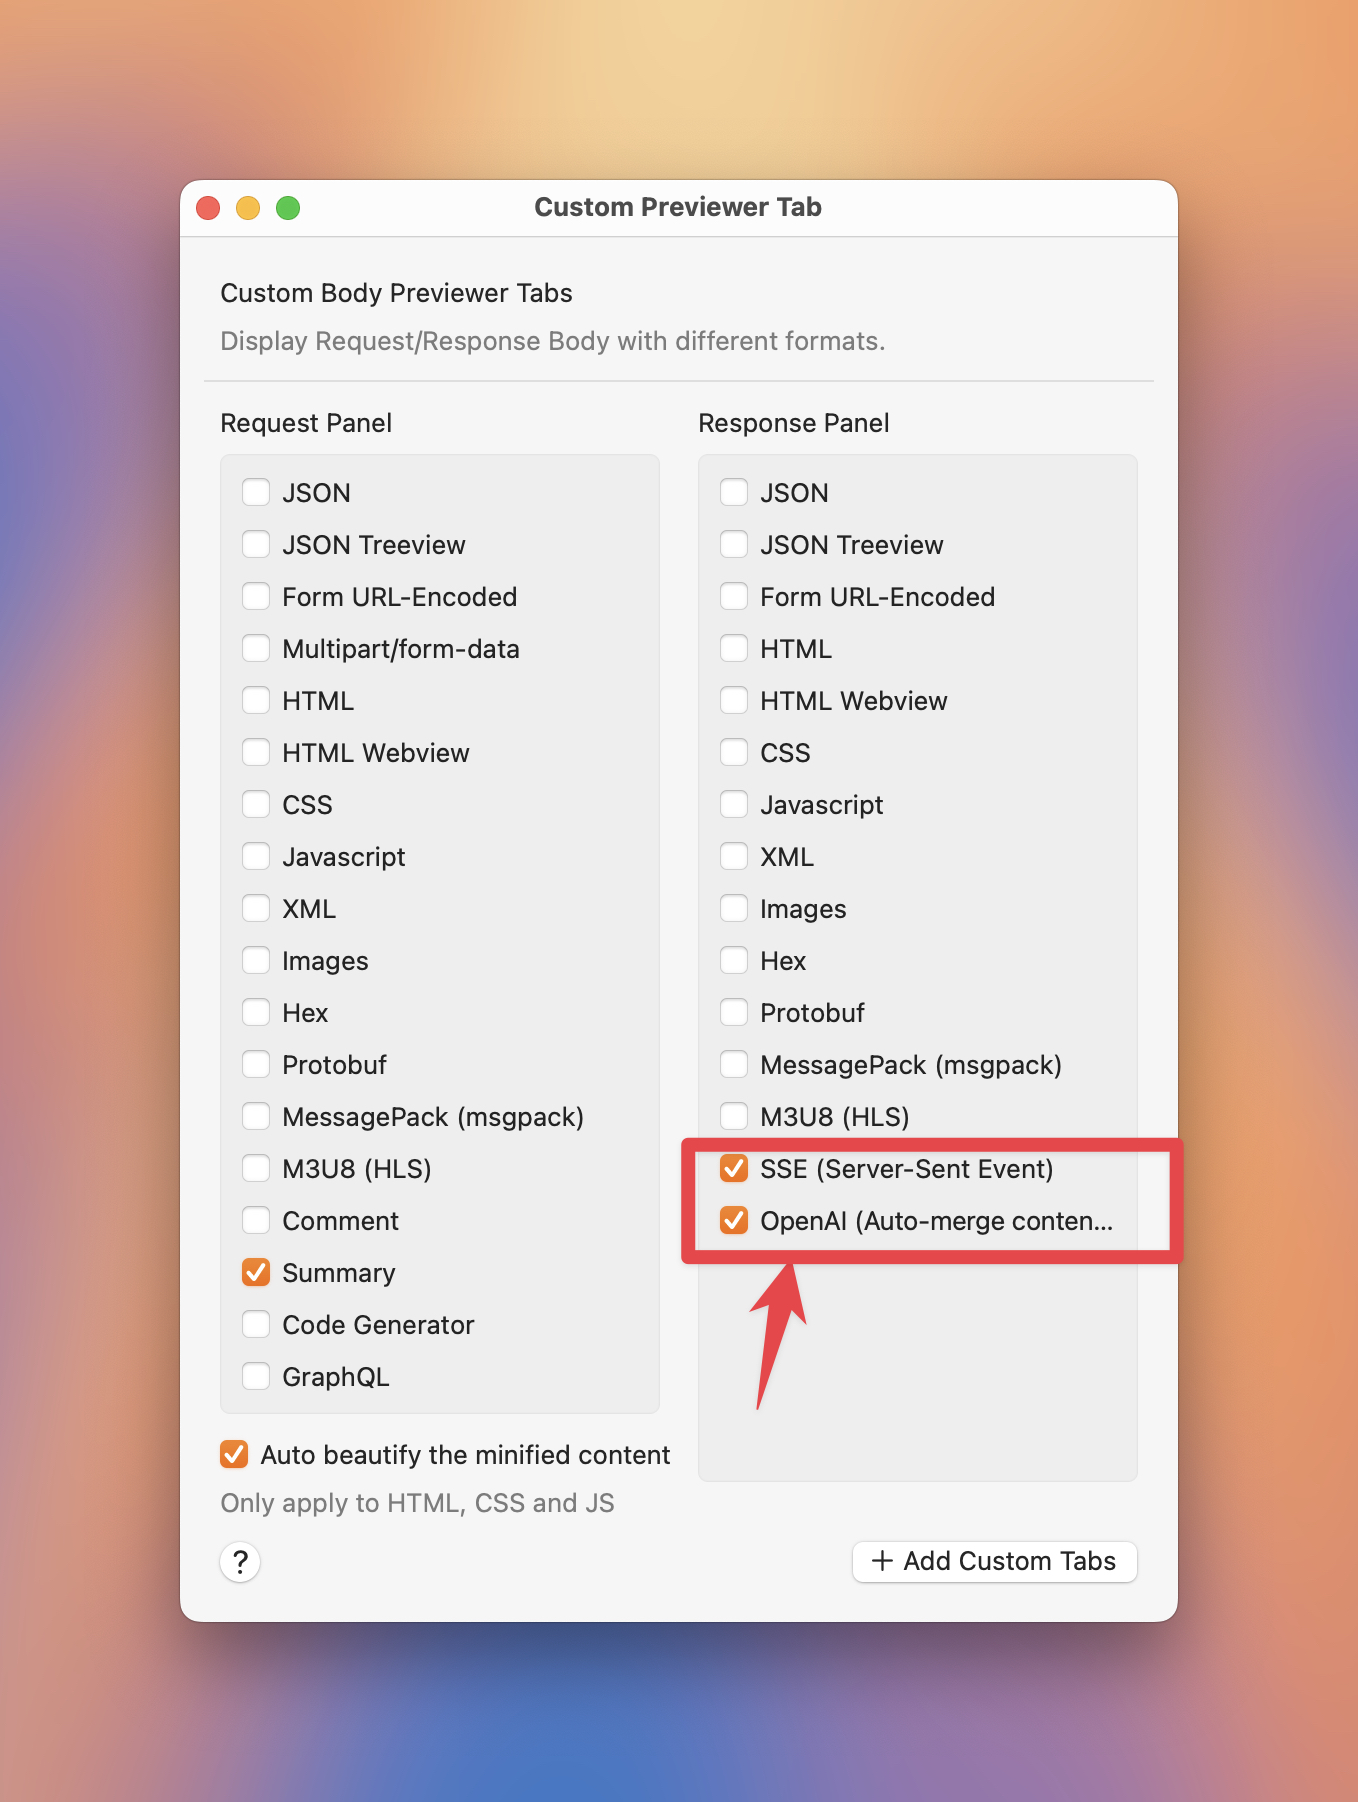
To make it easier to read, let's click on the "Prettify Body" on the top of the Response Body (If you can't find it, please click on the "+" button on the Response Toolbar -> Select "SSE" and "OpenAI" from Response Column)
Voila! Now you can see the Server-Sent Events from OpenAPI with Proxyman in a more readable format.
SSE Tab
- ✅ Proxyman keeps the SSE data but try to prettify the JSON data.
OpenAI Tab
- ✅ Proxyman tries to accumulate the OpenAI's content key and show the final result. It's Similar to what we see in the ChatGPT app.
3.2 What next?
- Proxyman can capture HTTPS traffic from iOS device, iOS Simulator and Android devices.
Proxyman is a high-performance macOS/Windows/Linux app, which enables developers to capture HTTPs traffic on iOS device, iOS Simulator and Android devices.
Get it at https://proxyman.com