How to capture and inspect HTTP(s) Traffic from your iOS (iPhone, iPad) using Proxyman for macOS
This mini-blog would demonstrate how to use Proxyman for macOS to capture and see HTTP/HTTPS Traffic from your iOS Devices.
This blog will cover the following:
- How to install & trust Proxyman Certificate on your iOS Devices
- How to inspect HTTP(s) Traffic from Unsplash app on your iOS (iPhone, iPad)
- See HTTPS Content Request/Response in plain text
- Open content with Editing tool
- Pin a domain to see all requests/responses of this domain
1. Configuration:
1.1/ Download the app
If you haven't downloaded the app, let download the latest version from Proxyman website https://proxyman.com/.
If you're a new Proxyman user, please follow Getting Started with Proxyman.
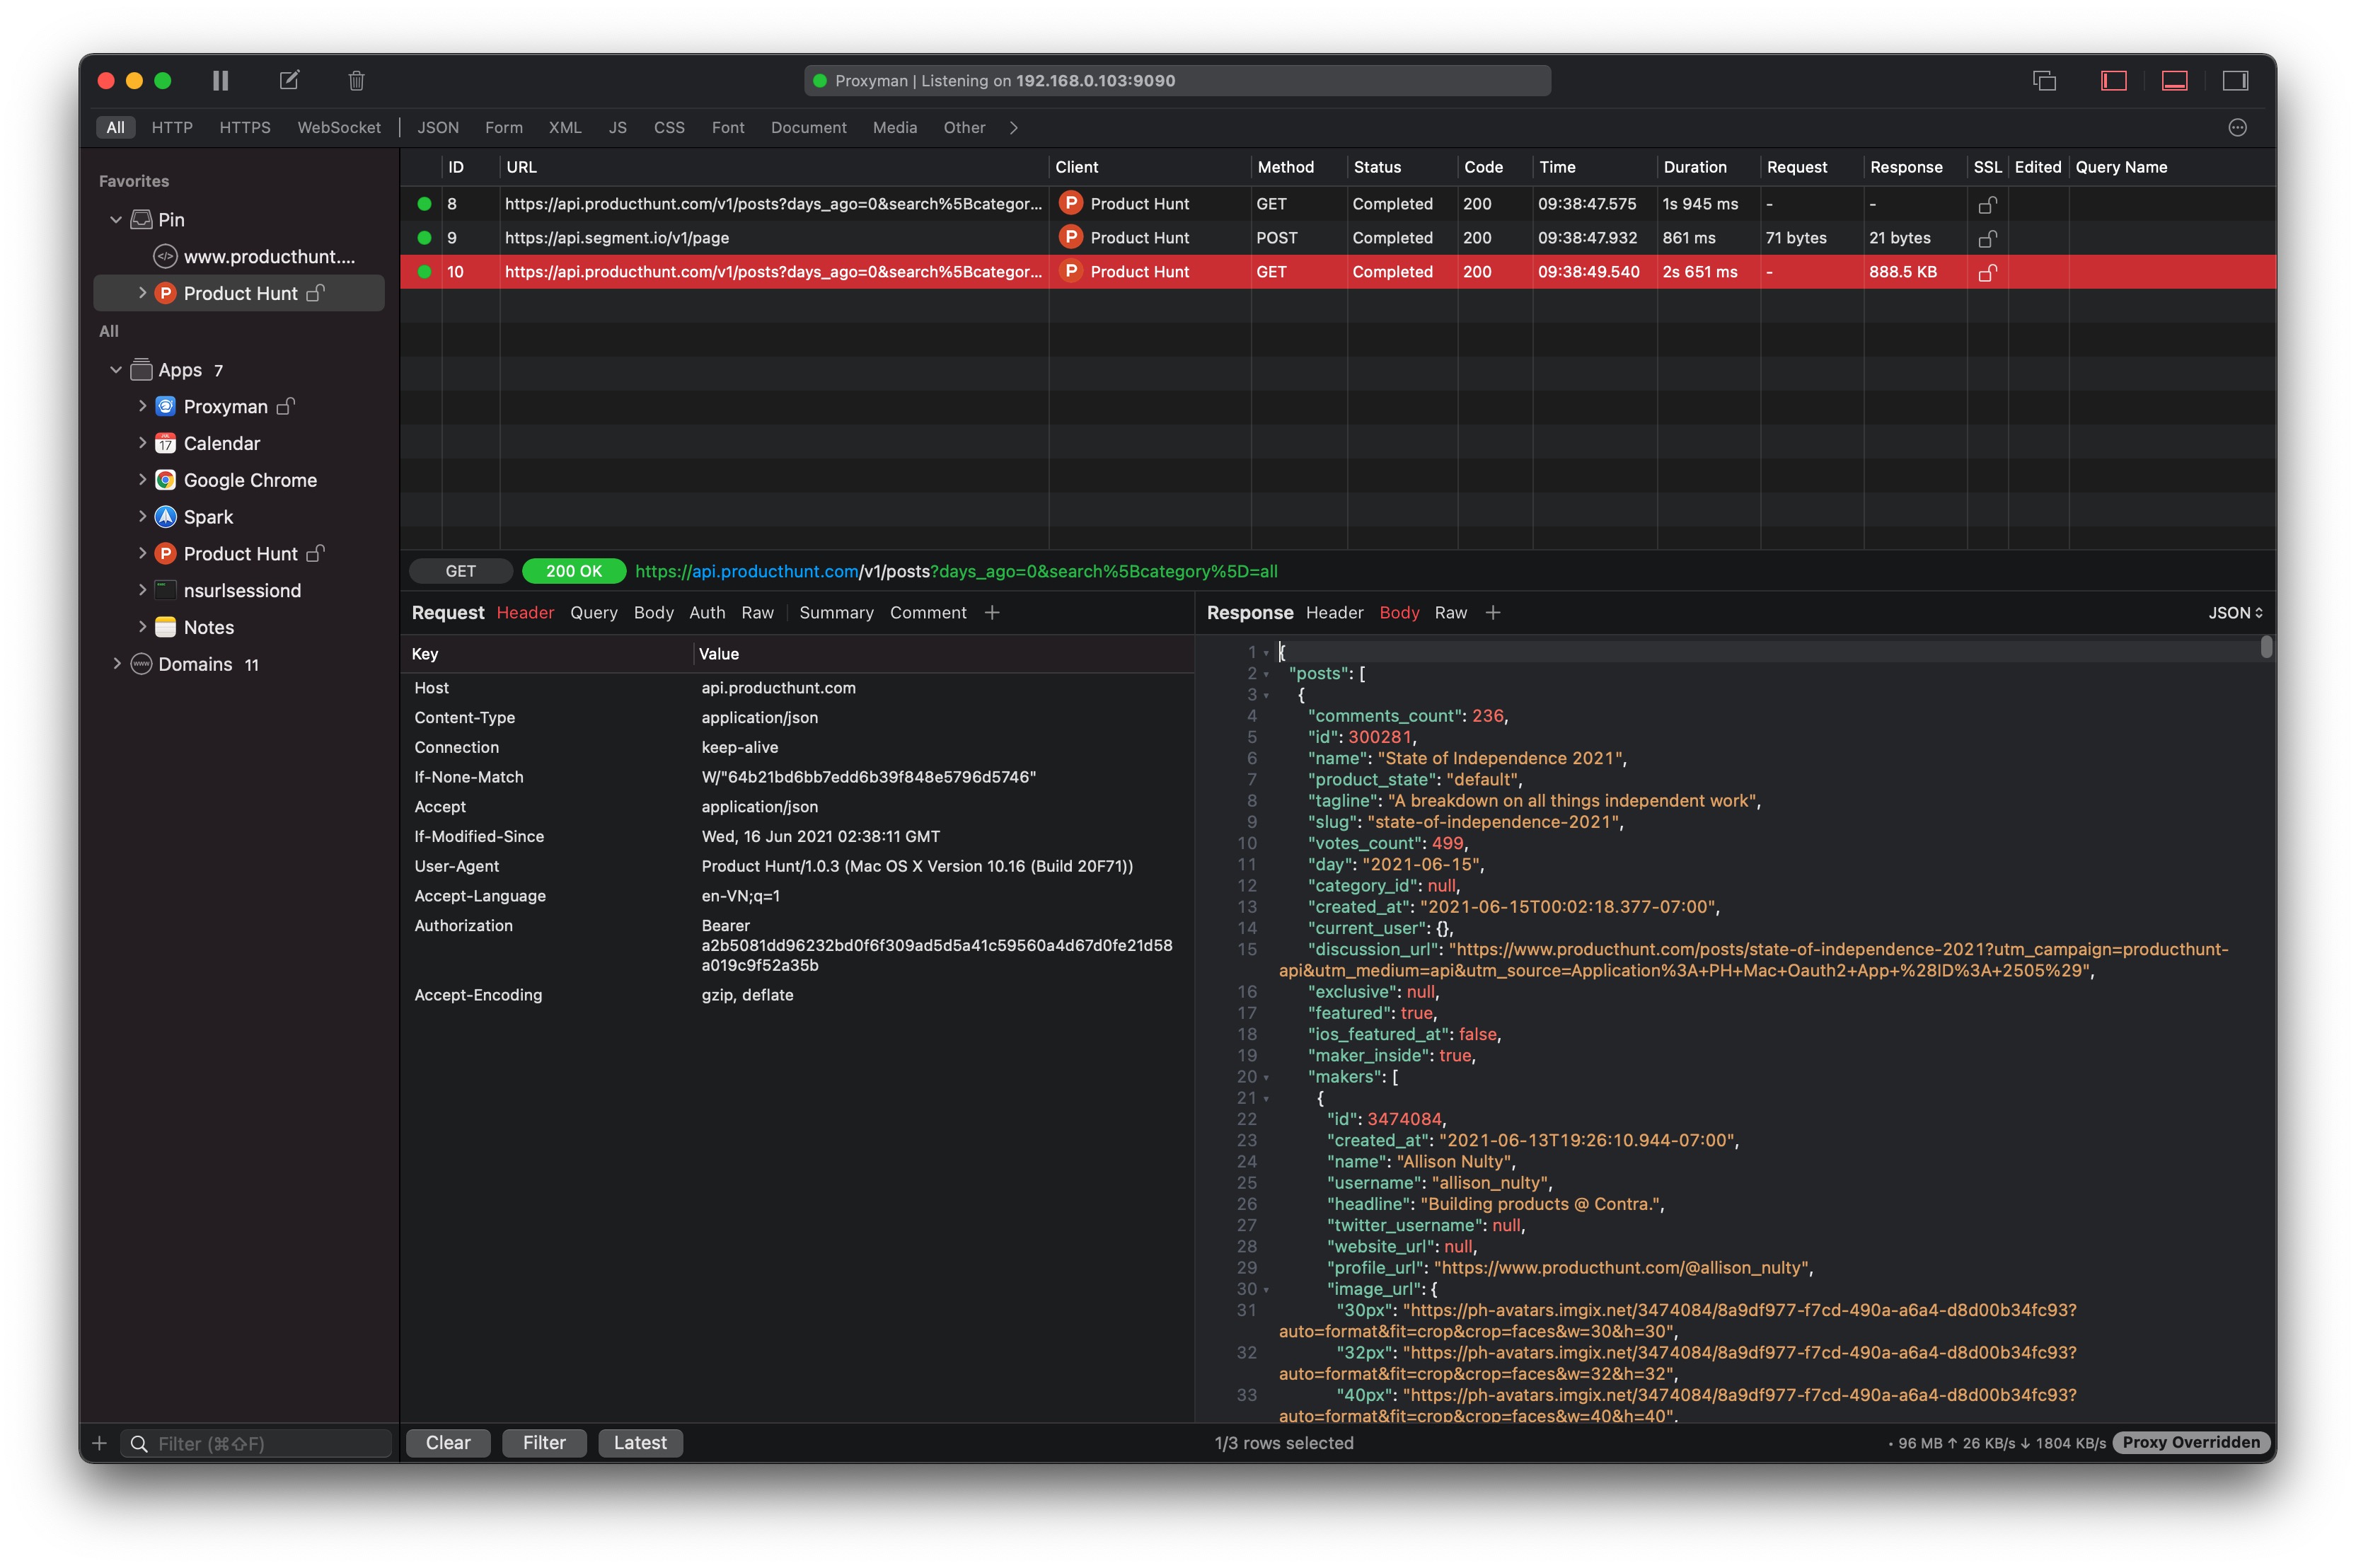
If you've done, you can see the HTTP/HTTPS Traffic from your macOS machine.
1.2/ Setup the Certificate for my iPhone
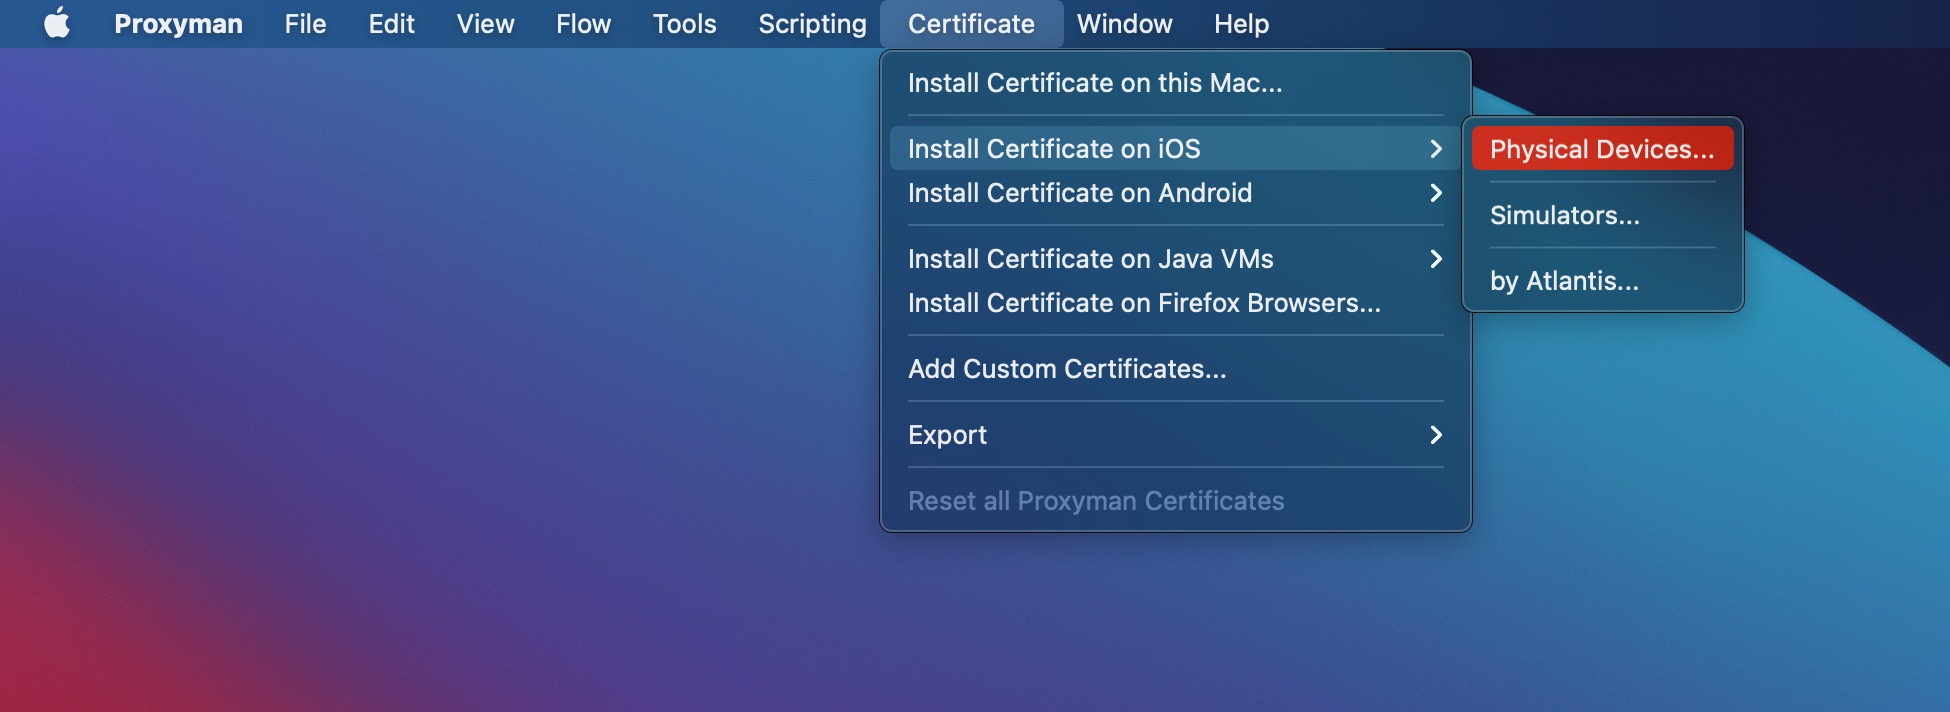
Please go to Certificate Menu -> Install Certificate on iOS -> Physic Devices.
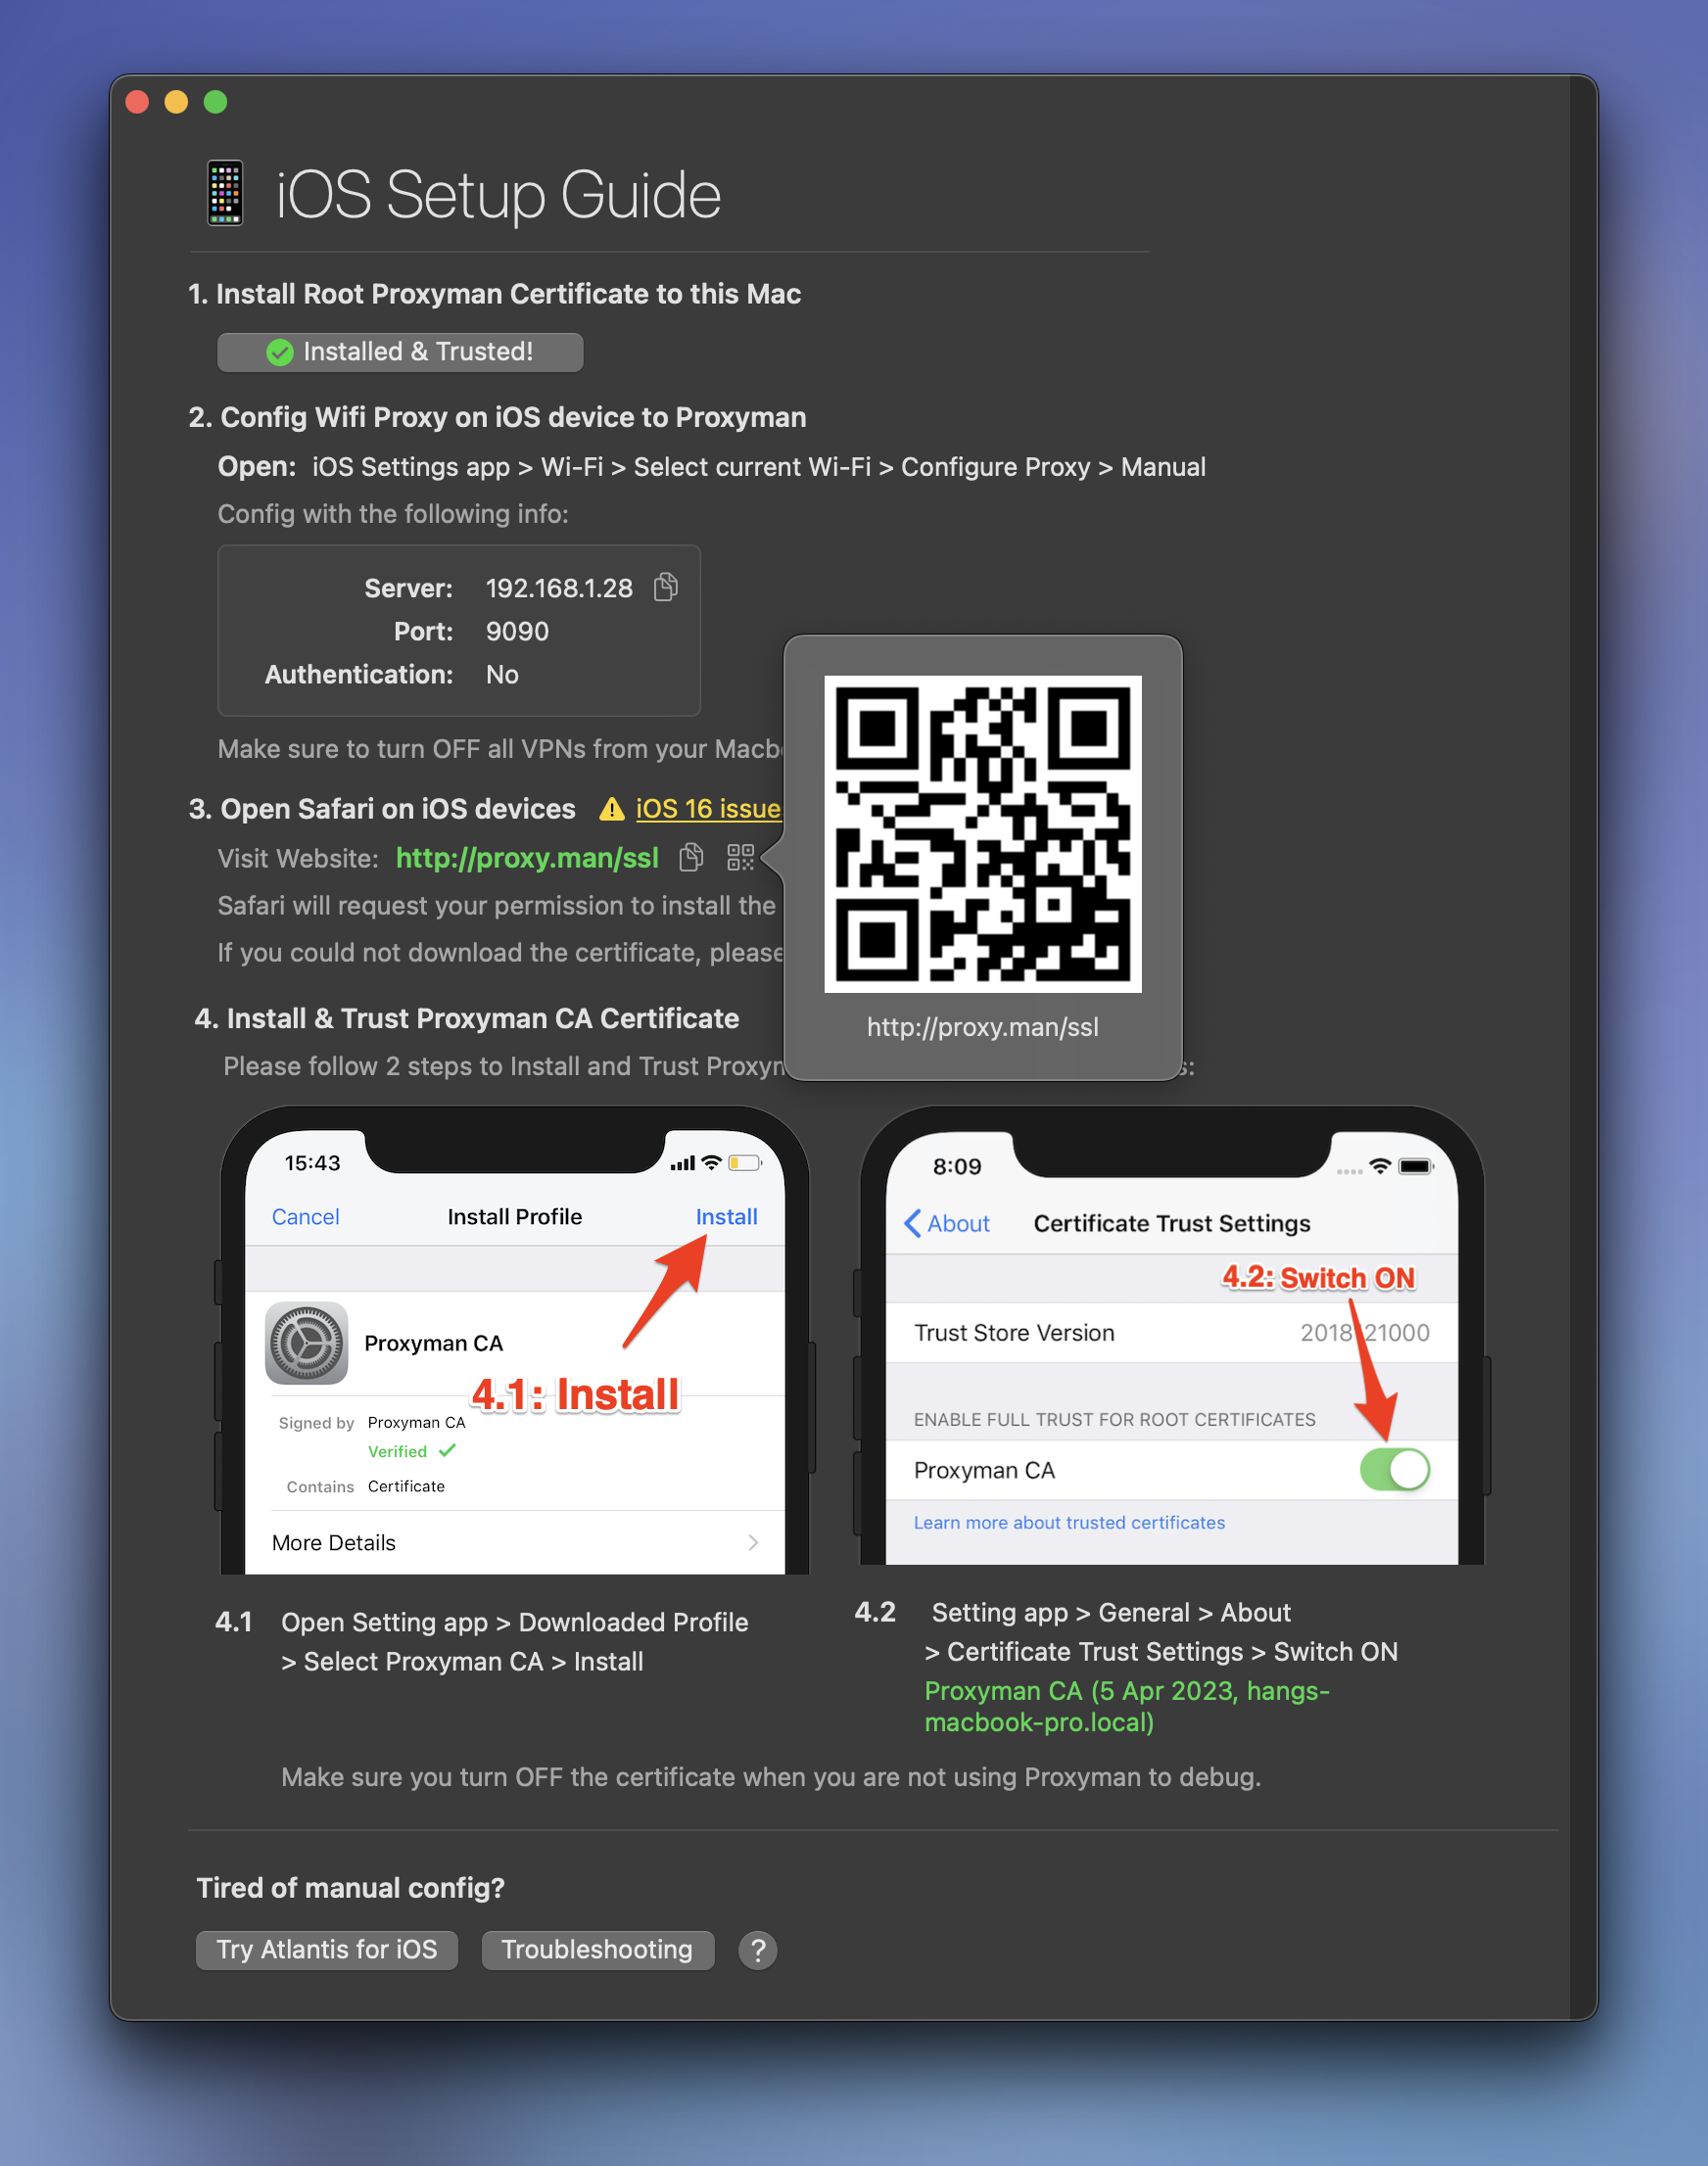
iOS Setup Guidline would show you all required steps:
1.3/ Config Wifi pointing to Proxyman
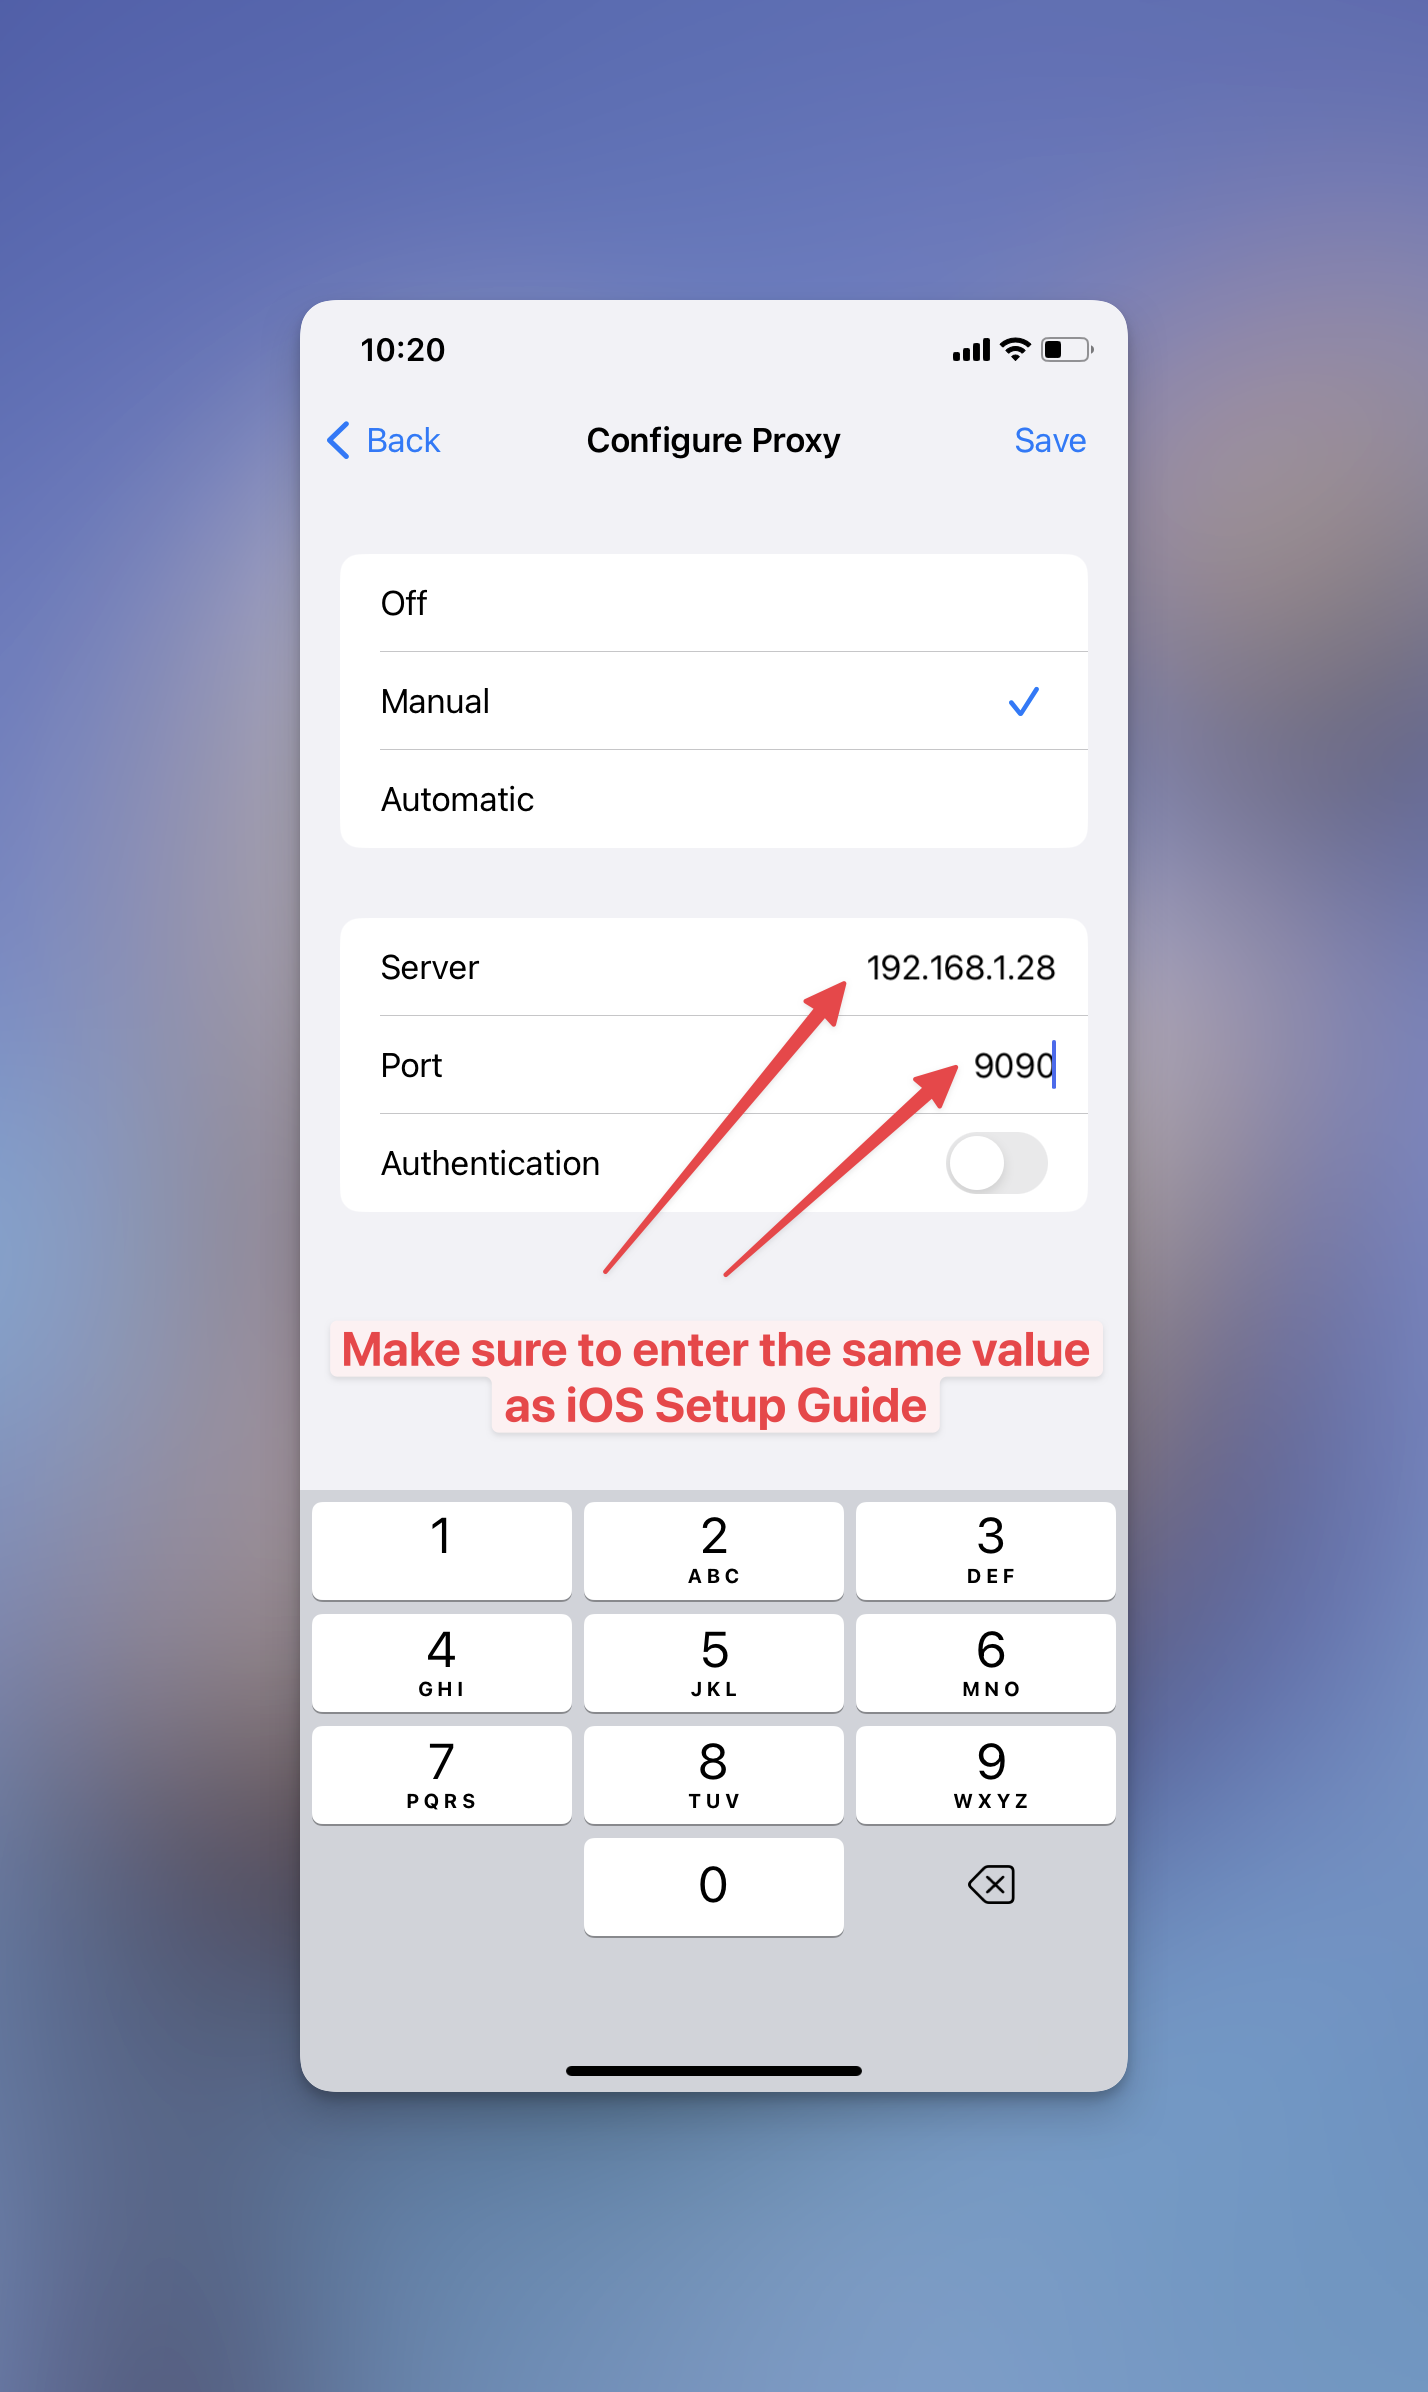
Get your iPhone device -> Go to Setting App -> Wifi -> (Select current Wifi) -> Configure Proxy -> Manual. Then I used the same Server and Port on Guideline to configure Proxy on my iPhone.
Please update the IP 192.168.0.103 to the IP, which is displayed in the iOS Guideline Windows.
1.4/ Install Proxyman Profile
At this step, we can see all requests coming from my device on Proxyman app. However, in order to see content of Responses, I will need to install Proxyman Certificate.
You can scan the QR code with your phone to be quickly navigated to http://proxy.man/ssl OR
Go to Safari -> http://proxy.man/ssl -> Click on Allow button.
If you could not access this domain, make sure you turn OFF all VPN apps on your iPhone devices. Otherwise, please follow this troubleshooting.
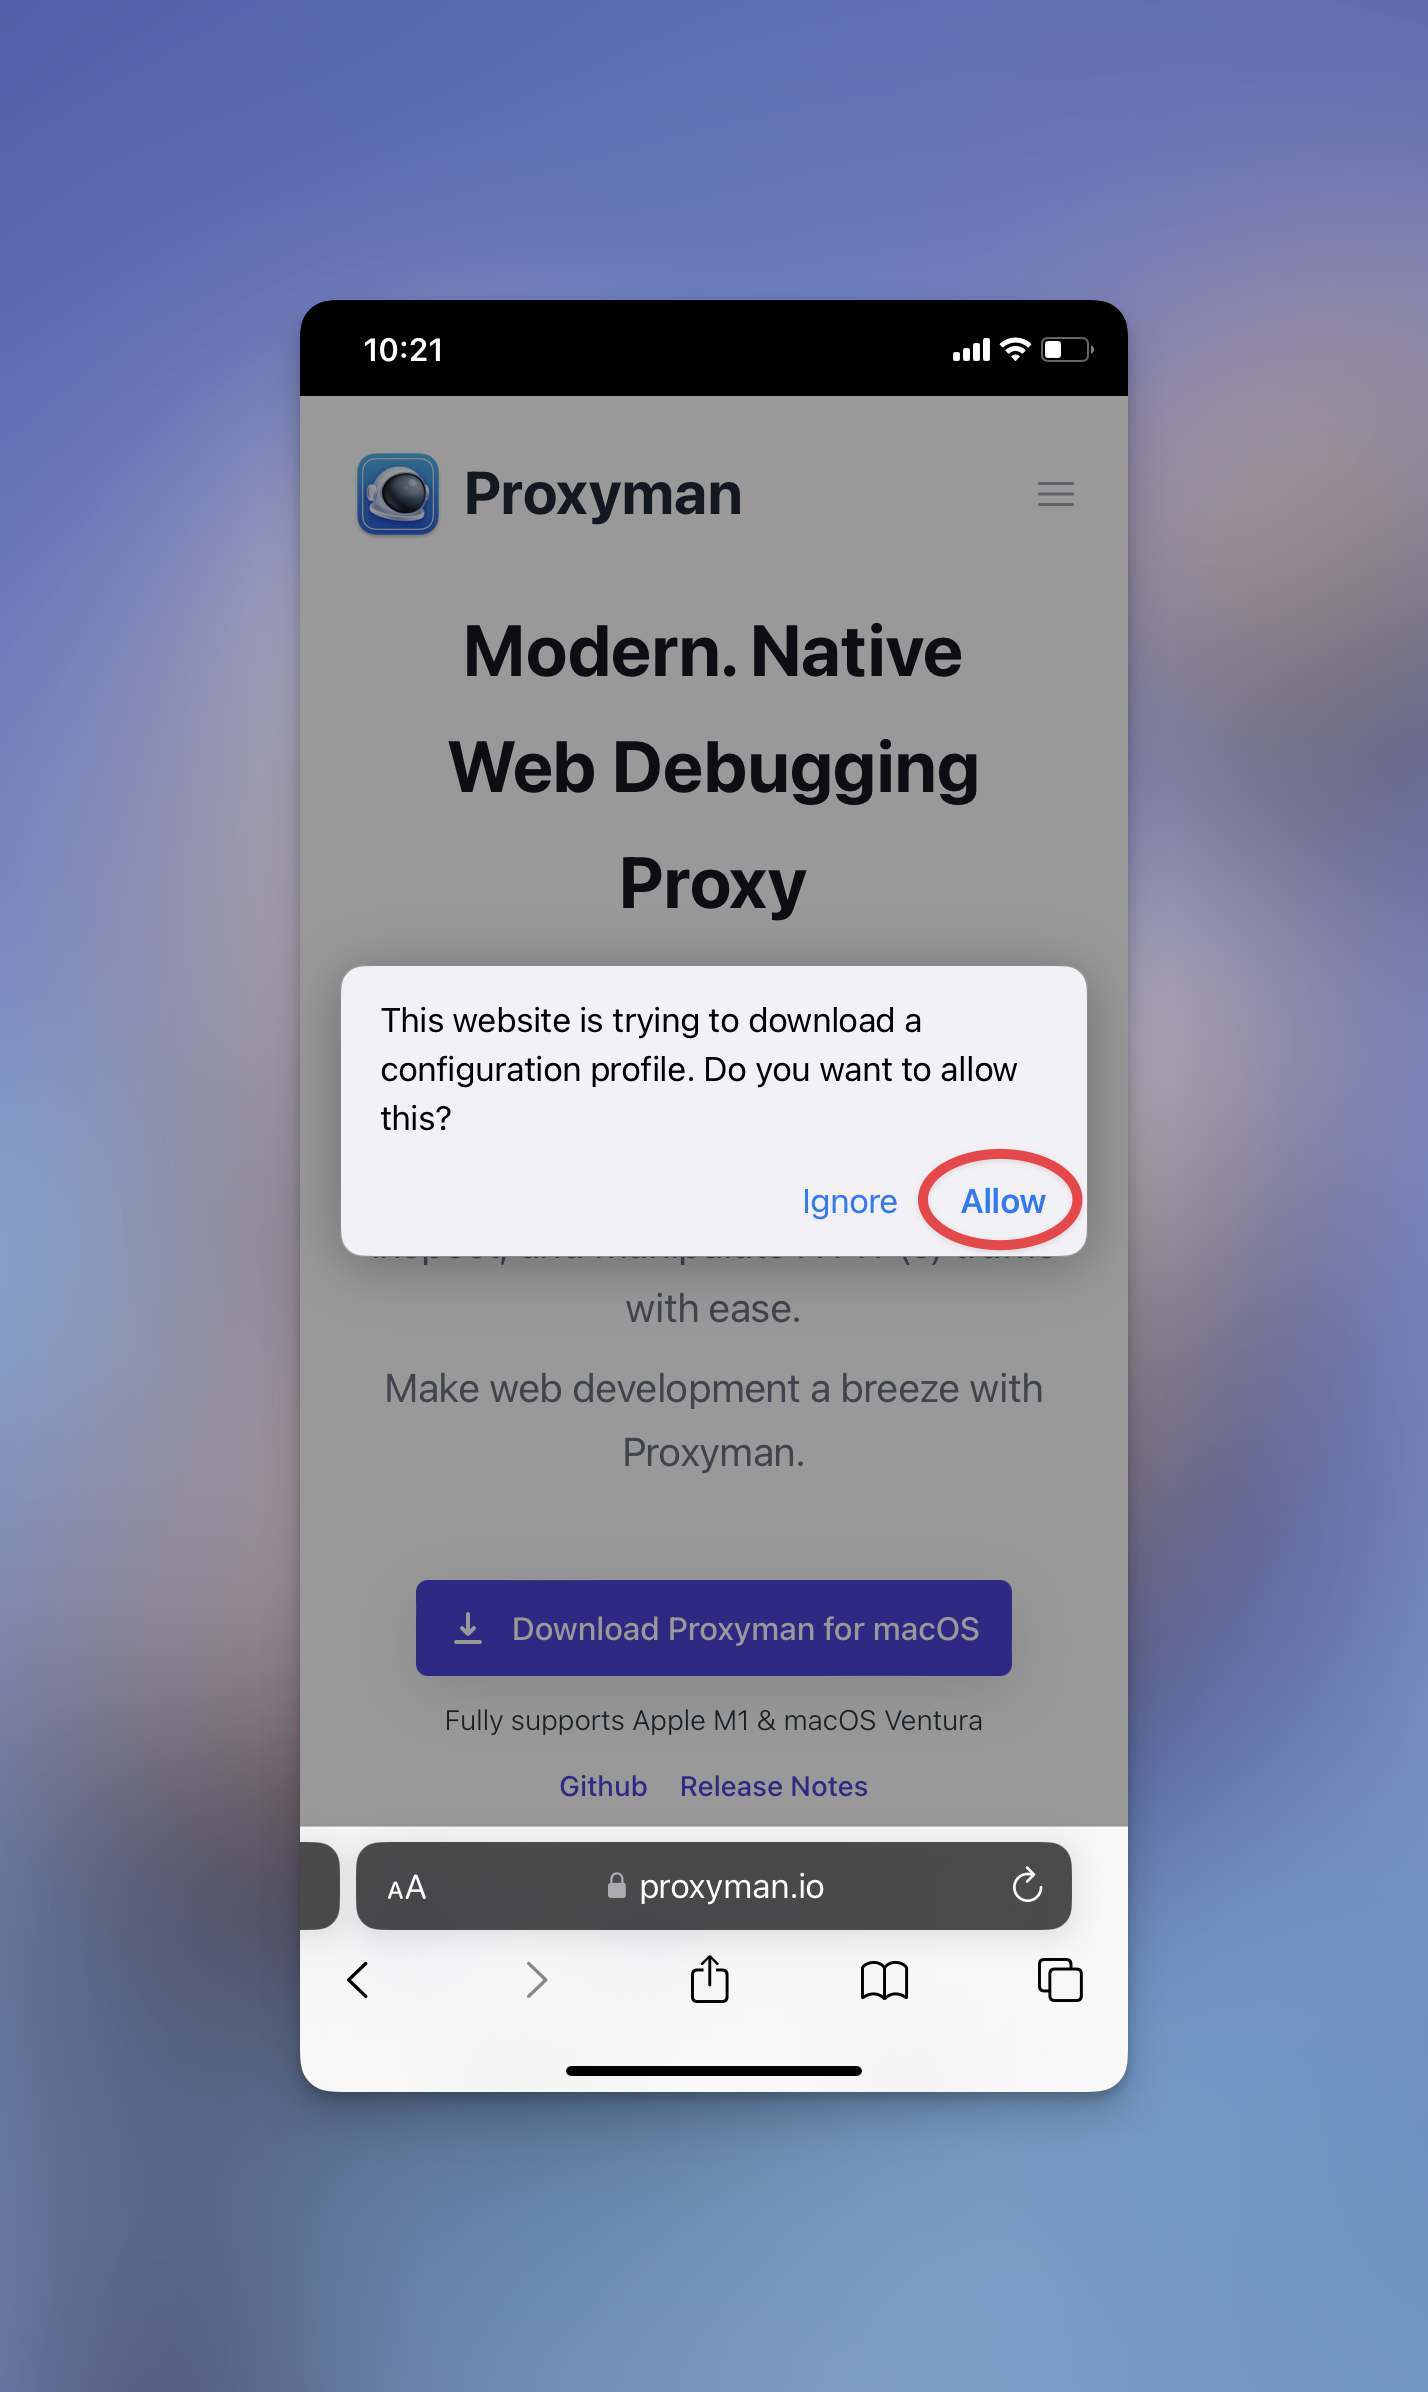
1.5/ Install Proxyman Certificate
Then go to Setting App -> Profiles Downloaded -> Select Proxyman CA -> Install
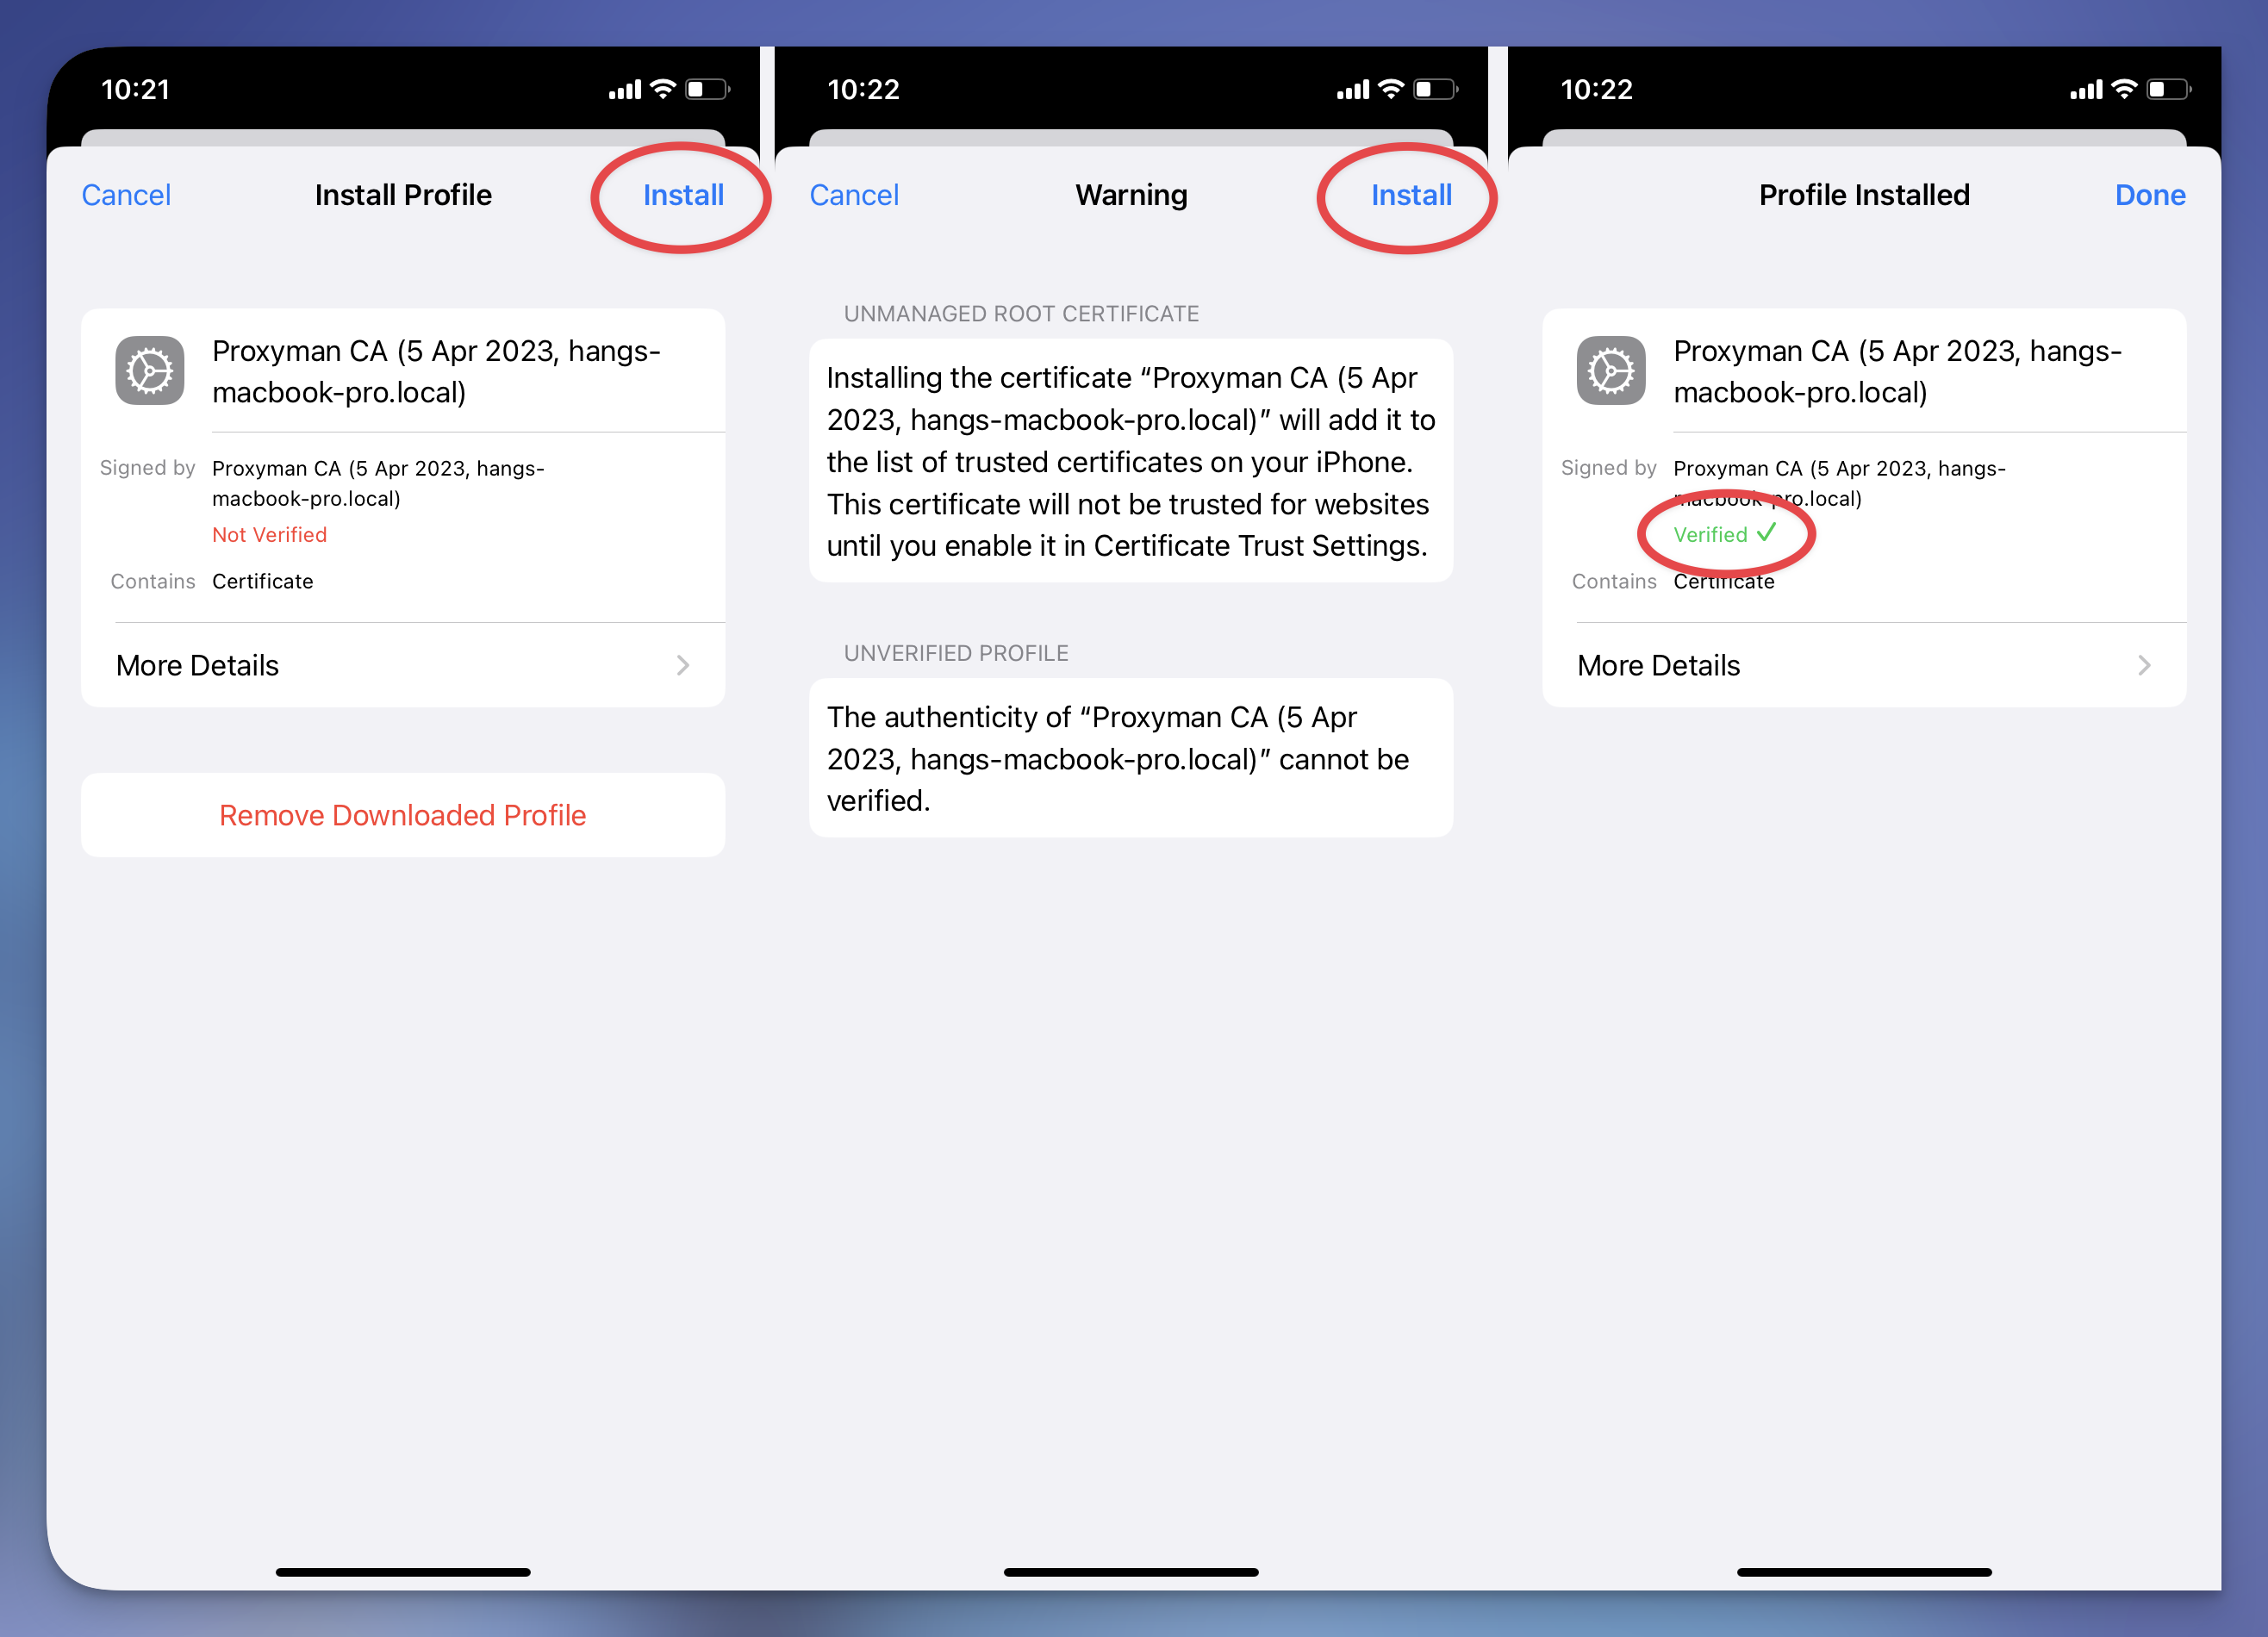
1.6/ Trust Proxyman Certificate
From iOS 10.3+, we need to trust certificate manually. Thus, final step is go to Setting App -> General -> About -> Certificate Trust Settings -> Turn ON “Enable full trust for root certificates”
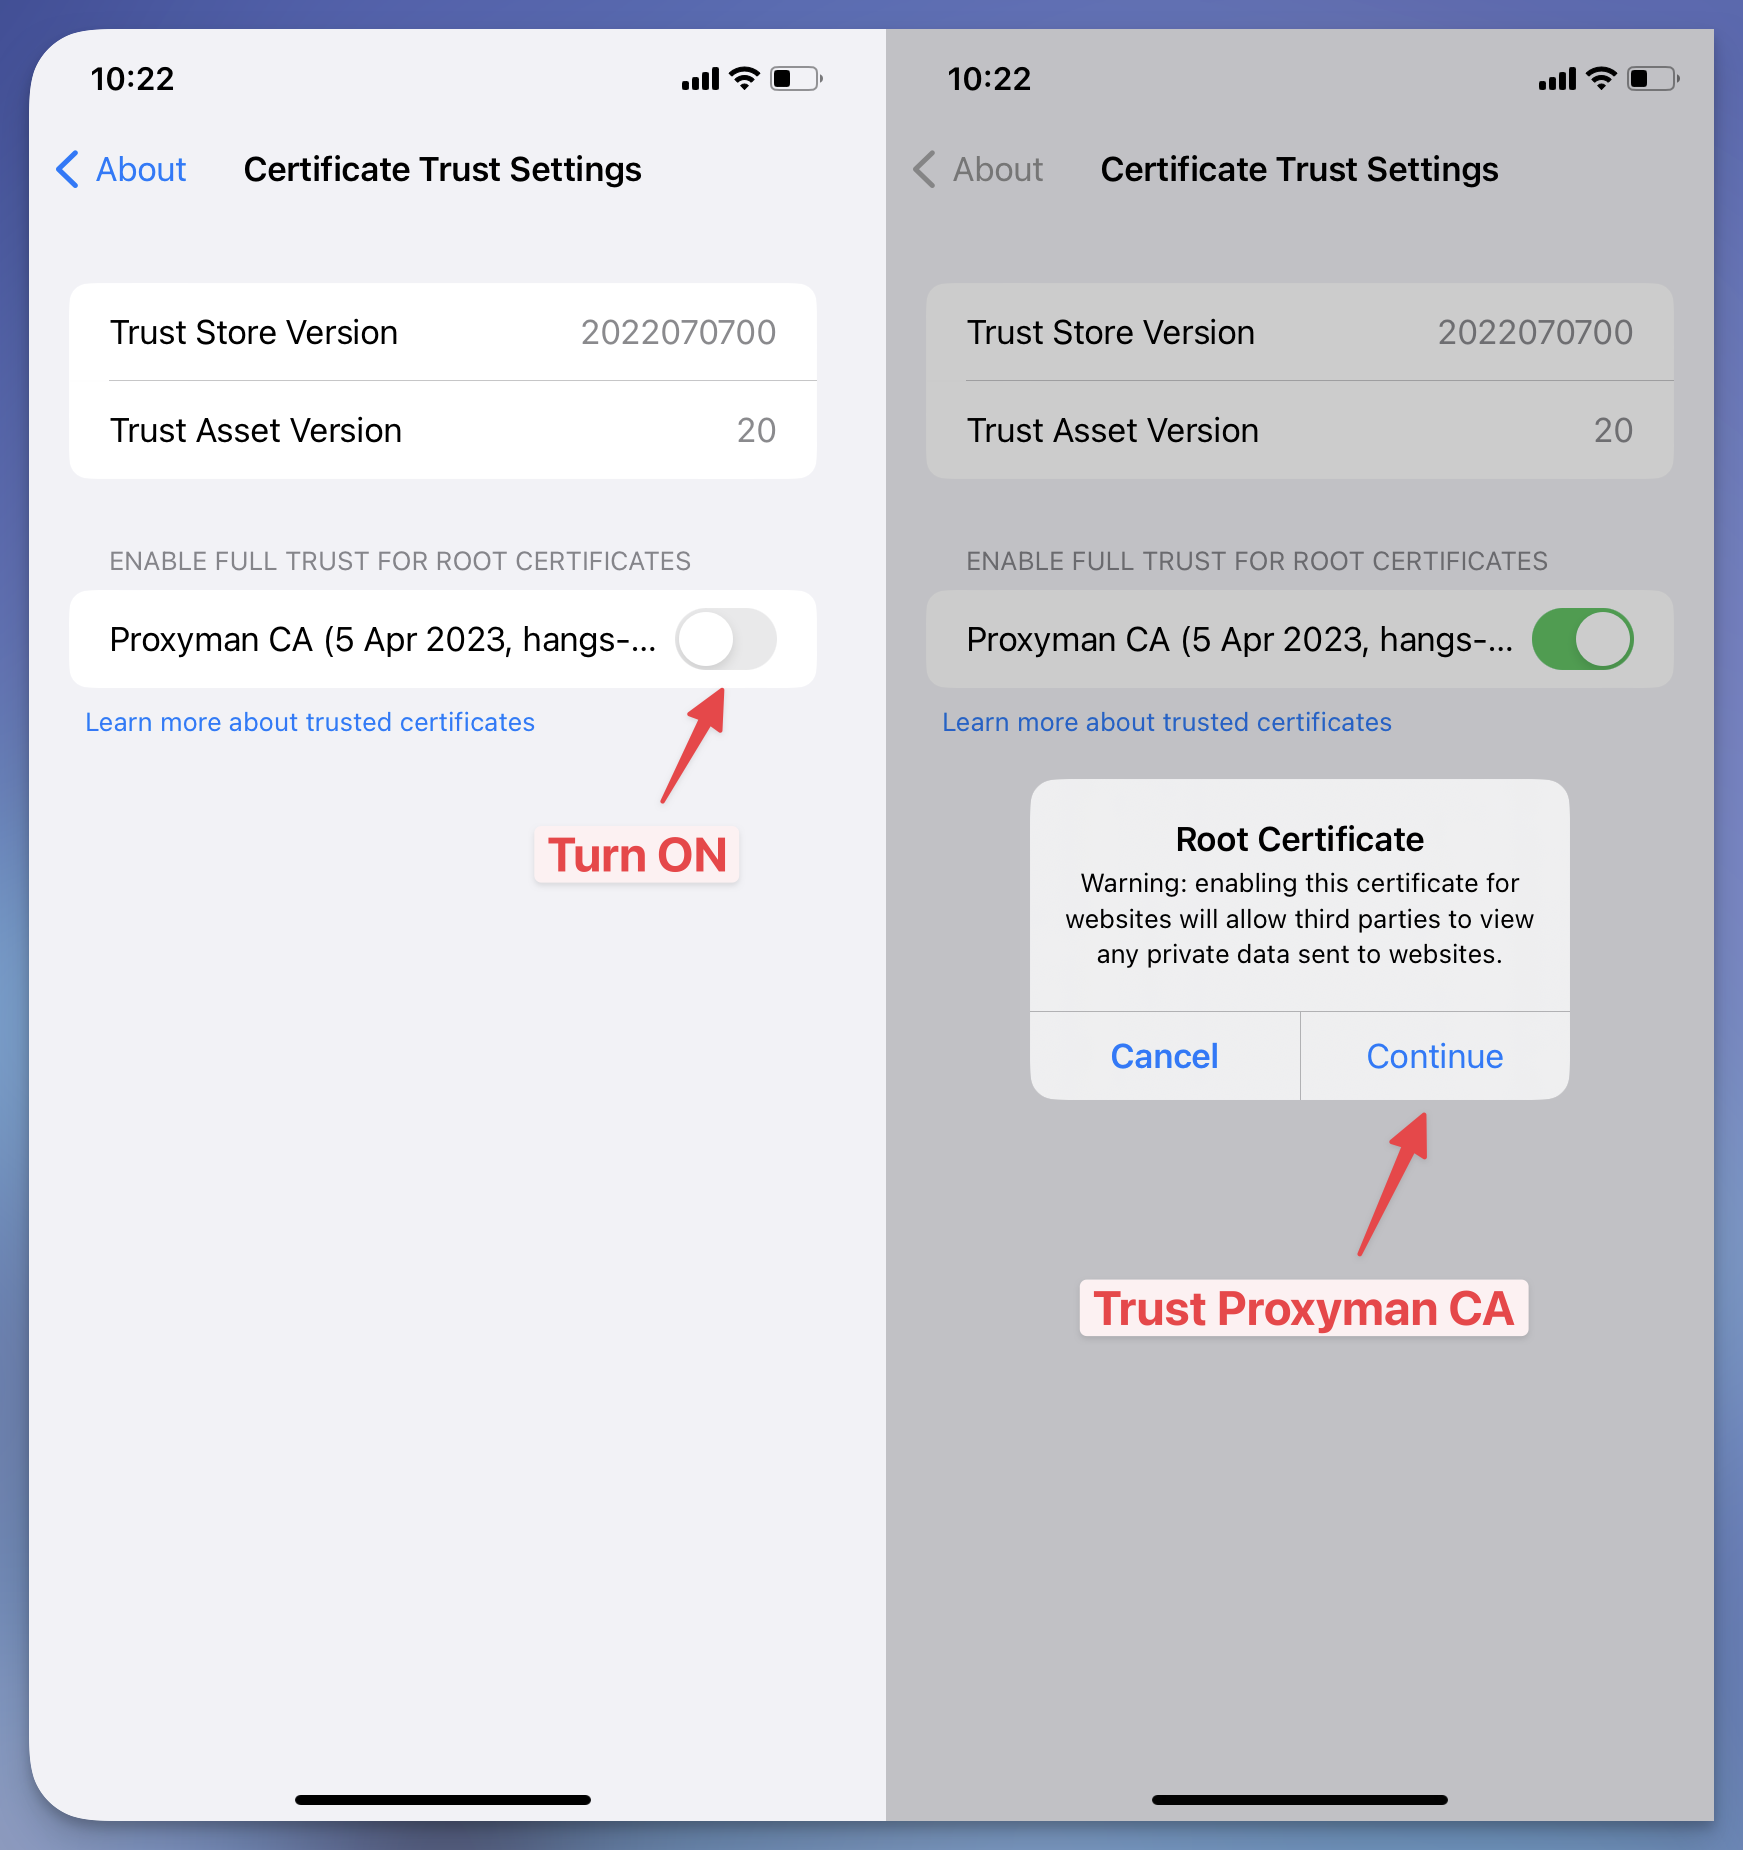
2. Time to debug Unsplash
OK, enough config. It’s time to actually see HTTP requests/ responses coming from Unsplash app.
From now, we can see all iPhone’s requests showed up after we finished configuring a proxy.
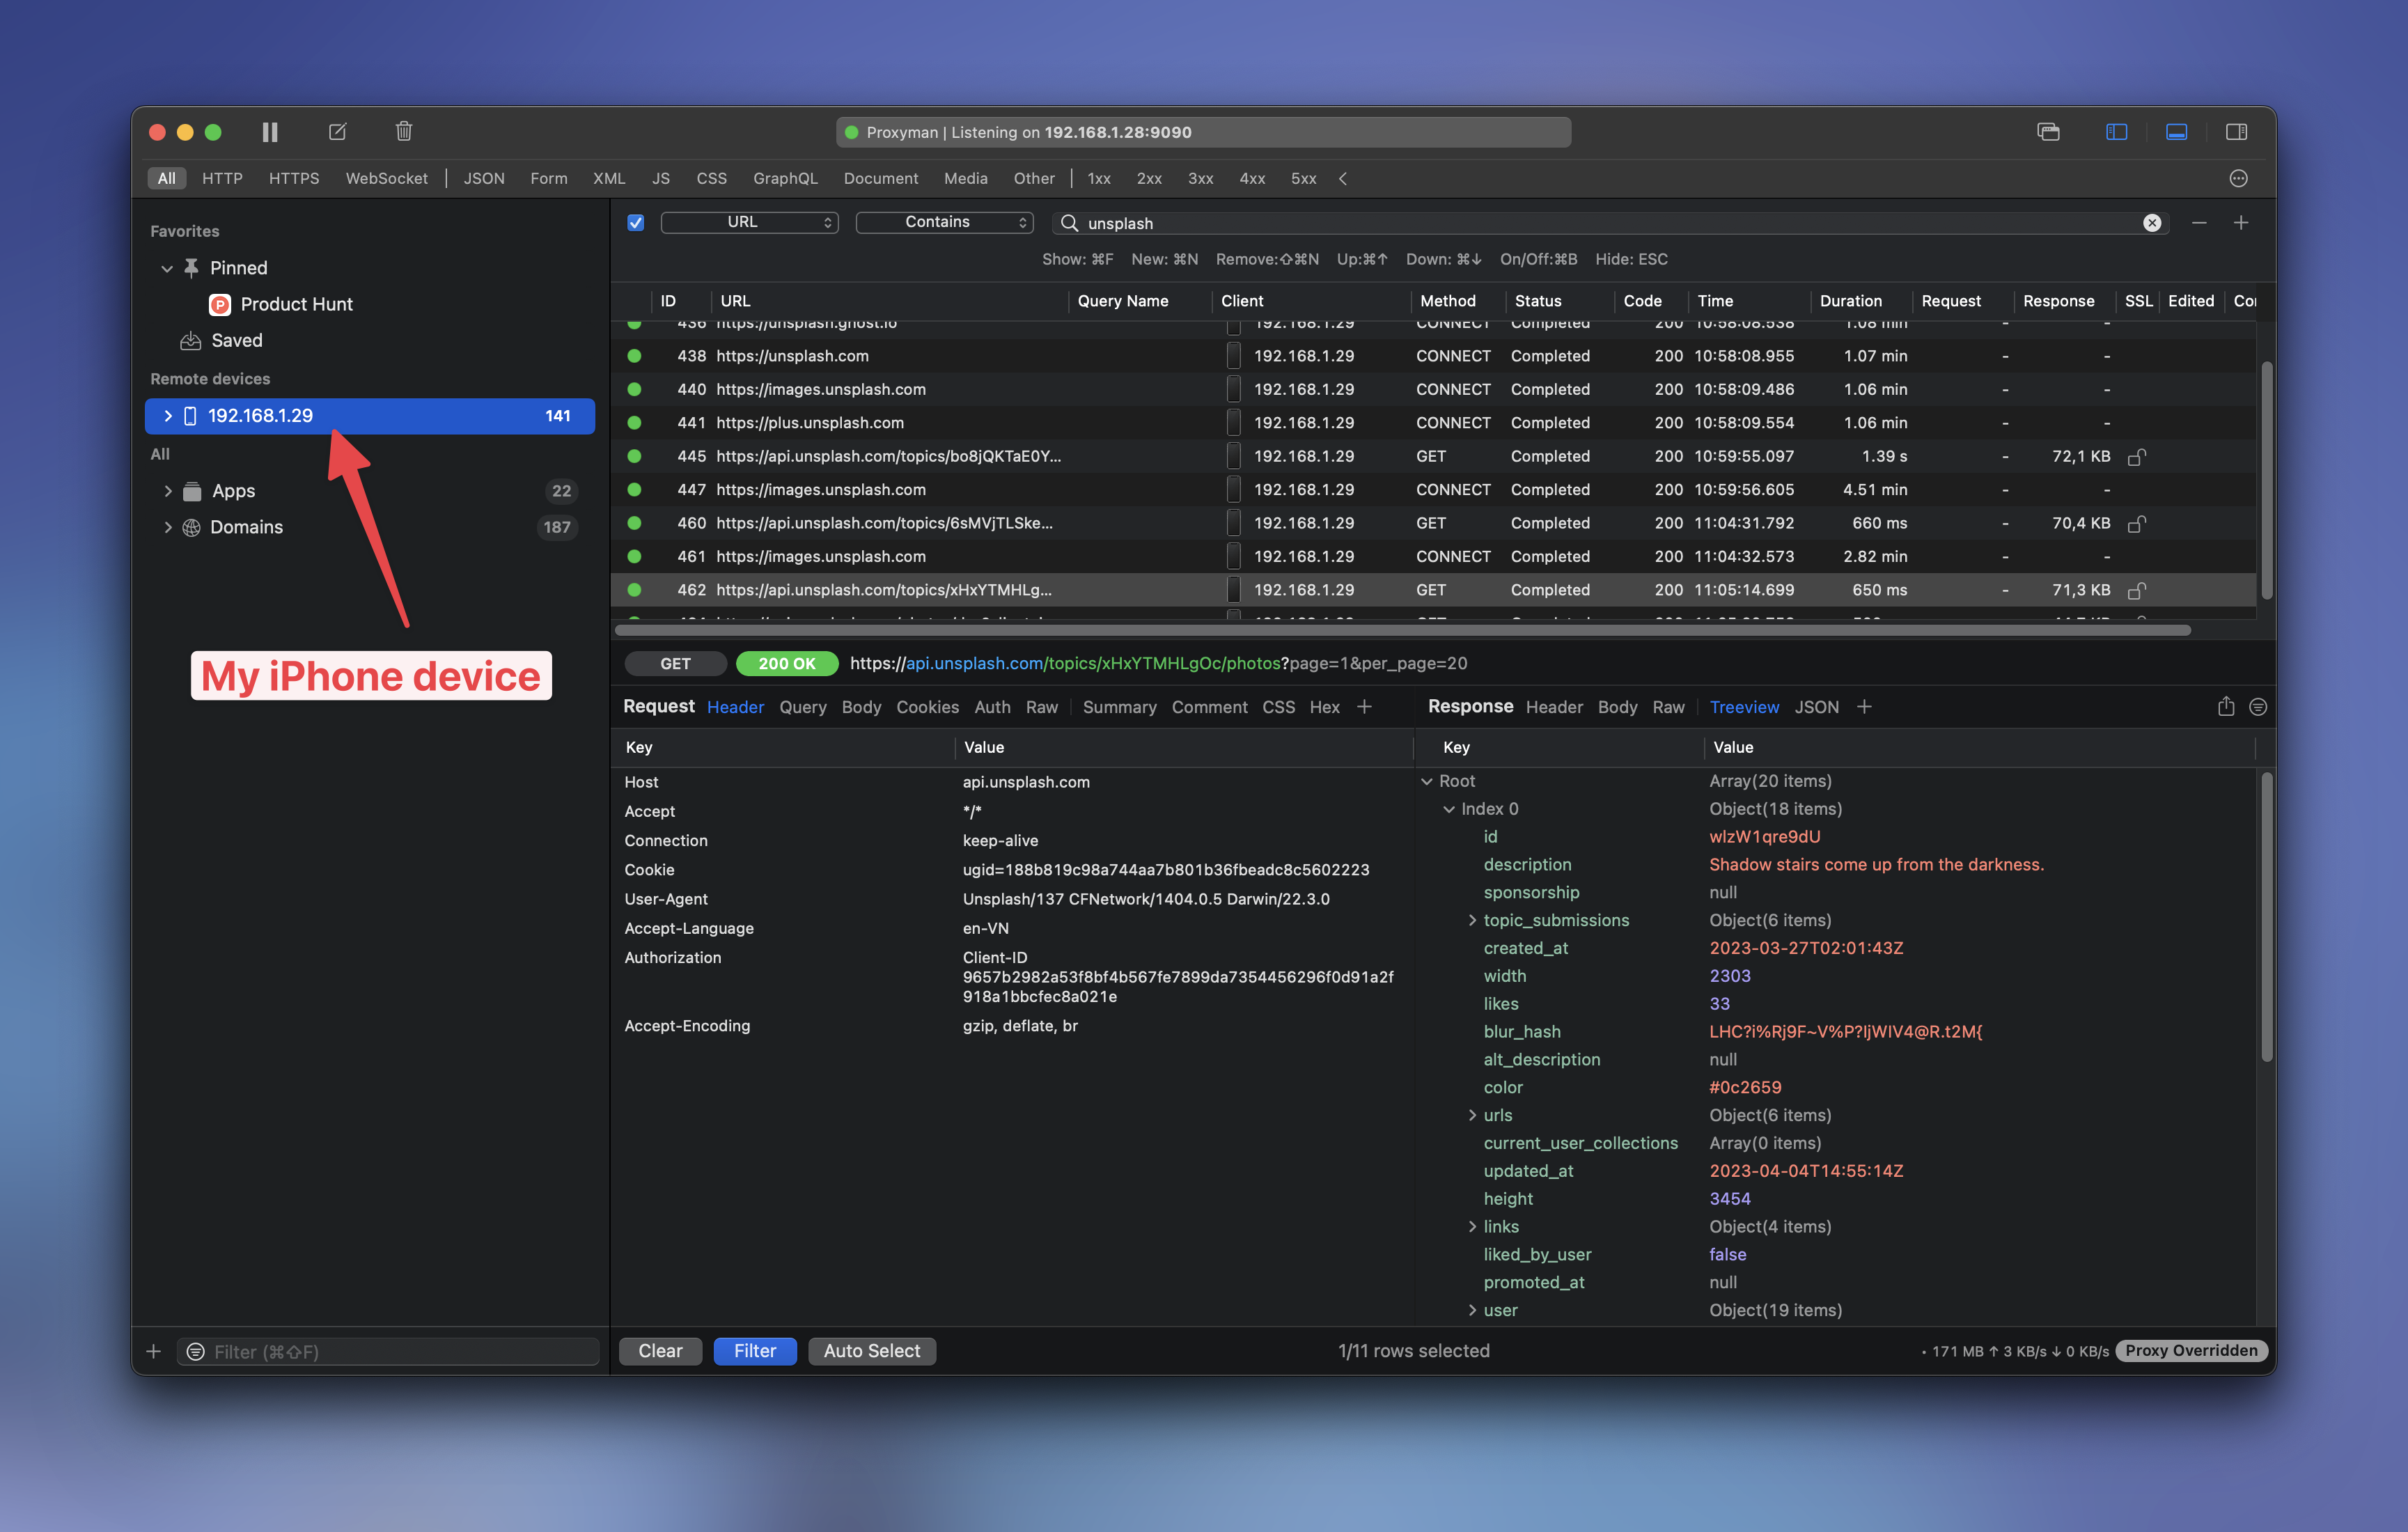
2.1/ Search and Pin a domain
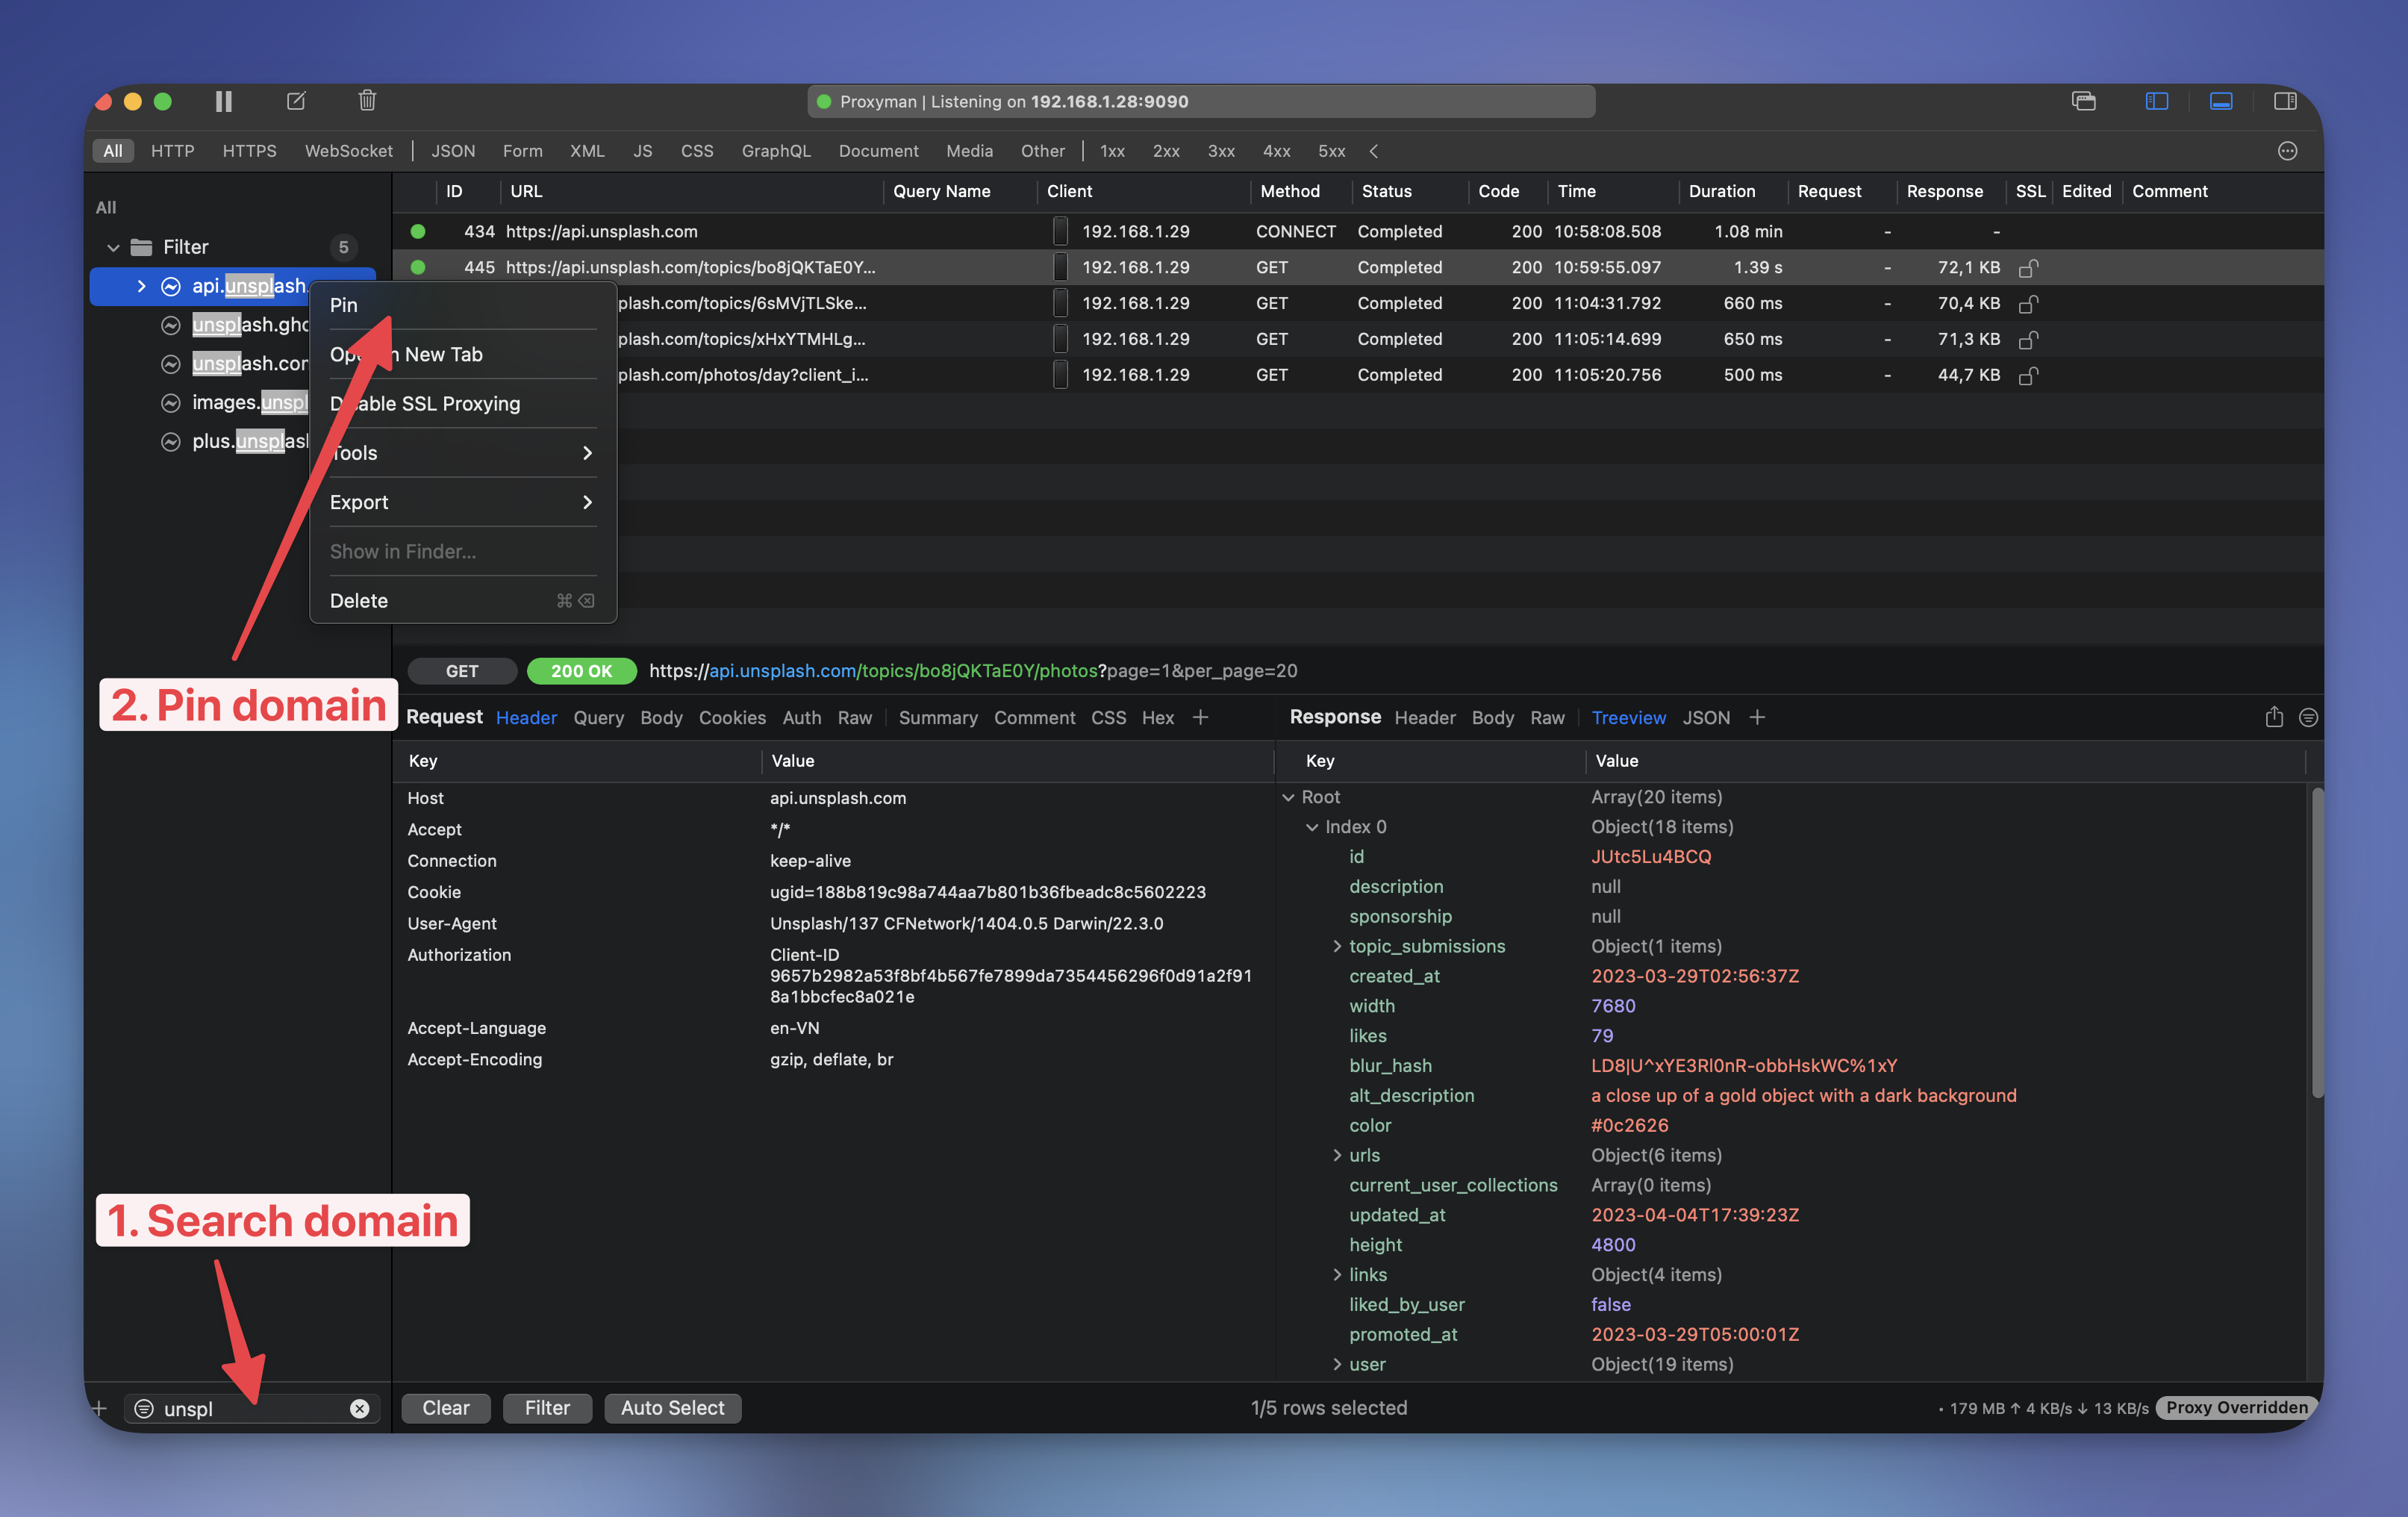
First, We search for app Unsplash with Command+Shift+F (You can also search the app using Search bar).
Then, right click and select Pin. This is one of interesting features of this app. We can Drag & Drop a specific domain into Pin section. As soon as we pin a domain, Proxyman automatically enables SSL Proxying for this domain too.
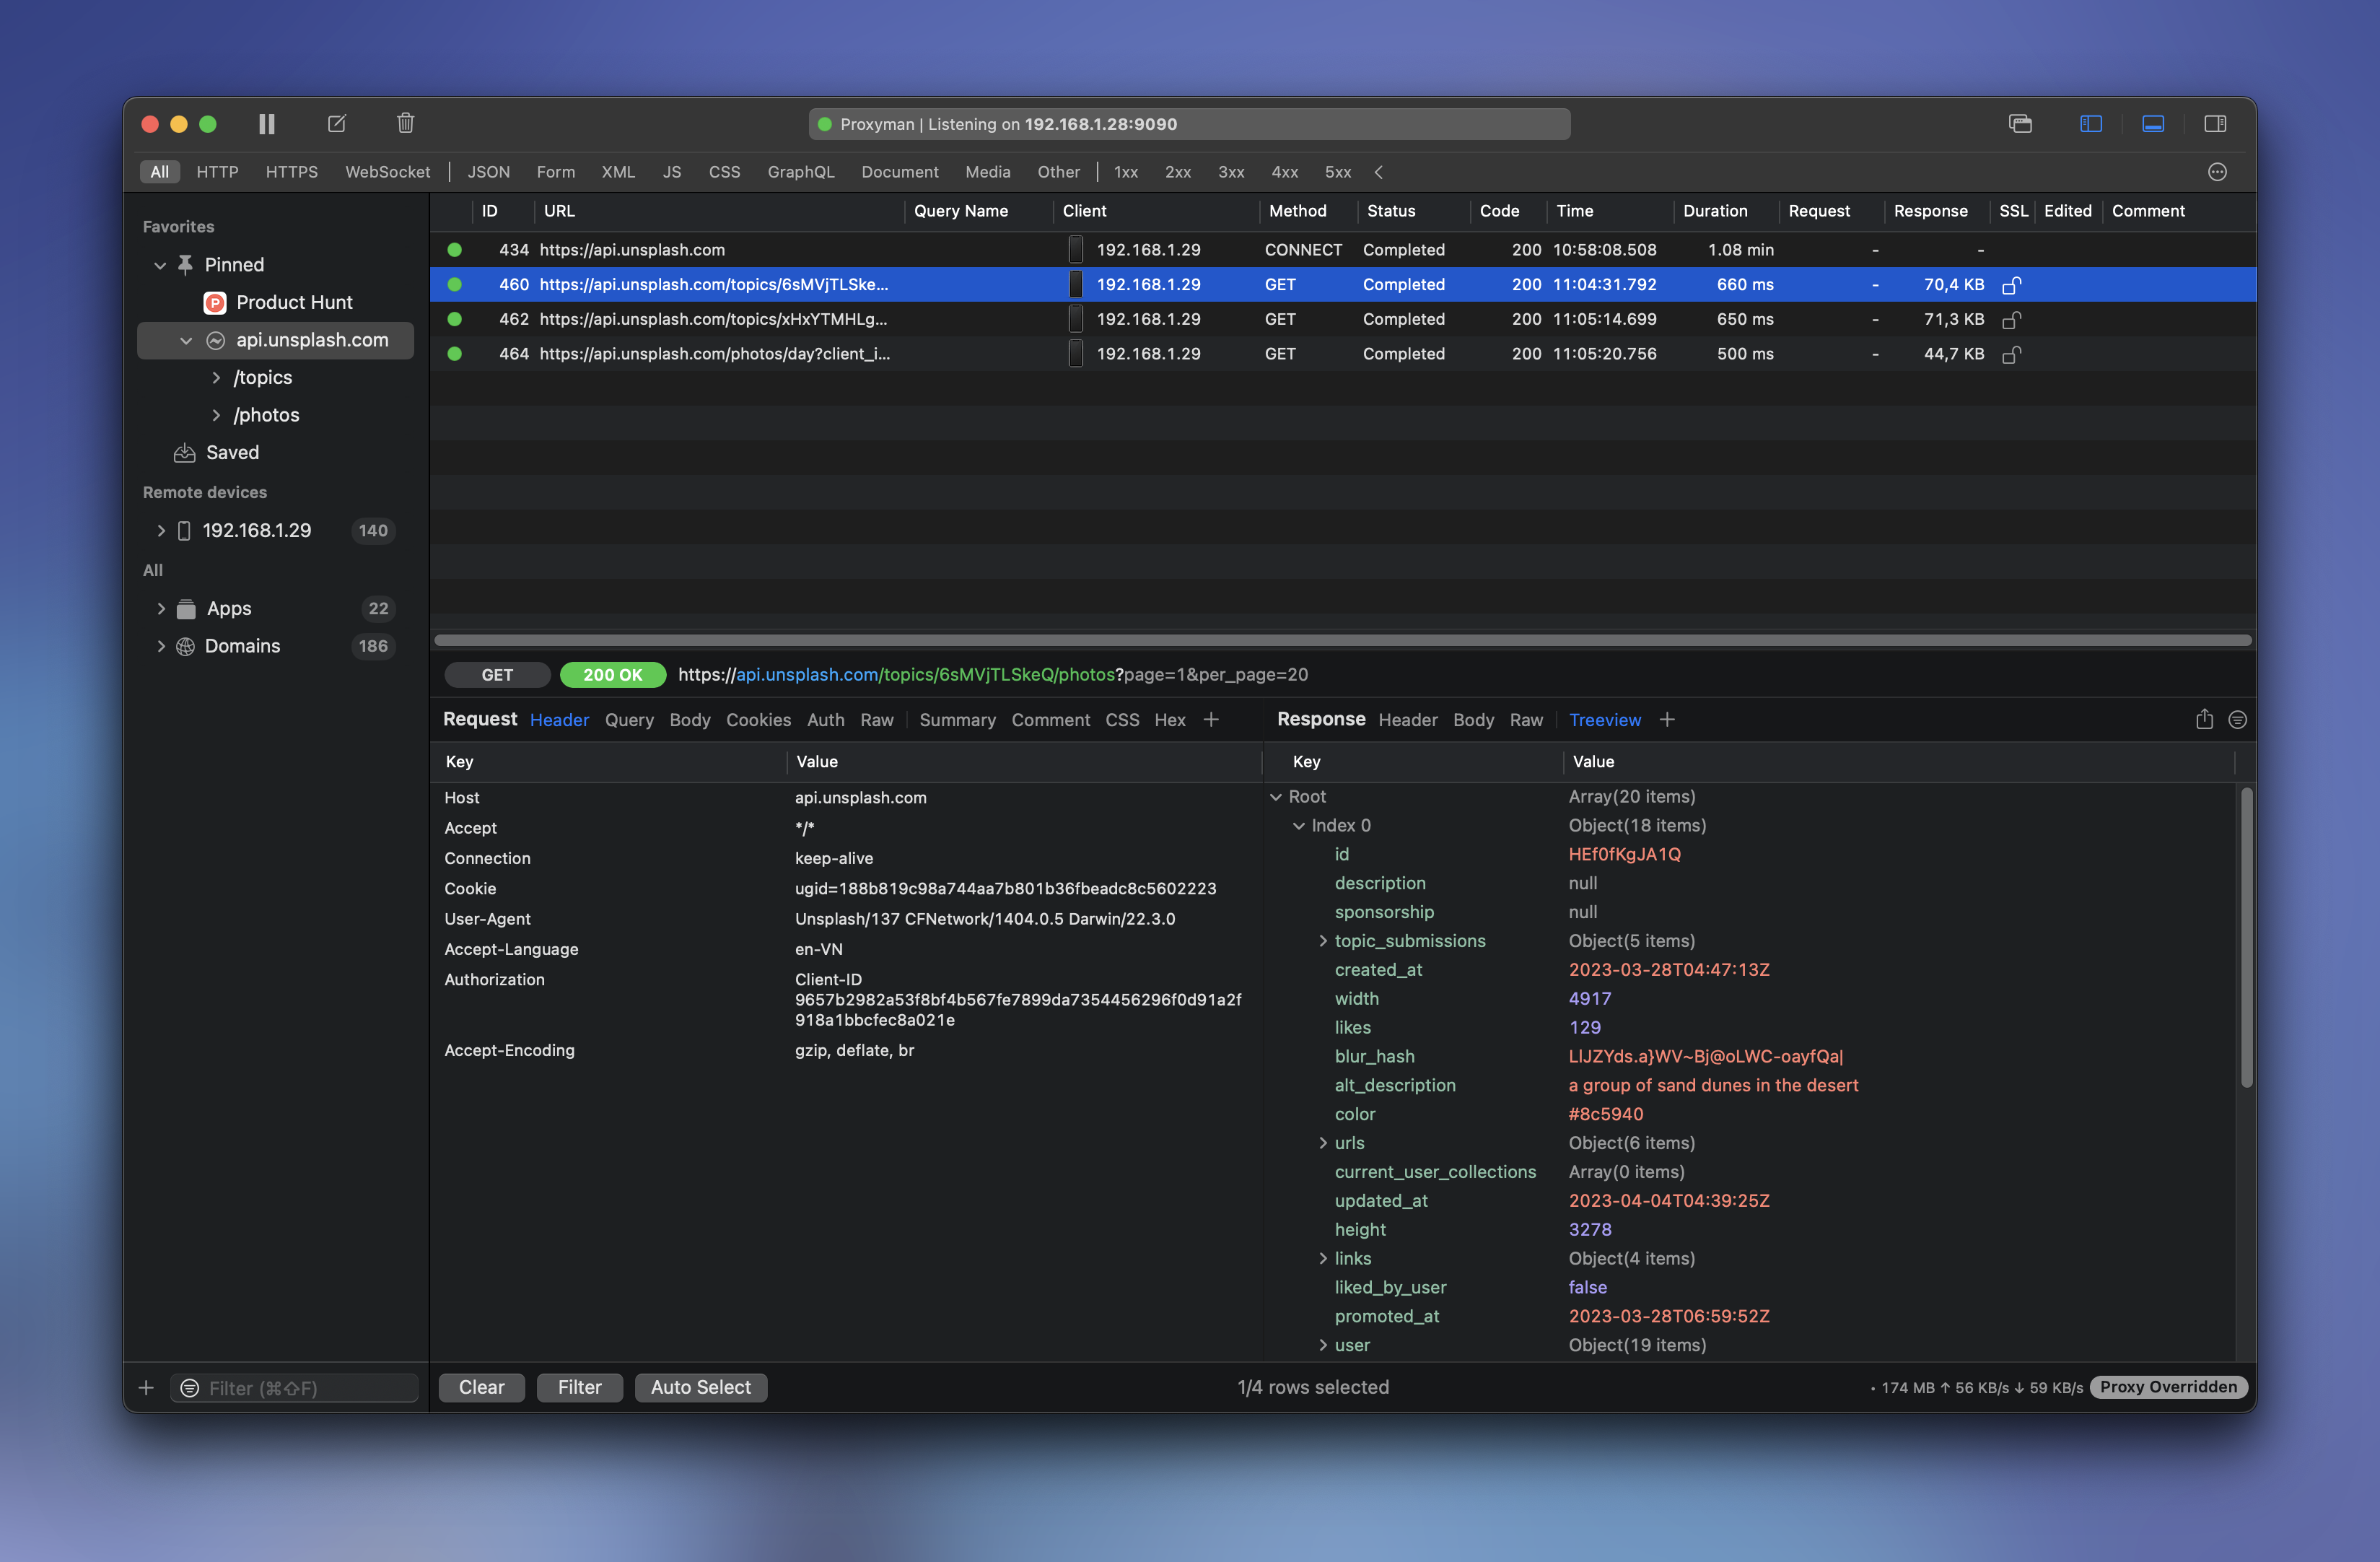
2.2/ See decrypted HTTPS Content
Make a request again, you can see the HTTPS Request/Response in plain text.
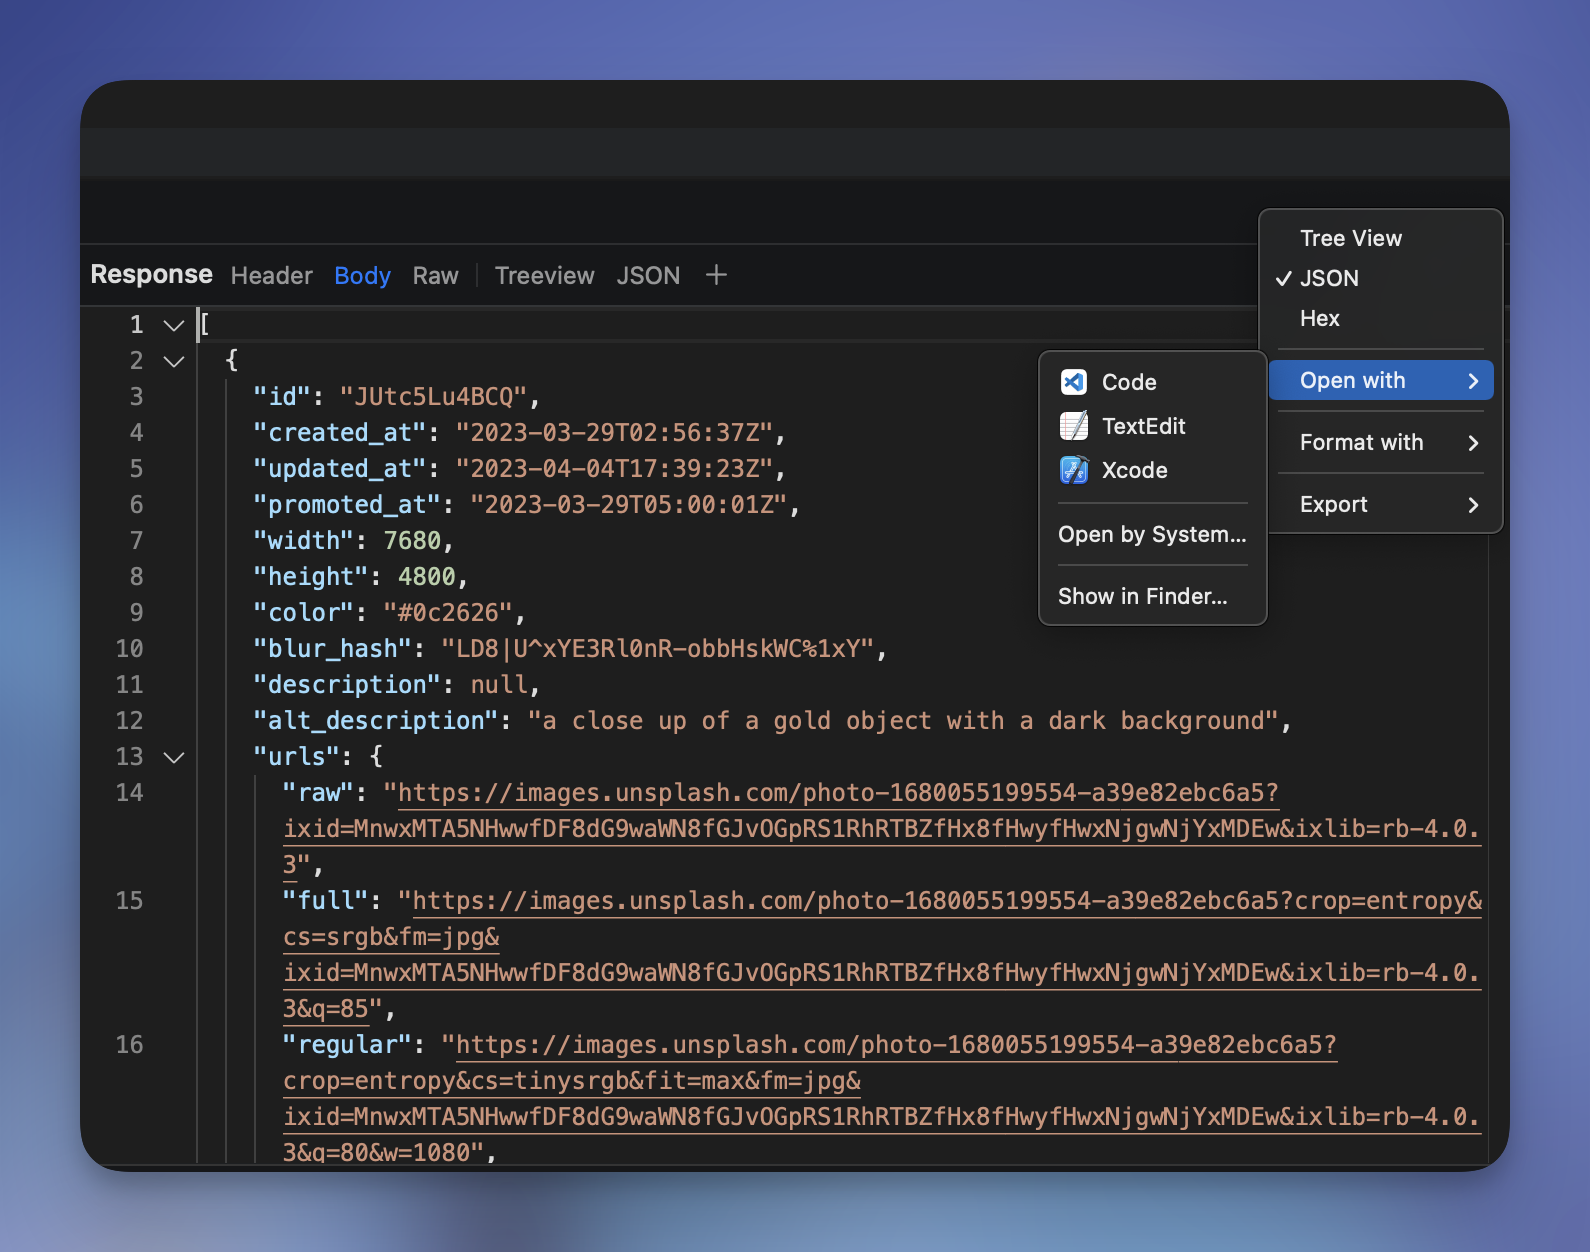
Additions: Open content with Editing tool
There is a small button on the top right corner. When clicking the app reveals some Editing app, which is installed on your macOS machine.
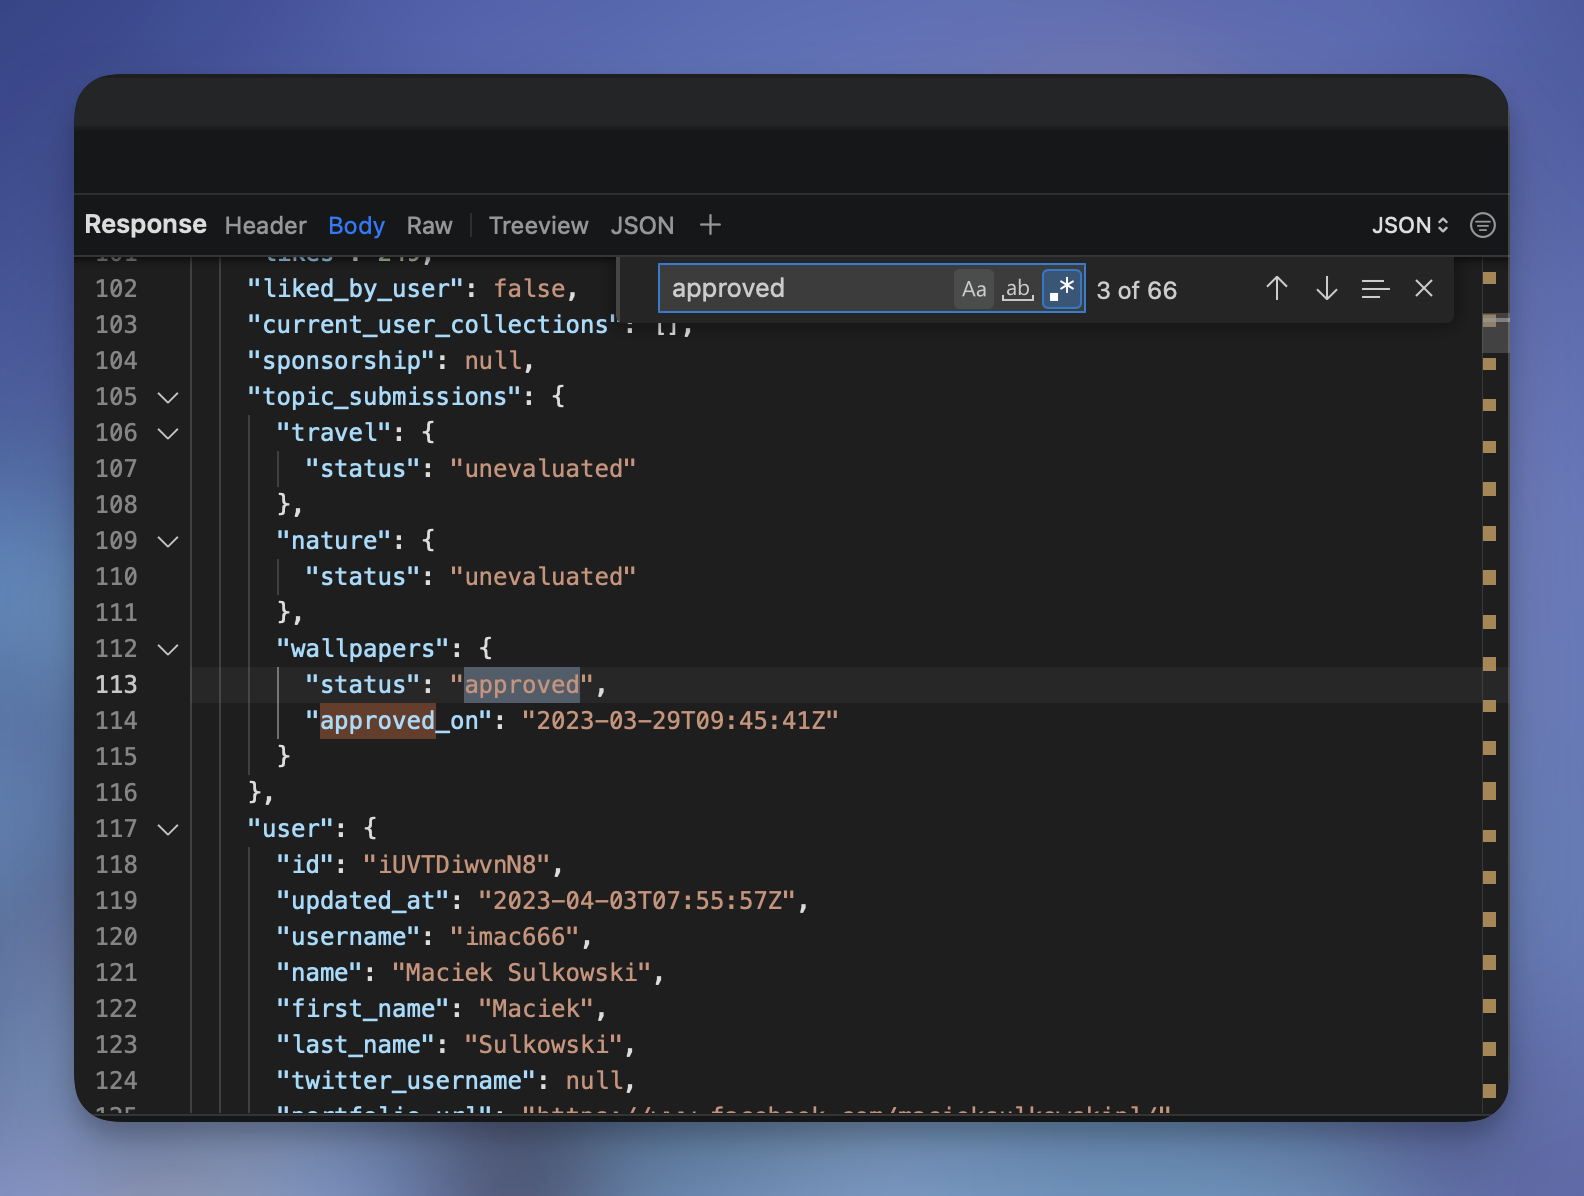
You can also access other built-in functionalities such as search, search and replace...within the body content as easily as your familiar Editor tools.
What going next?
After this tutorial, you can inspect HTTP/HTTPS Traffic from your iOS devices with Proxyman for macOS.
If you would like to go further, there is the next step:
- Learn to use Breakpoint tool, to manipulate the data on the fly.
- Learn to use Map Local to provide a Mock Response.
- Use iOS Simulator?
- ...
Proxyman is a high-performance macOS app, which enables developers to capture and inspect HTTP(s) traffic from apps and domains on iOS devices, iOS Simulators, and Android devices.
Get it at https://proxyman.com/
