How to capture HTTP localhost traffic from Google Chrome (localhost:3000)
Here is what we achieve in this tutorial:
- Understand why
localhost:3000doesn't show up in Proxyman (or Charles) while developing on Google Chrome - Learn the old workaround: map
localhosttoproxyman.debugvia/etc/hosts - ✅ Use the new 1-click solution: Proxyman Automatic Setup for Google Chrome (Current Profile or New Profile)
If you're building a web app (Next.js, React, Vite, etc.) and trying to debug API calls, it can be confusing when everything works in the browser, but nothing appears in Proxyman.
This post shows the most reliable way to capture http://localhost:3000 traffic from Google Chrome.
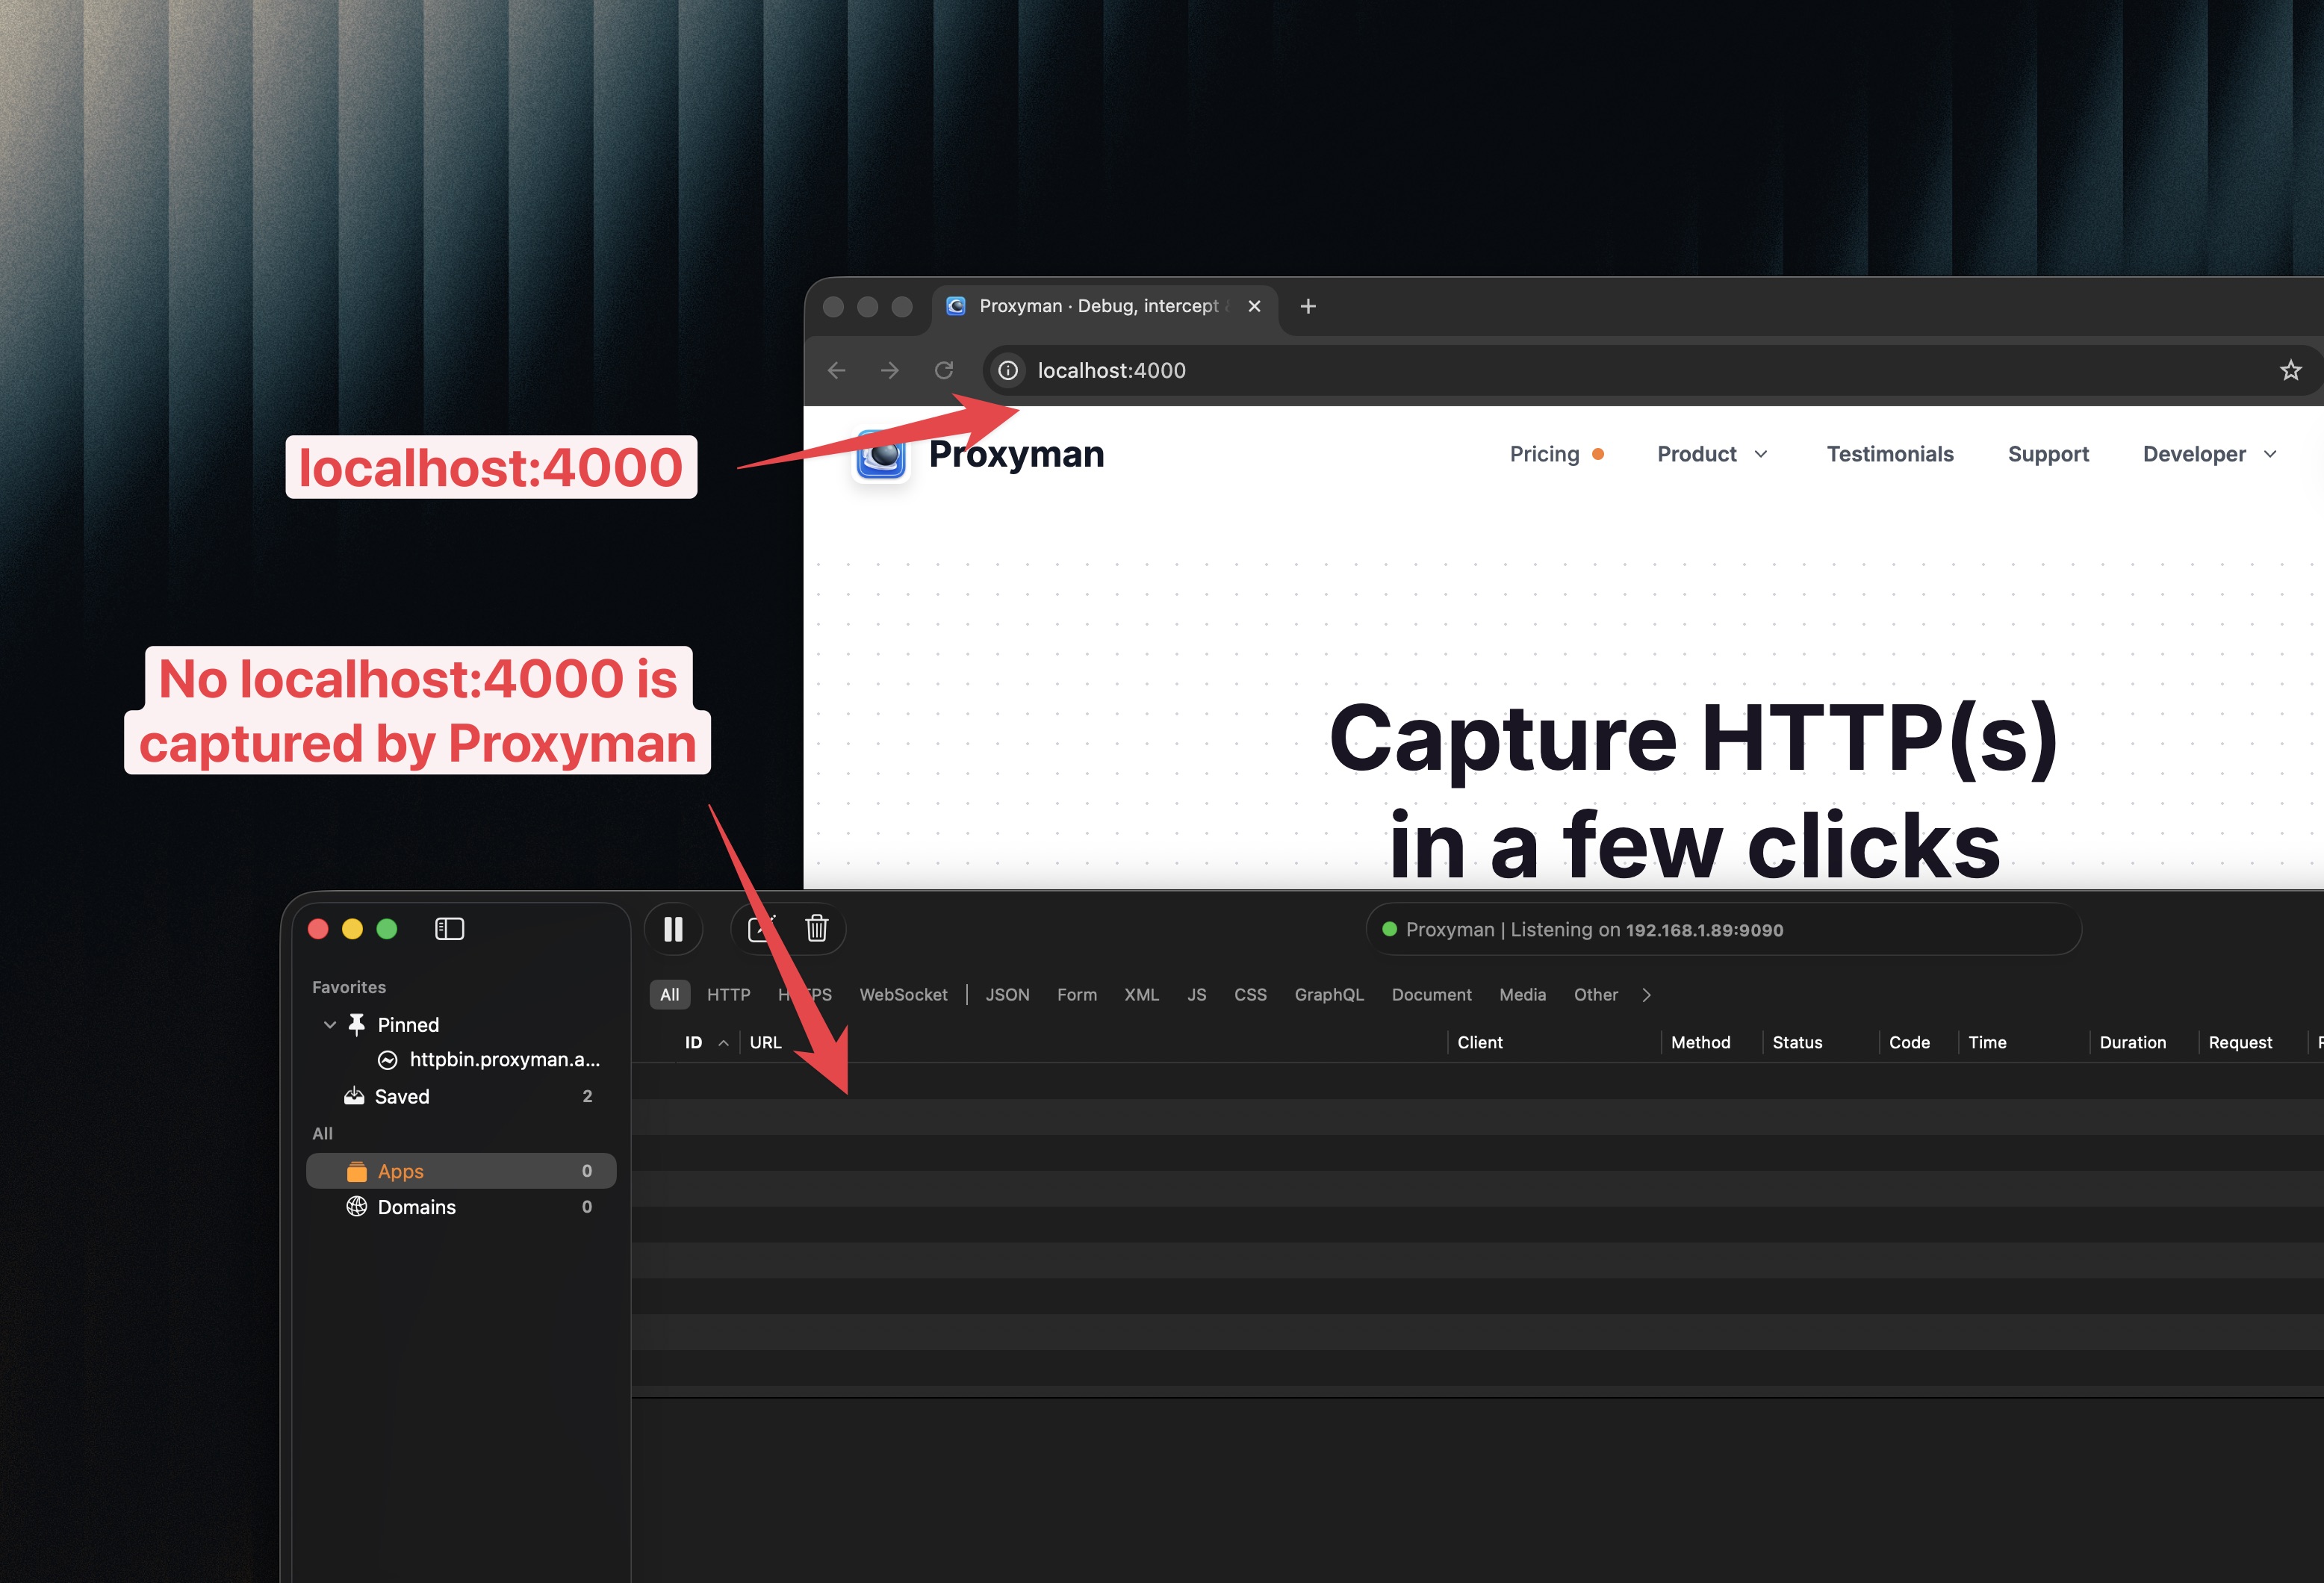
1. Problem: can't capture localhost:3000 during web development on Google Chrome
A common setup:
- Your app runs at
http://localhost:3000(Next.js dev server) - You open Chrome and browse your local site
- You expect to see traffic in Proxyman (or Charles)
But Proxyman shows… nothing.
Even worse: remote websites (like https://google.com) might show up fine, but localhost requests are completely missing.
2. Reason: localhost traffic doesn't use the system proxy by default
Most proxy tools rely on your system proxy settings (or browser proxy settings) to route traffic through the proxy.
However, browsers typically treat local addresses specially:
localhost/127.0.0.1is loopback traffic- By default, it usually bypasses proxy
So the request never reaches Proxyman/Charles — which is why you don't see any traffic.
3. Old solution: edit /etc/hosts and use proxyman.debug
The classic workaround is to stop using localhost in the browser URL.
Instead, map localhost to proxyman.debug and open your local server via that hostname.
3.1 Add proxyman.debug to /etc/hosts
Open Terminal and edit the hosts file:
- Run:
sudo nano /etc/hosts
- Add this line:
127.0.0.1 proxyman.debug
- Save and exit.
Now, instead of opening http://localhost:3000, you open:
http://proxyman.debug:3000
This forces Chrome to treat it like a normal hostname (not the special localhost), so proxy tools can capture it.
3.2 Downsides of the old approach
- You have to remember to use a different hostname
- Some OAuth/redirect URIs and local dev tooling may be hard-coded to
localhost - It’s annoying to explain to teammates (and it’s easy to forget)
4. ✅ 1-click new solution: Proxyman Automatic Setup for Google Chrome
Proxyman has a newer approach that doesn't require editing /etc/hosts.
It launches Google Chrome with the right proxy configuration so localhost traffic can be captured.
4.1 Steps
- Open Proxyman
- Open Command Palette
- macOS:
Shift + Command + P - Windows/Linux:
Ctrl + Shift + P
- macOS:
- Type Automatic Setup and open it
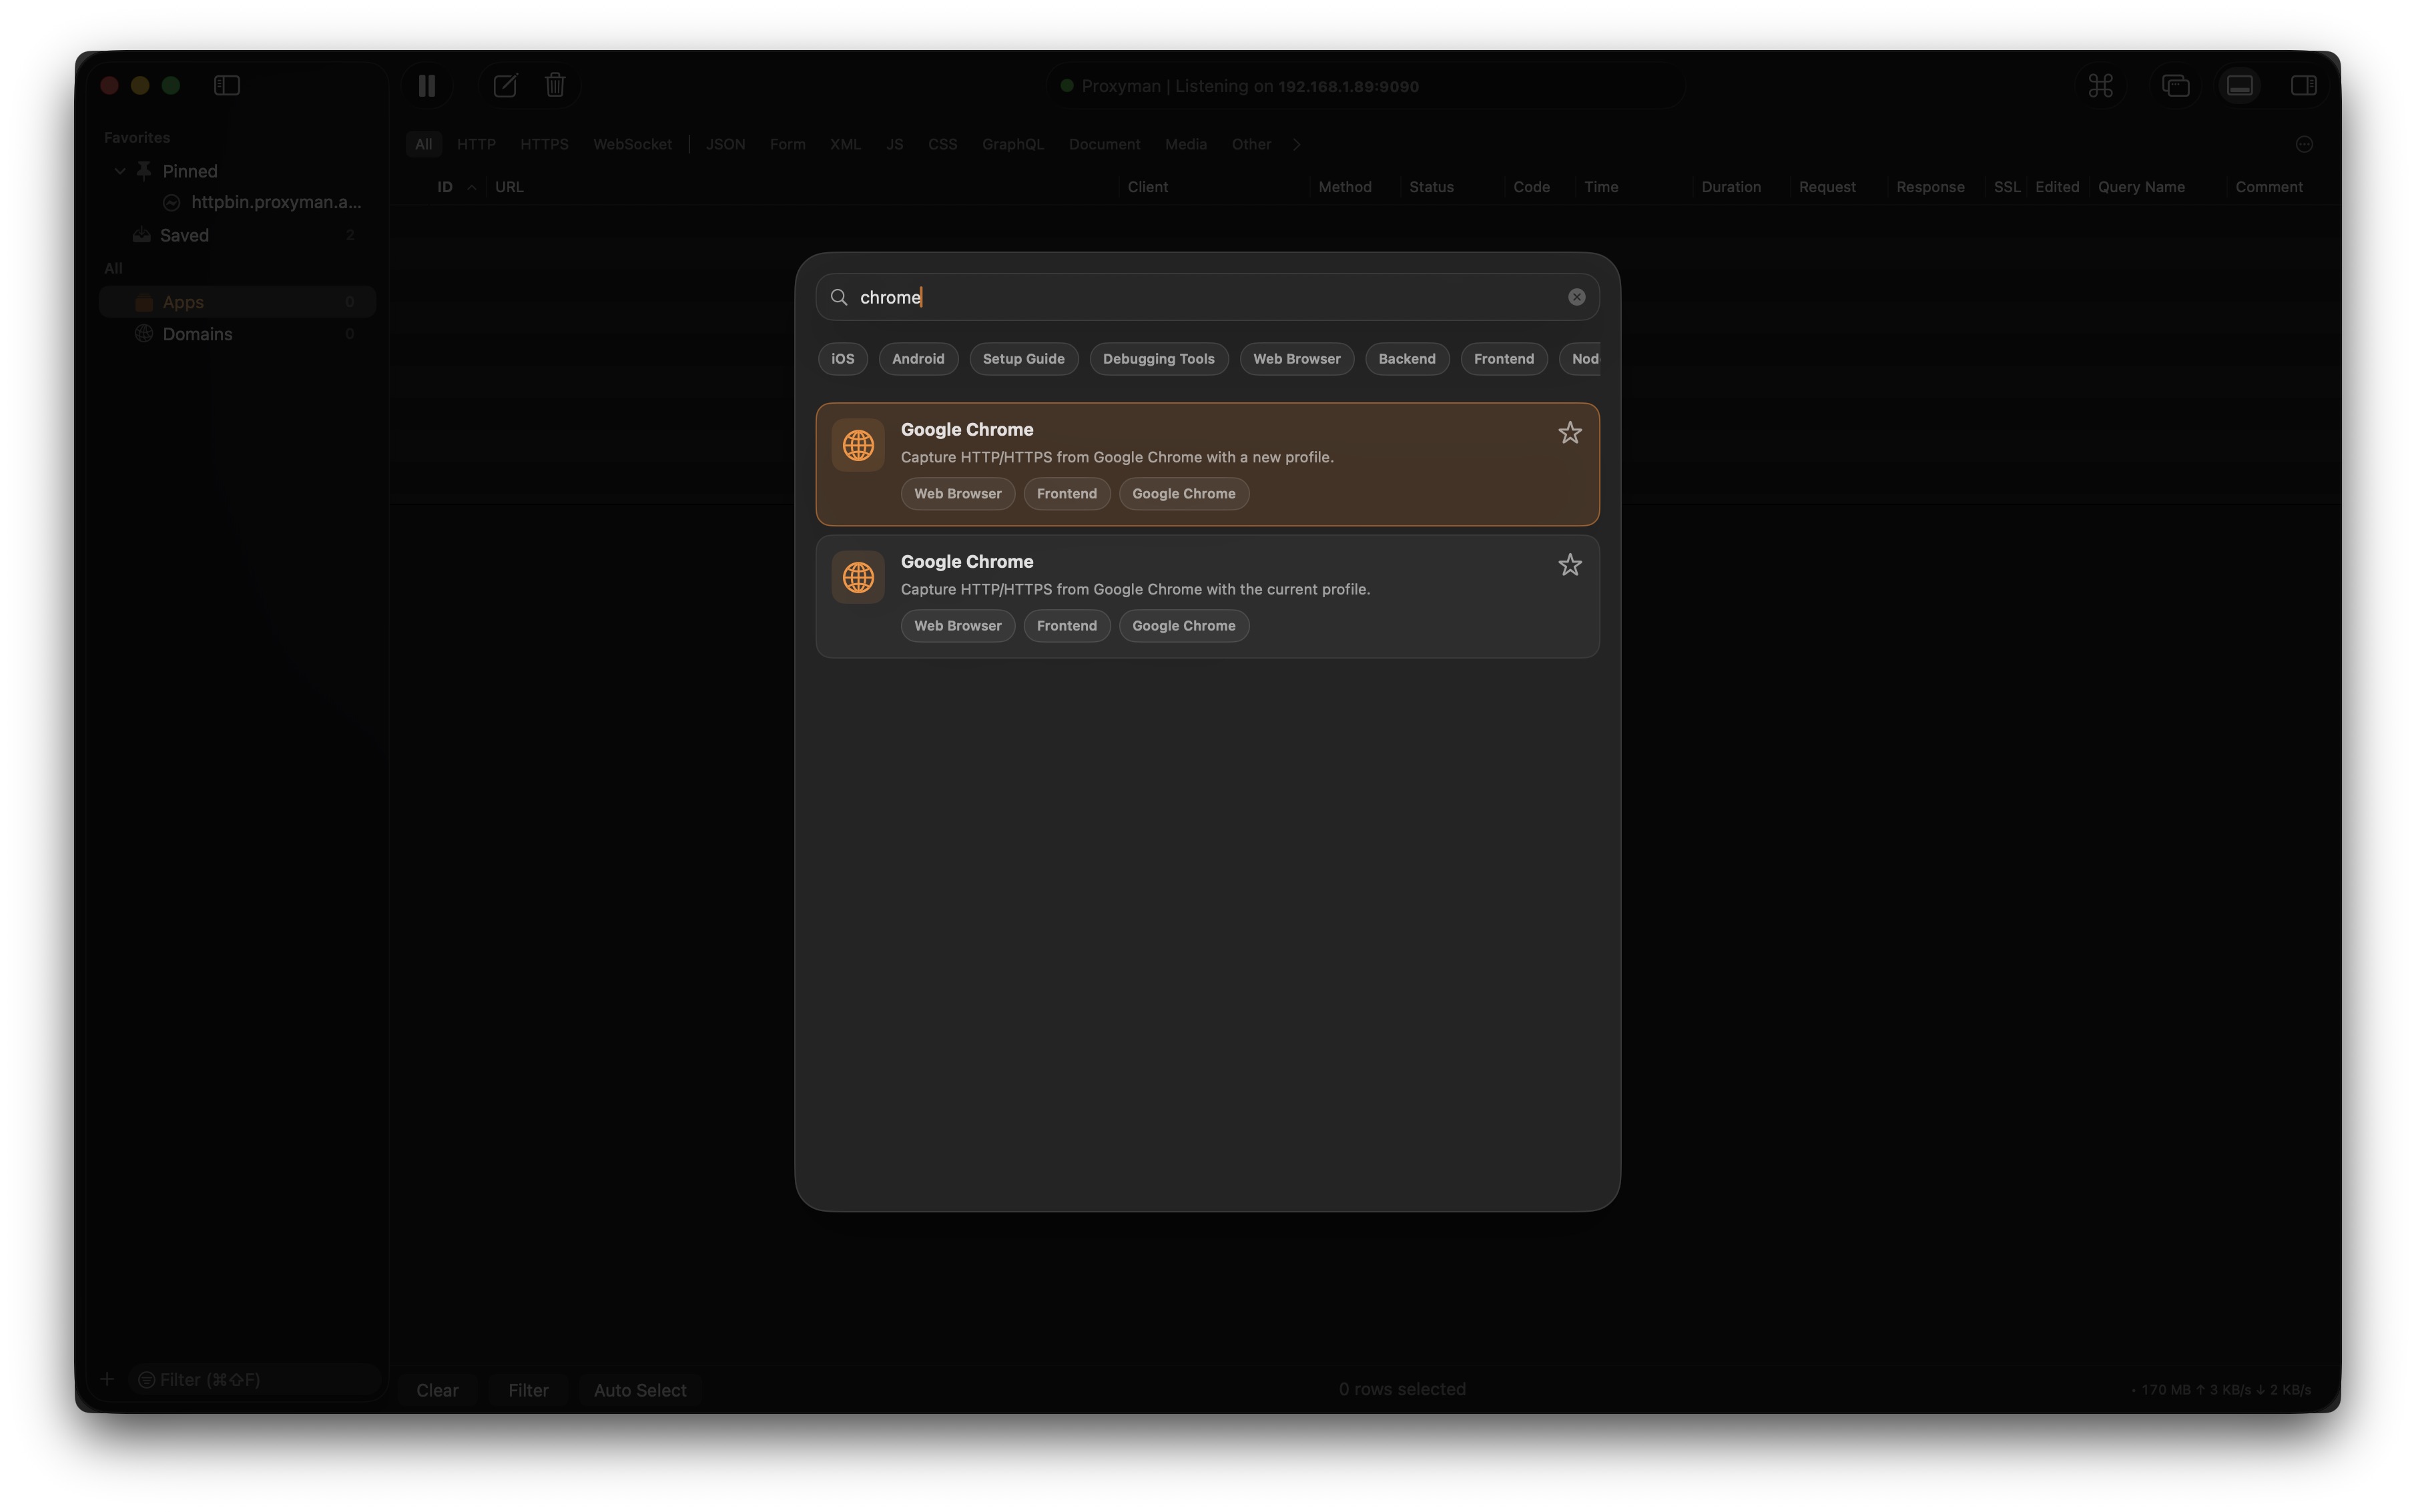
- Select Google Chrome
- Choose one:
- New profile (recommended if you want a clean proxy-only browser)
- Current profile (if you want your existing Chrome profile)
- Click Start
A new Google Chrome window will open.
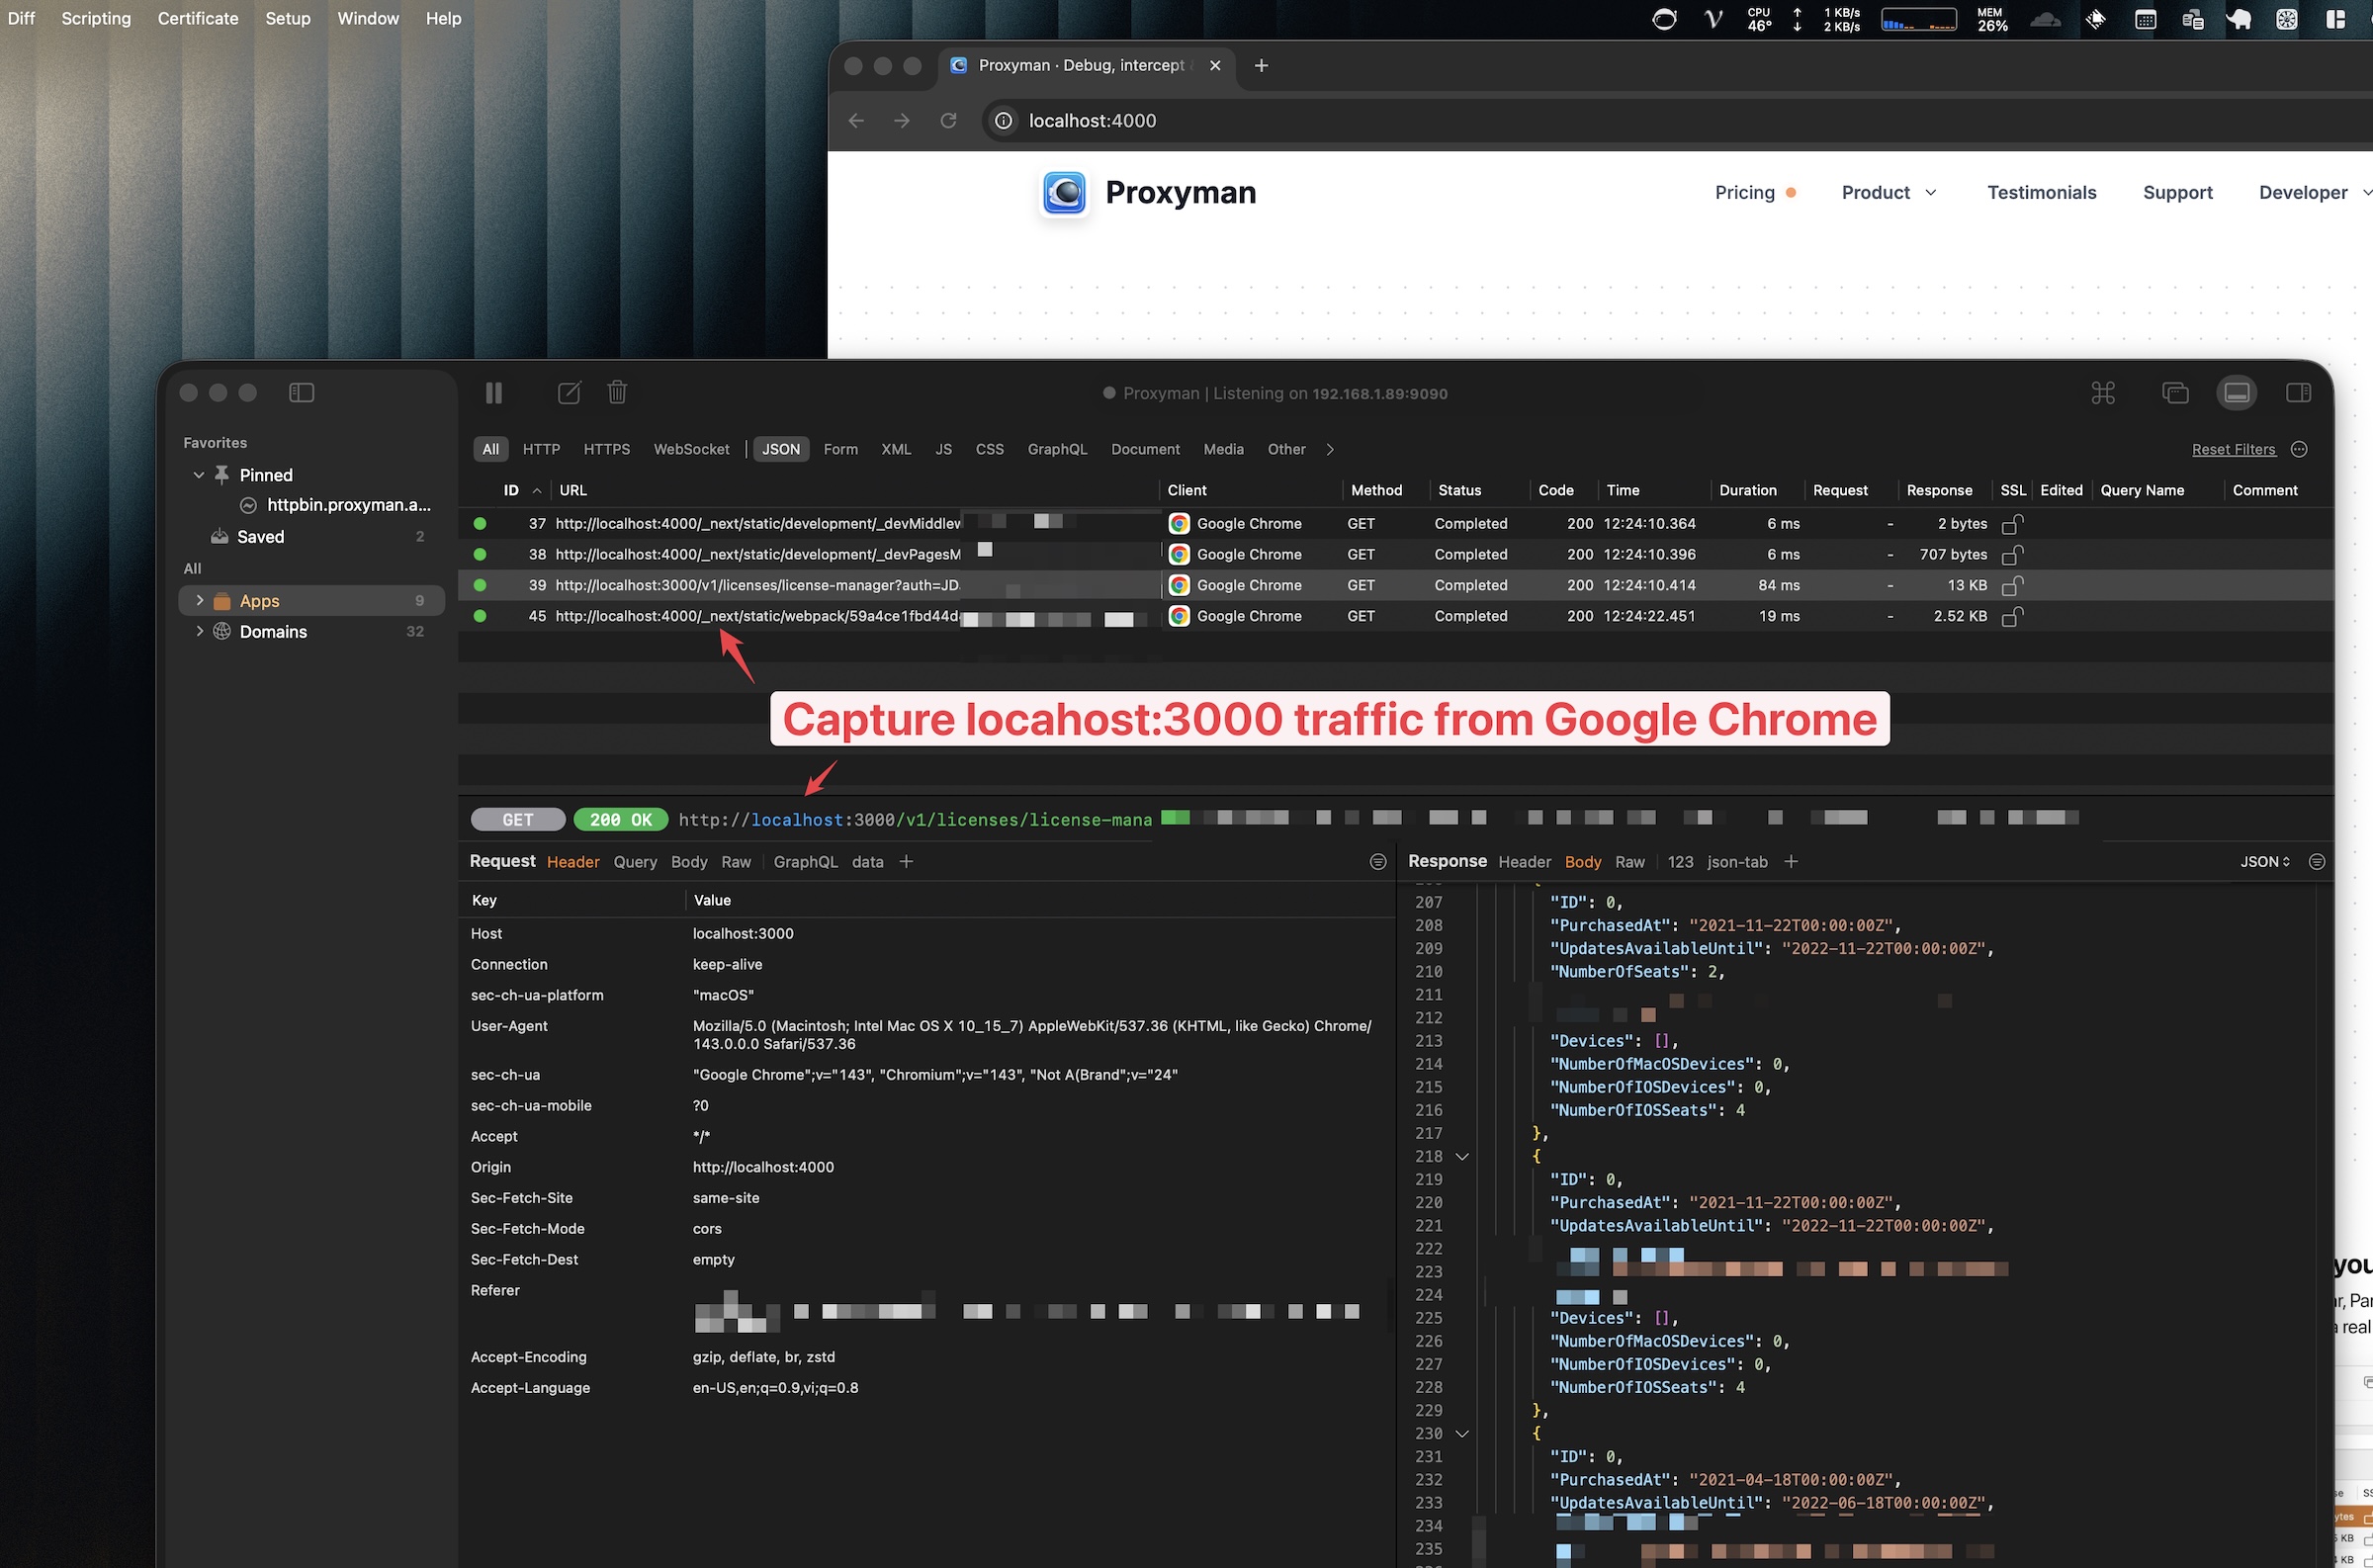
4.2 Done: localhost:3000 is now captured
Now open your local site again:
http://localhost:3000
Go back to Proxyman — you should see your localhost requests captured ✅
- If you have multiple Chrome windows open, it’s easier to use the New profile option so you always know which Chrome instance is routed through Proxyman.
- ⚠️ If you close Proxyman, make sure to close your current Google Chrome window. Otherwise, the Google Chrome window will not be routed through Proxyman.
5. Conclusion
In this tutorial, we learned why localhost requests often bypass proxy tools, how the old /etc/hosts workaround works, and how to use Proxyman’s Automatic Setup to capture localhost:3000 in 1 click.
If one request still seems missing, open Chrome DevTools, turn on Disable cache in the Network tab, and reload the page inside the Chrome window opened by Proxyman. A browser cache or service worker may return old data without making a new network request. The New profile option is also a quick way to check whether an extension or saved browser setting is involved.
6. Related posts
- How to capture HTTPS traffic from Firefox Browser
- SSL Debugging with Firefox?
- Capture HTTP Request from Server Side on NextJS
- Debug OpenAI APIs in NodeJS with Proxyman
- Switch API endpoint from Production to localhost environment for testing
Proxyman is a high-performance macOS/Windows/Linux app, which enables developers to capture HTTPs traffic on iOS device, iOS Simulator and Android devices.
Get it at https://proxyman.com