How to capture WebSocket and decode Protobuf message
Here is what we achieve in this tutorial:
- Download and setup Proxyman macOS
- Capture WebSocket traffic from Google Chrome or iOS apps
- ✅ Decode Protobuf messages from WebSocket traffic with Proxyman
WebSocket is a popular protocol for real-time communication between clients and servers. Many modern applications use Protobuf (Protocol Buffers) to serialize data over WebSocket for better performance and smaller payload sizes.
This guide shows how to capture WebSocket traffic and decode Protobuf messages using Proxyman macOS 6.5.0 or later.
1. Download and Setup Proxyman macOS
Before we start, please download and setup Proxyman macOS.
- Open Proxyman's website and download the latest version of Proxyman macOS
- Proxyman macOS: Support macOS 12 or later
- Install Proxyman macOS
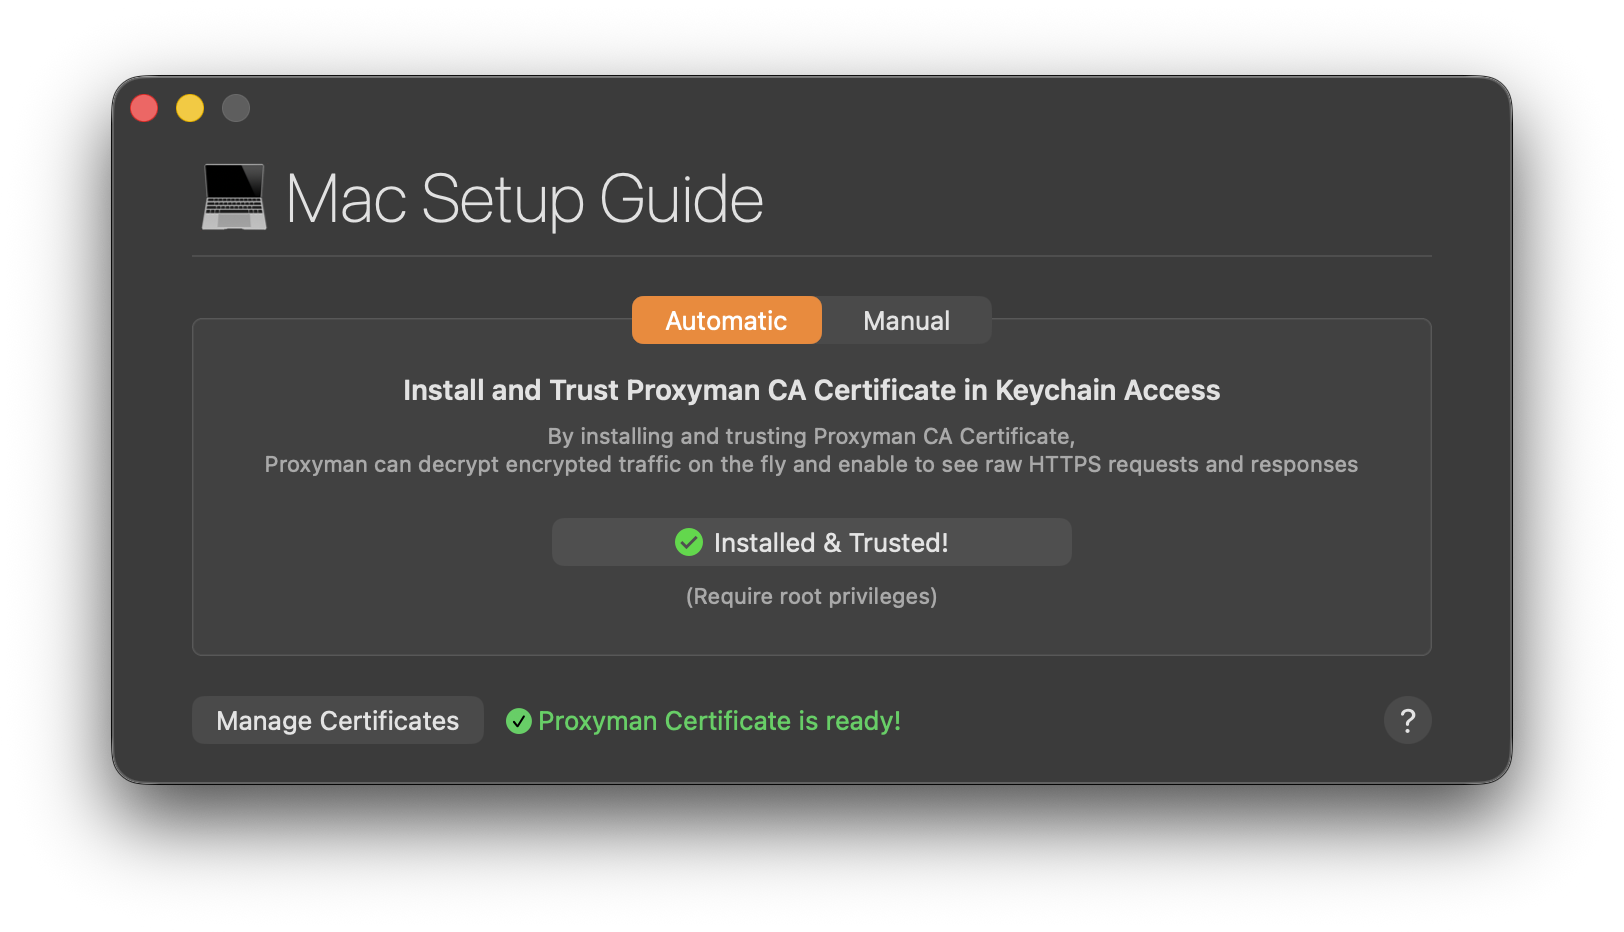
- Open Proxyman and install the certificate to your macOS. You can follow the instruction in
Proxyman > Certificate Menu -> Install for macOS -> Follow the instruction - In the Automatic Tab -> Click on the "Install & Trust"
- Verify the green checkmark on the Proxyman certificate
2. Capture WebSocket Traffic
2.1 From Google Chrome (Works out of the box)
Proxyman can capture WebSocket traffic from Google Chrome without any additional configuration.
- Make sure Proxyman is running
- Open Google Chrome
- Navigate to a WebSocket testing site, for example: https://echo.websocket.org/.ws
- At this time, you can see the WebSocket traffic is captured by Proxyman ✅
- On the Response Panel, click on the "Enable SSL Proxying" if you see SSL encrypted traffic
- Reload the page or reconnect the WebSocket, so Proxyman can decrypt the WebSocket traffic ✅
- Done. You can now see WebSocket messages in real-time.
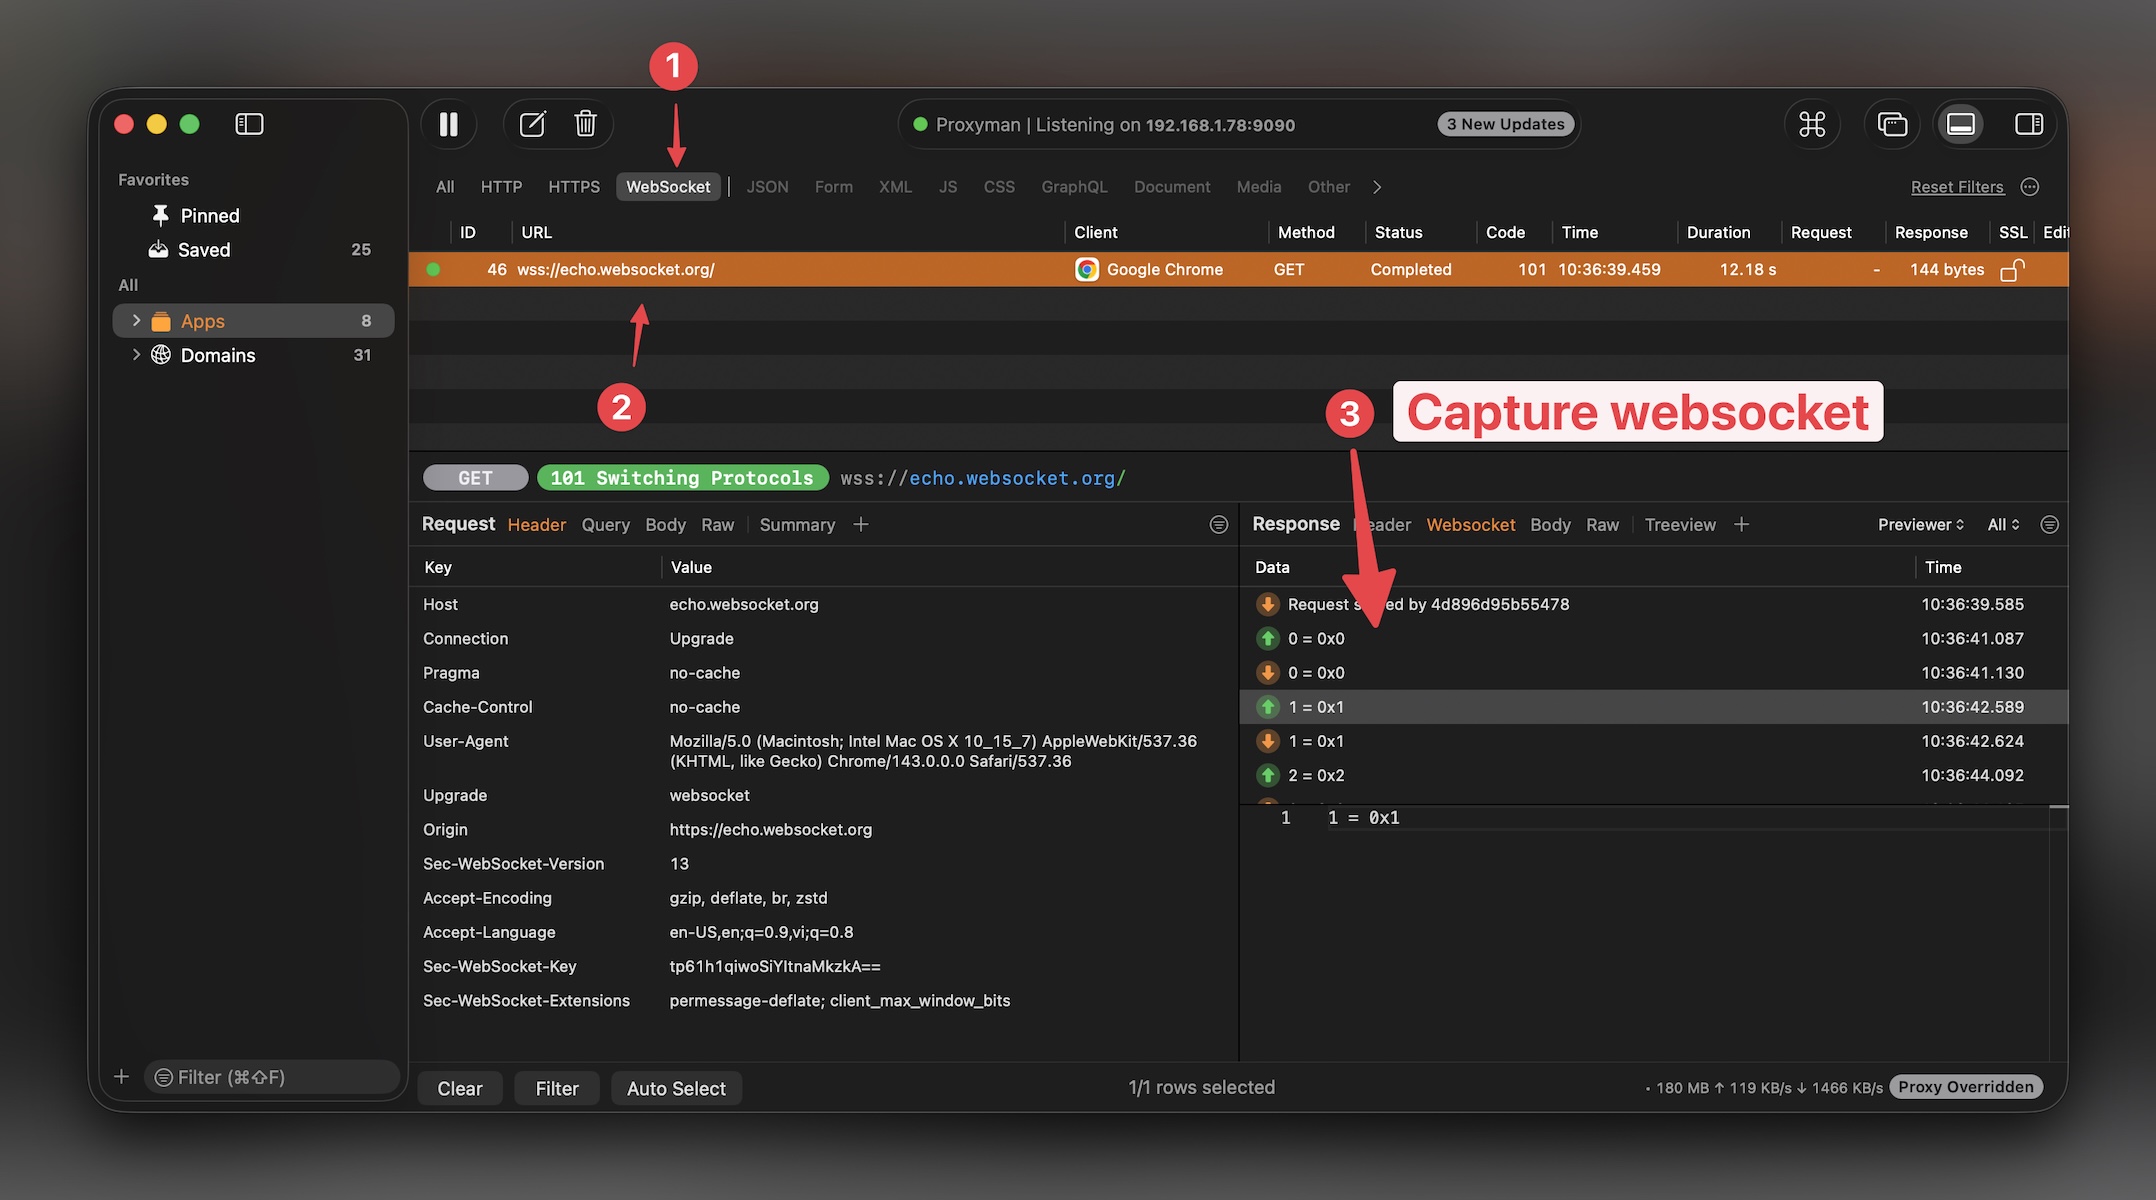
WebSocket traffic will appear with a special WebSocket icon in Proxyman's flow list. You can see both sent and received messages in the WebSocket tab.
2.2 From iOS Apps
If your iOS app uses URLSessionWebSocketTask or iOS WebSocket libraries (e.g., Starscream, SocketRocket), you need to configure the SOCKS Proxy to capture WebSocket traffic.
This is because URLSessionWebSocketTask doesn't respect the System HTTP Proxy by default.
For detailed instructions on capturing WebSocket from iOS apps, please follow our dedicated tutorial: How to intercept and debug WebSocket from iOS simulators or devices
Here is a quick summary:
- Enable SOCKS Proxy in Proxyman:
Tools->Proxy Settings->SOCKS Proxy settings->Enable - Note down the port number (default is
8889) - Configure your iOS app to use the Proxyman SOCKS Proxy Server
3. Decode Protobuf Messages
Requires Proxyman macOS 6.5.0 or later. Please update Proxyman if you're using an older version.
Once you have captured WebSocket traffic, you can decode Protobuf messages directly in Proxyman.
3.1 Decode with Raw Mode (Quick & Dirty)
Raw mode is useful when you don't have a Protobuf definition file (.proto). Proxyman will attempt to decode the binary data and display the fields.
- Select a WebSocket flow in Proxyman
- Find the WebSocket message that contains Protobuf data
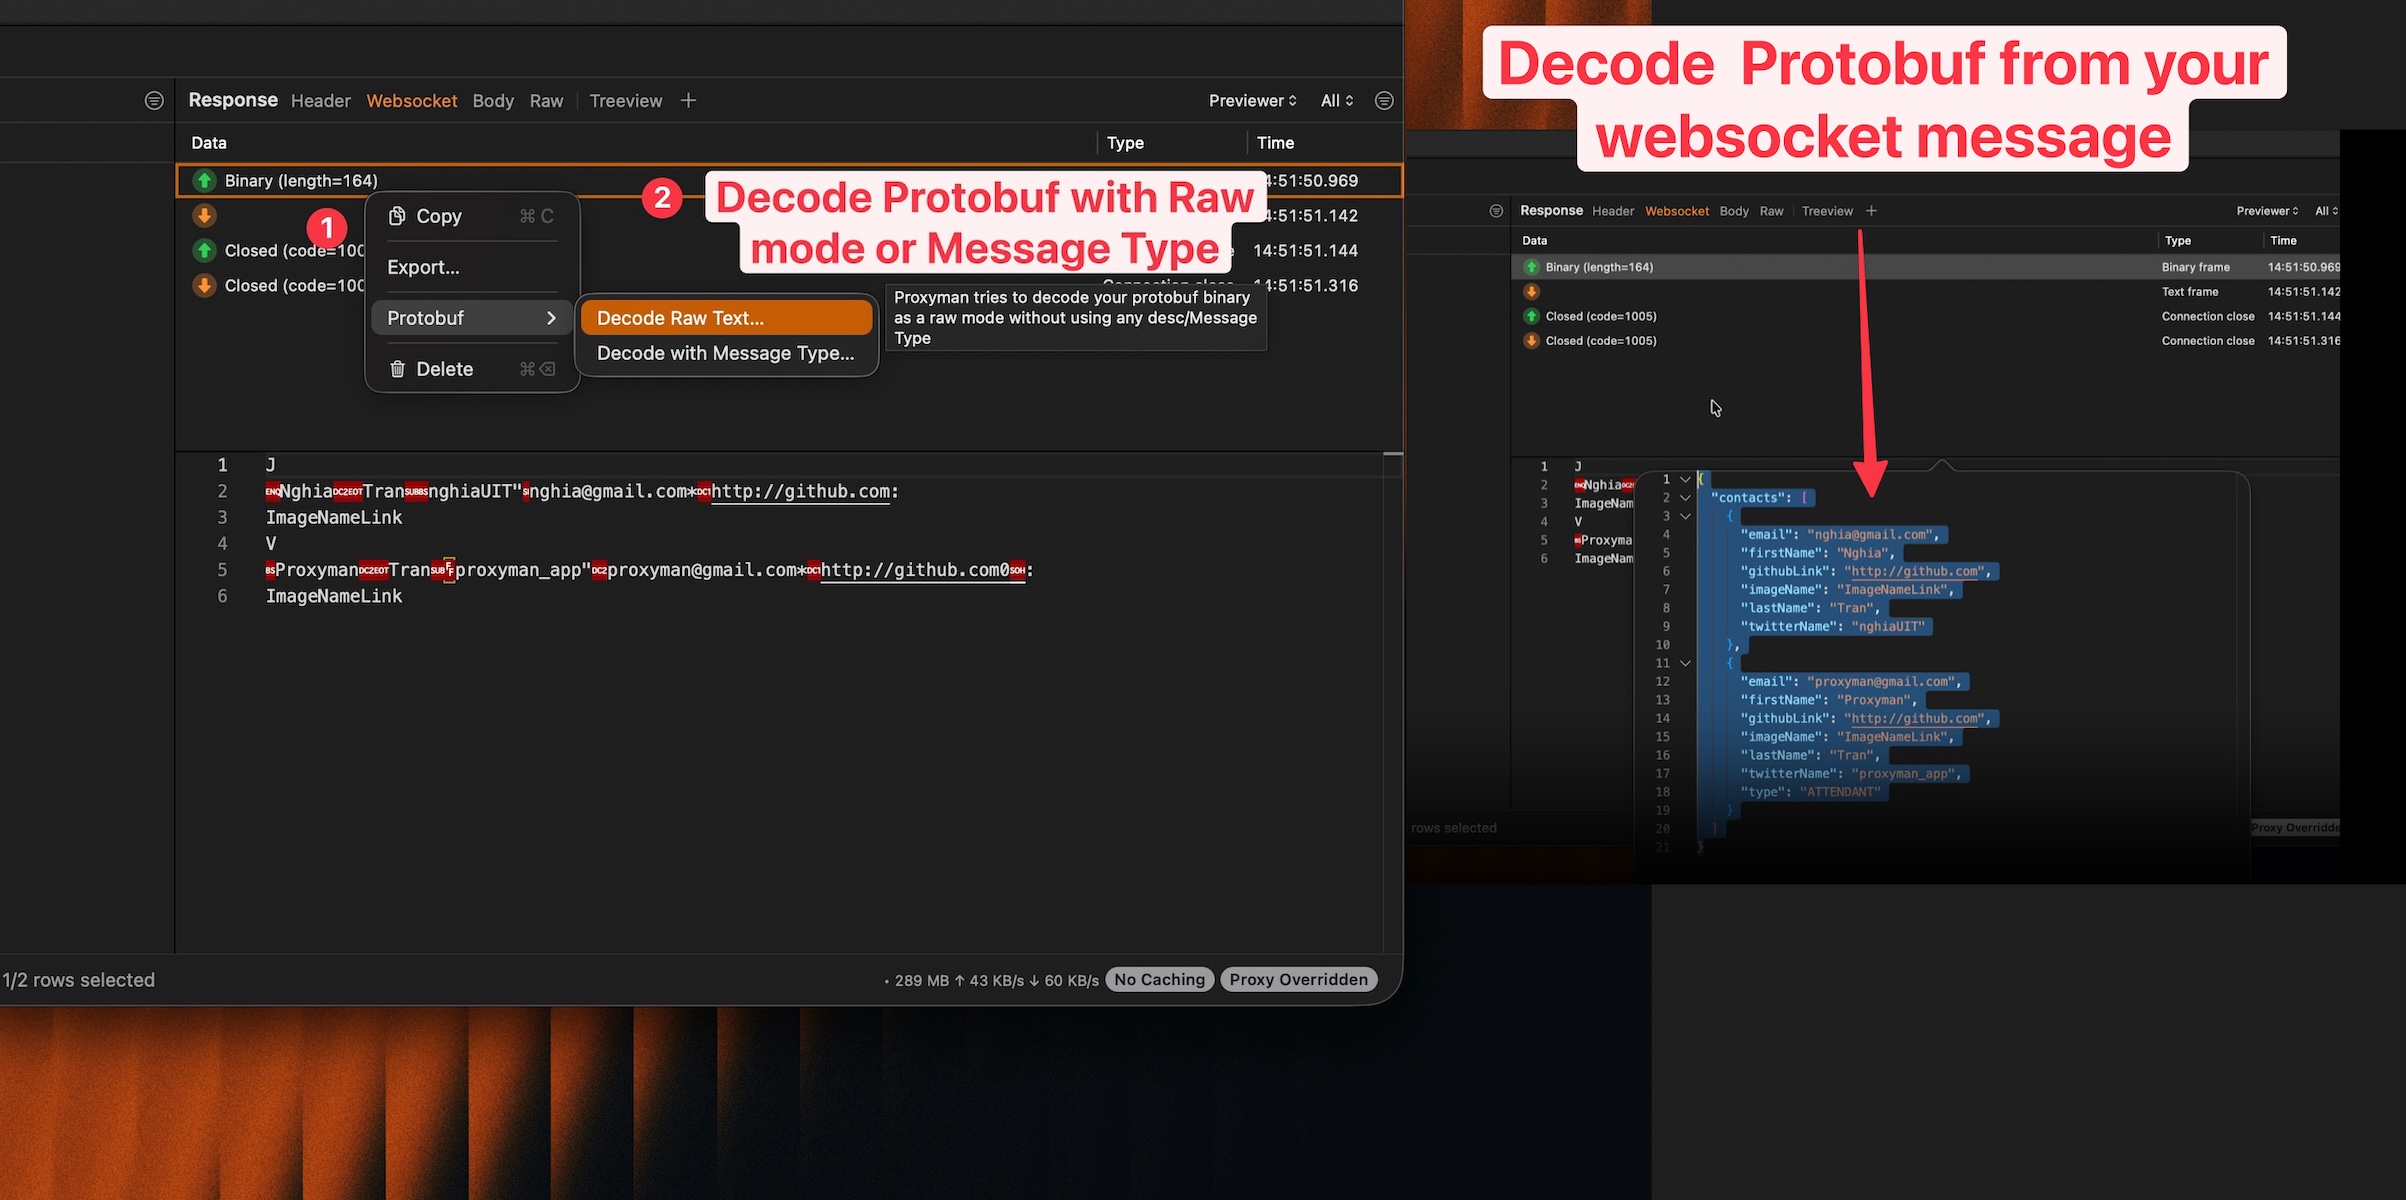
- Right-click on the Protobuf message ->
Protobuf->Decode - Select
Raw Mode - Done. Proxyman will decode and display the Protobuf fields ✅
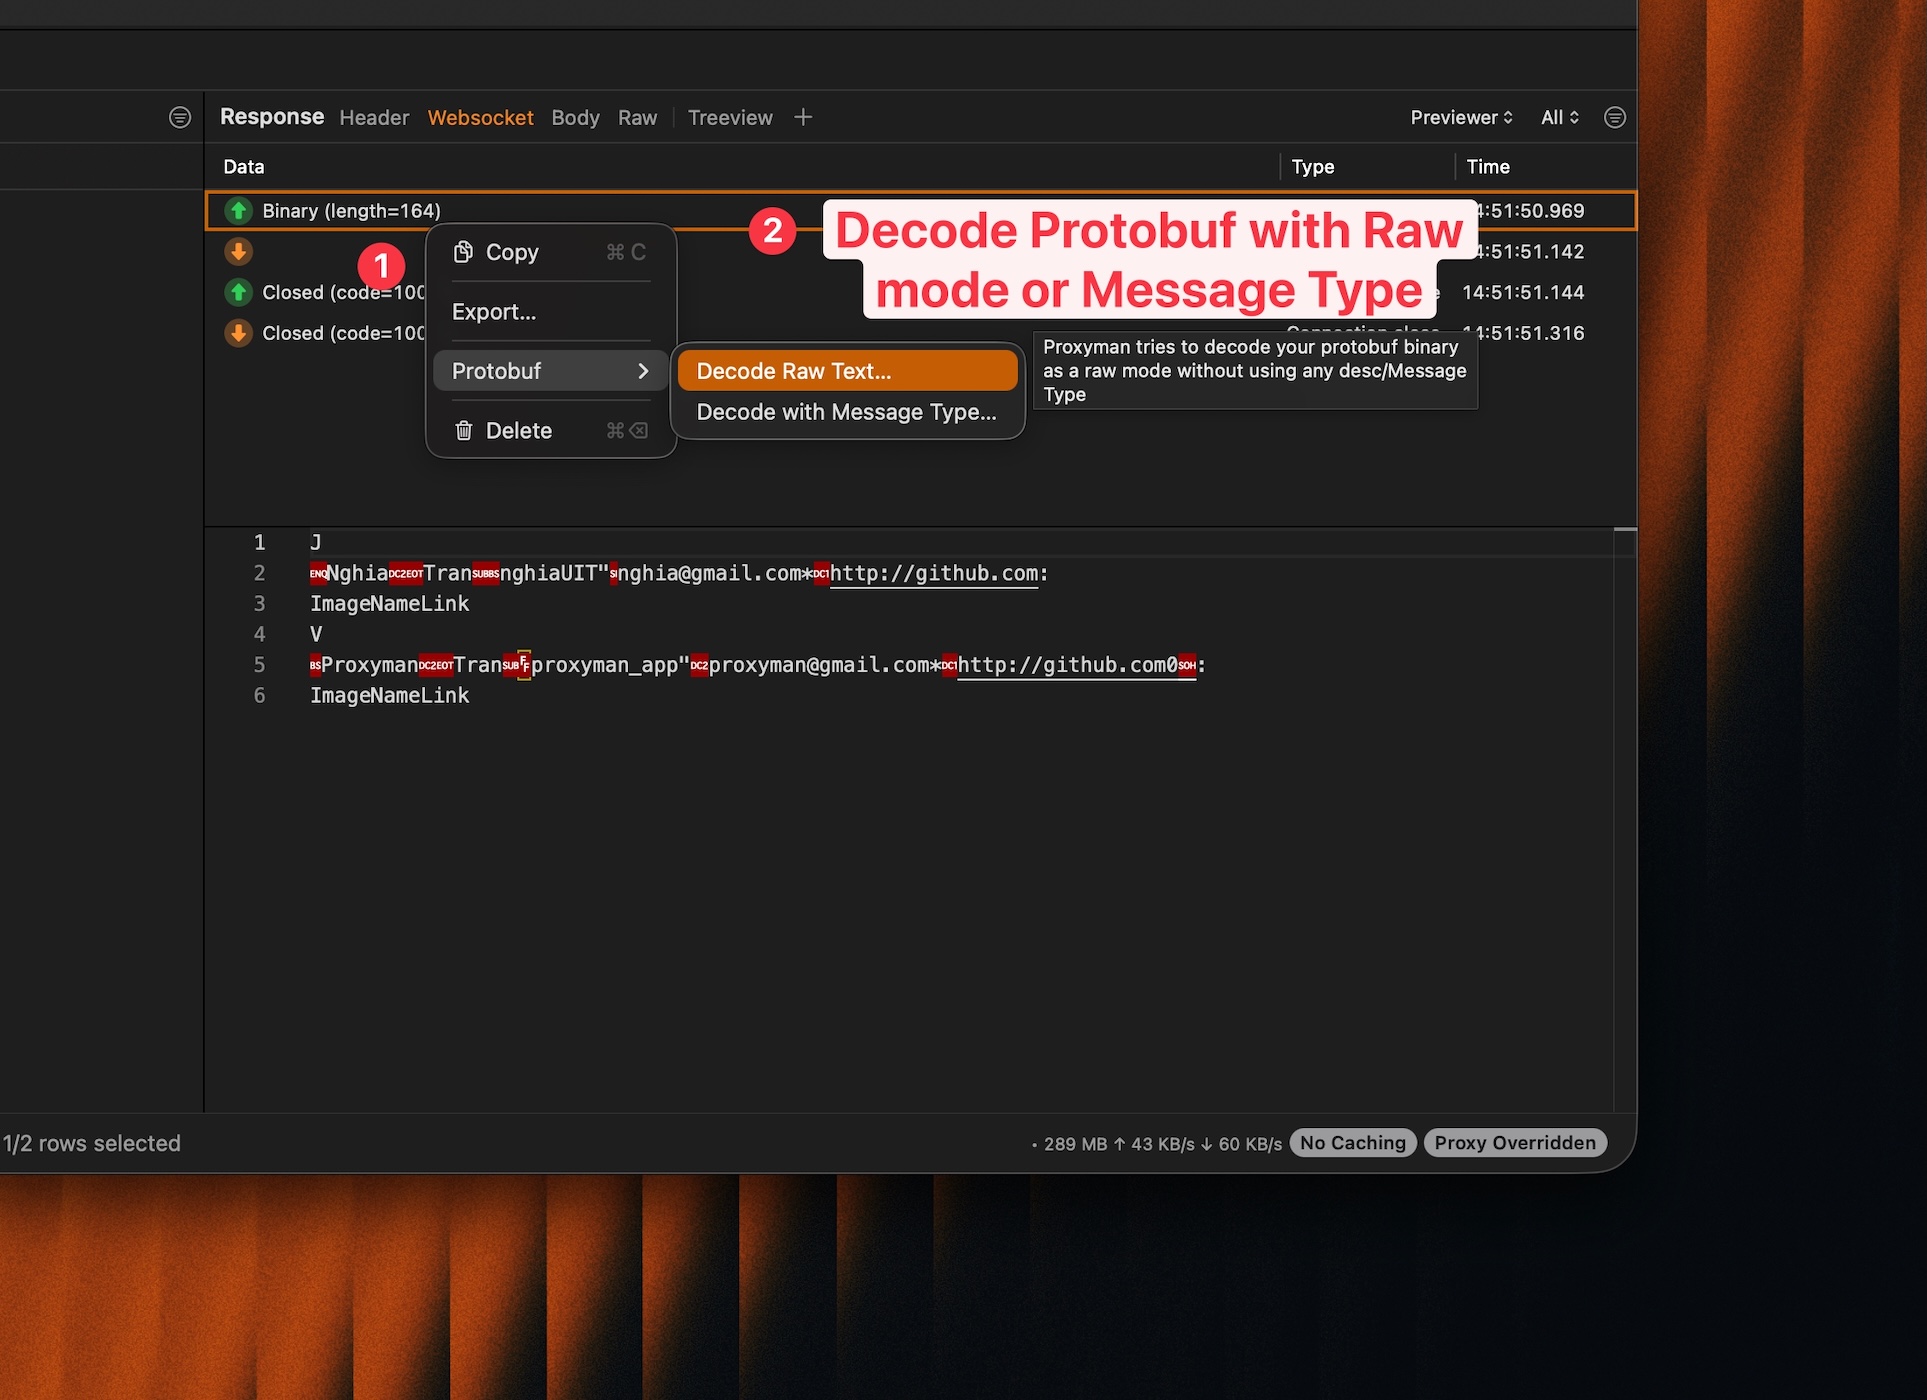

Raw mode shows field numbers and inferred types. Field names won't be available without a .proto file, but you can still inspect the data structure.
3.2 Decode with Message Type (Recommended)
If you have a Protobuf descriptor file (.desc), you can decode messages with proper field names and types.
- Select a WebSocket flow in Proxyman
- Find the WebSocket message that contains Protobuf data
- Right-click on the Protobuf message ->
Protobuf->Decode - Select
Message Type - Choose the message type from your Protobuf descriptor file
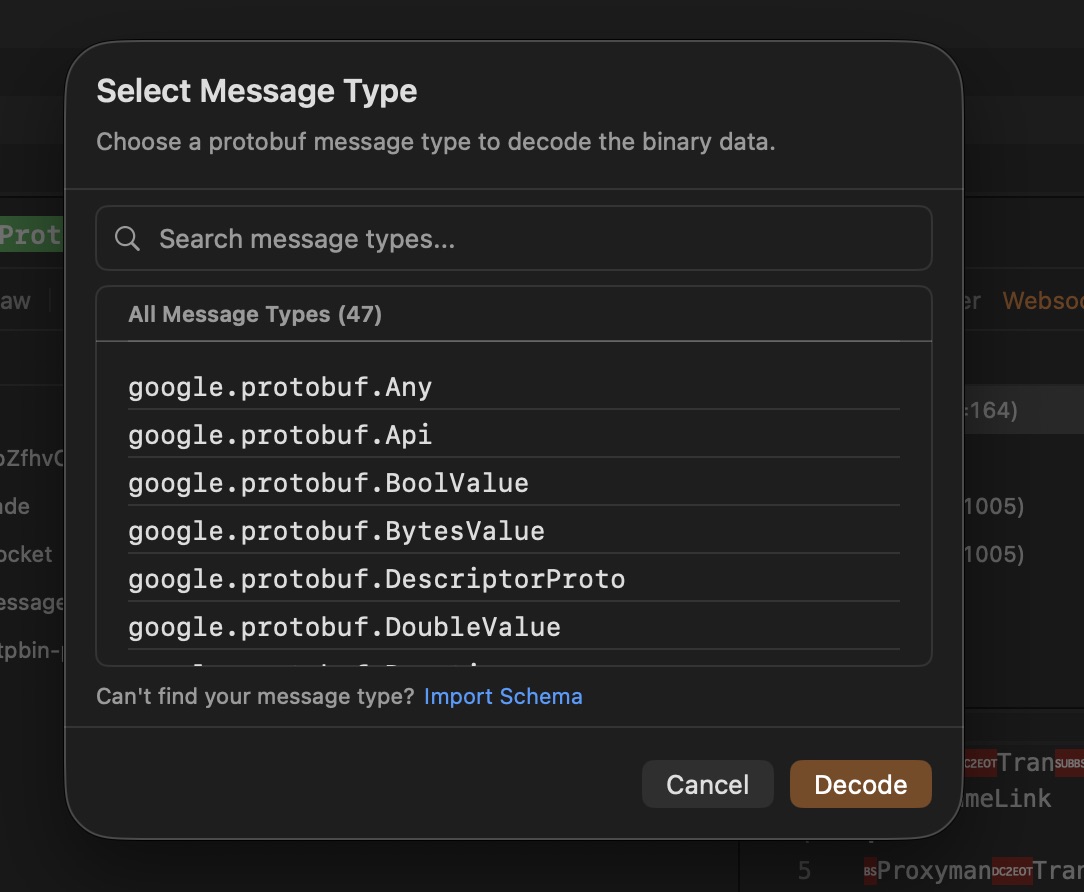
If you can't find your Message Type, make sure to import your .desc file to Proxyman by clicking on the "Import Schema" buttons.
Refer this documentation to see how to generate a .desc file from your .proto files: How to generate a .desc file from your .proto files
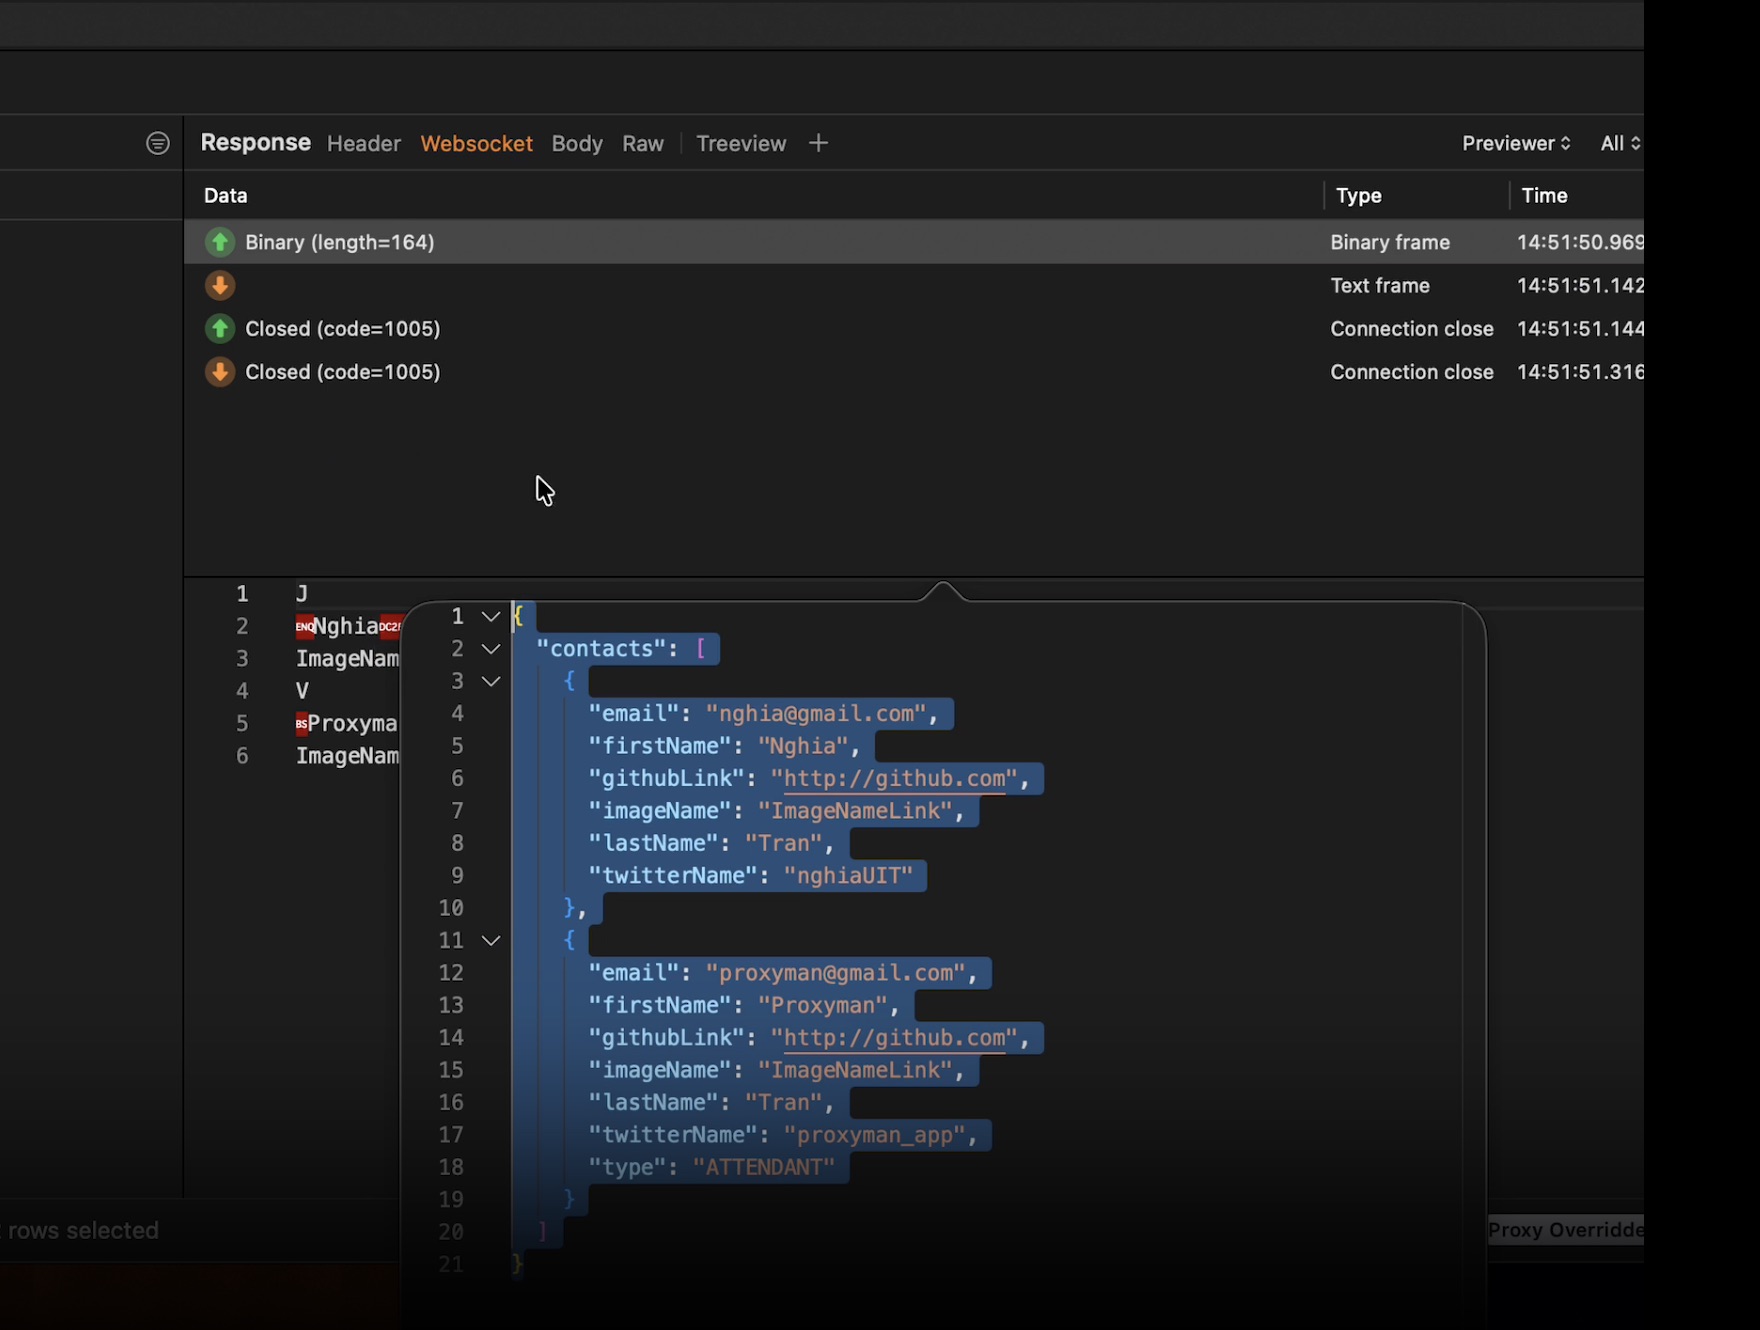
- Done. Proxyman will decode the message with proper field names ✅
To generate a .desc file from your .proto files, use the protoc compiler:
protoc --descriptor_set_out=message.desc --include_imports your_message.proto
The --include_imports option adds message types used by imported .proto files. Without it, Proxyman may not find a type that appears to be present in your main schema. Raw mode is still useful when you have no schema, but its field types are guesses; use a descriptor when the exact names and types matter.
4. Problems and Solutions
4.1 I can't see WebSocket traffic from my iOS app
Solution: iOS WebSocket libraries don't respect the HTTP Proxy. You need to enable SOCKS Proxy in Proxyman and configure your app to use it. Check out our WebSocket debugging tutorial for detailed instructions.
4.2 The Protobuf decode option is not available
Solution: Make sure you're using Proxyman macOS 6.5.0 or later. You can check your version in Proxyman -> About Proxyman and update from proxyman.com.
4.3 Raw mode shows incorrect field types
Solution: Raw mode uses heuristics to infer field types. For accurate decoding, use the Message Type mode with your Protobuf descriptor file.
4.4 I can see WebSocket traffic but the messages are encrypted
Solution: Make sure SSL Proxying is enabled for the domain. Right-click on the flow -> Enable SSL Proxying, then reconnect the WebSocket.
5. Conclusion
In this tutorial, we have learned how to:
- Capture WebSocket traffic from Google Chrome and iOS apps with Proxyman
- Decode Protobuf messages using Raw mode (without .proto file) or Message Type mode (with .proto file)
Related tutorials you might find helpful:
- How to intercept and debug WebSocket from iOS simulators or devices
- How to capture HTTP/HTTPS traffic from iPhone iOS 26
- How to capture HTTPS traffic from Firefox browser
Proxyman is a high-performance macOS/Windows/Linux app, which enables developers to capture HTTP/HTTPS and WebSocket traffic from browsers, iOS devices, iOS Simulators, and Android devices.
Get it at https://proxyman.com